Starting over with SCA Garb

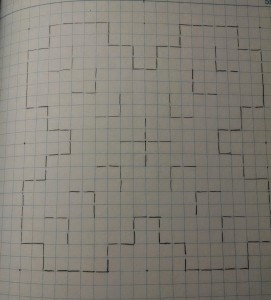
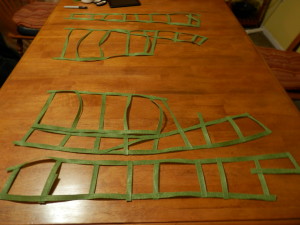
PC240223For lo, I did look at my SCA grb, and I did see that it was … lack luster.  And I did find unto the nets an interesting tutorial at Making a Mathless Draft which uses velcro to grid out the upper body as it were, and I did convince my husband that this was a righteous thing to ty, and we did grid my body, discovering it very busty, and did create velcro pattern pieces that looked like this.

And we copied it out onto grid paper and decided not to fuss about the arm scyes yet because they are deep and are easier to adjust in fitting …

And then it was time for some christmas whiskety.

Weaving Class 19 Dec, 2015

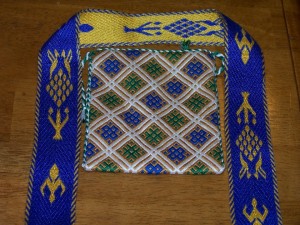
Today I am teaching two classes on tabletweaving covering the methods of doubleface and brocading.  This post is primarily intended as a resource for that class, and includes links:

It’s that Christmas time again

One of my favourite Christmas songs is a dutch song that dates back to the middle ages.  It was recorded in the Wettener Liederhandschrift in 1650 ( as recorded in the Dutch Song Database) and there’s a copy of the music at database – transcription.  The words are simple:

Hoe leit dit kindeke

Hoe leit dit kindeke hier in de kou
Ziet eens hoe alle zijn ledekens beven.
Ziet eens hoe dat het weent en krijt van rouw!
Na, na, na, na, na, na, kindeke teer,
Ei zwijg toch stil, sus, sus! En krijt niet meer

Sa ras dan, herderkens komt naar de stal
Speelt een zoet liedeke voor dit teer lammeken
Het dunkt mij dat het nu haast slapen zal.
Na, na, na, na, na, na, kindeke teer,
Ei zwijg toch stil, sus, sus! En krijt niet meer

En gij, o engeltjes, komt ook hier bij
Zingt een motetteke voor uwen koning
Wilt hem vermaken met uw melodij.
Na, na, na, na, na, na, kindeke teer,
Ei zwijg toch stil, sus, sus! En krijt niet meer .

This is my translation of the lyrics, with an attempt to keep both the sense of the words and the scansion accurate (although I wasn’t able to maintain the rhyming scheme)

How lies this little child, here in the cold,
See here how all his little limbs shiver,
See here how that it wails and cries of sorrow,
Na na na na na na, little child dear,
Eh, hush now still, sus sus, en cry no more.

So quick then, shepherds young, come to the stall,
Play a sweet little song for this dear little lamb,
I think that it now will fall asleep soon.
Na na na na na na, little child dear,
Eh, hush now still, sus sus, en cry no more.

And thee, oh angels small, come too near by
Sing a motet so small for your king
Will him amuse here with your melody
Na na na na na na, little child dear,
Eh, hush now still, sus sus, en cry no more.

The song is a lullaby, sung to quieten a bitterly cold child.  While the song was recorded in a book in 1650, the words suggest that the song is much older.  The motet so small that the angels sing is a multi-part choral, and could have dated all the way back to the 13th century.  The terms in the original for the shepherds, angels, and the motet all use the “-ken” ending, which refers to small or young things; as applied to the motet I think it indicates a small motet suitable for a young child.

This Christmas song is still sung today, and given its simple melody is often used as an early teaching song for students learning the recorder and the piano (which is where I first encountered it lo these many years ago).

For those who can read dutch,  an interesting article written in 2010, arguing for the song being written in the fifteenth century, when the little ice age was in full flow.  And on that note, I’m going to be diving into  The Snowmen of 1511, which describes in academic detail the snow festivals of 1511.
Some Actual Inkle Weaving …

‘Tis the day after Thanksgiving and it was more than time to unwarp the loom; I had tried to set up for some inkle weaving, but had horribly miscounted, and nothing was working right, and I’d put up the loom (on the top of a six foot bookcase so it would stop taunting me) until I was ready to face it.
And today it was finally cool enough on the porch to enjoy sitting outside in the fresh, fragrant air and unwind the warp onto four cones while admiring the lizards as they hunted bugs.  The joys of living in the south definitely preclude snow.
Threading Pattern
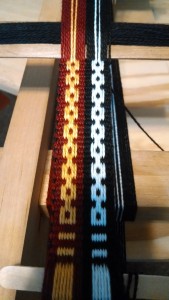
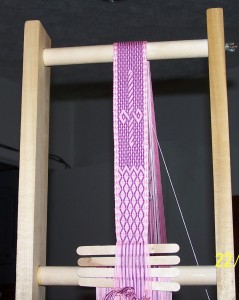
Closeup of Chains and startAfter unwarping, I warped up a simpler set-up as seen in this pattern.  The yellow and white threads are the pattern threads, and the background is red and black.  With simple inkle weaving I end up with short yellow and white bars on a red and black background.

However, add a few extra loops and we can turn this into something more interesting.  One set of loops went around pattern strings 1, 2, 5, and 6 of each colour, and the other went around pattern strings 3 and 4.  Now when inkle weaving, you alternately push the open strings below and above the heddled strings to make the shed.  But to make this pattern, when the open strings are pushed down, the loops are pulled back up to create floats.  By alternating between sets of loops, I could create squared off boxes, that look like chains if you tilt your head sideways a little.


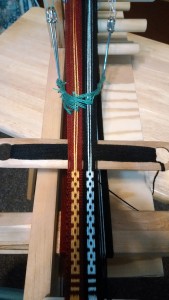
IMG_20151127_150644801In this picture showing more of the loom, you can see how I’ve run large kilt pins through the two sets of supplemental loops so that I only have to grab one pin or the other as needed.

Now all I need to do is find a good tv-show to marathon, and I can finally finish this weaving project.

A little bit of this, a little bit of that …

First off, I’ve been finding interesting articles all week, and collecting them, so without further adieu, a few links:

Secondly, I’ve been (unsuccessfully) trying to design knotwork in the Snartemo 4 colour technique, but in the process ended up digging out a lot of my old 3/1 broken twill notes. So here a very brief explanation of how I weave 3/1 broken twill.

In 3/1 broken twill, patterns will have a light and a dark colour. Each of the pattern tablets is threaded with two light and two dark colours, just as one does for doubleface.  But then, using Collingwood’s 2 pack method, the cards are divided into two groups: the odd numbered cards form one group, and the even numbered cards form the other. Each group turns as a whole; colour changes are created by flipping a card around its vertical axis – which reverse the threading – rather than by changing turning direction.


Setting up the two groups:

  • In each group flip the cards as needed so that they alternate S and Z threading.
  • In the odd group, turn the cards so that the background colour goes through the two holes closes to the weaver.  This is the “vertical” position, because the two holes threaded with the background colour are one above the other (aka vertical if the warp is held horizontal).
  • In the even group, turn the cards so that the background colour goes through the two top holes.  This is the “horizontal” position, because the two holes threaded with the background colour are beside each other (aka horizontal if the warp is held horizontal)

Turning Directions:

The cards are turned in a few turn repeat.  Each of the two groups moves 2F/2B, but there is an offset because of the differing starting positions.  Repeating this turning should yield a solid-coloured band with a structural diagonal.

Turn Odd Group Even Group
1 Forward Forward
2 Forward Back
3 Back Back
4 Back Forward

Patterns:

250152_198275326971392_2012513524_nI draw my patterns on a rectangular grid with a brick like pattern; Tree with Birds Pattern is a  pattern that uses 32 cards, but because of the symmetry the setup is modified slightly so that the second set of 16 cards completely mirrors the setup of the first 16 cards

In the pattern, each column represents one card over all the many turns; each rectangle represents that card for two turns.  Note how the odd and even rectangles are offset, because of the offset turning directions.  In the right side of the pattern you can see the changes needed for the colour changes; if the next rectangle switches from white to grey or vice versa, flip the card.
But that would give you some ugly edges, so sometimes we also need to flip the card when the colour is horizontal rather than vertical.  Those flips are represented in the left half of the pattern by the blue < in a rectangle.

Zen and the Art of Celtic Knots

I spent a lot of time drawing Celtic Knots this summer, in a little journal.  It helped me meditate, as it were.  And it’s been a while.  But the journal was here, lunch time was here, and my embroidery was a 10 minute drive away.

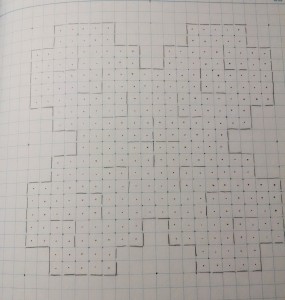
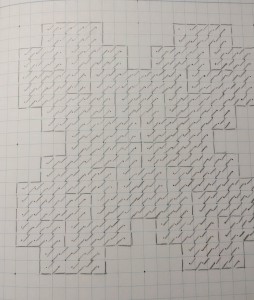
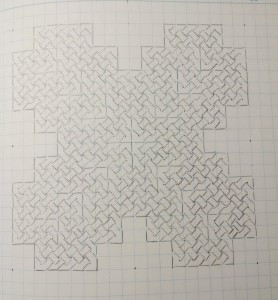
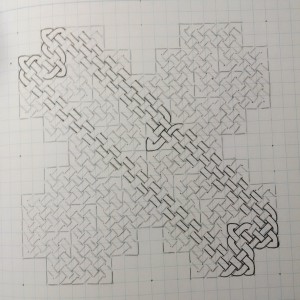
I have been reading about Fresnel lenses, and wondered what would happen if I started similar structures in a knot.  This first knot is still fairly straightforward, and I already have several ideas on how I can expand/improve it for the next version.  So let’s look at the in-progress pictures where I’m using the method described in the Celtic Knots Class Handout.

Basic skeleton
Basic skeleton drawn in pencil on graphic paper.
Added dots
Adding dots in the center of every square.
Added ribbons in one direction
Adding ribbons in one direction; each ribbon has two sides that each go from a point in the center of a square to a corner square.
Added ribbons in second direction
Adding ribbons in the second direction.
Begin inking the ribbons
Now that all the ribbons have been penciled in, I begin inking the ribbons, and now I follow one ribbon around the knot at a time.

Folding a Christmas Wreath

This past week I was seized by the inexplicable need to make Christmas Decorations.  Or perhaps you could say that Christmas was my excuse for folding 144 identical modules (12 modules per cube, 12 cubes …) and combining those cubes into a wreath.

In Progress (1/3) Modular Wreath

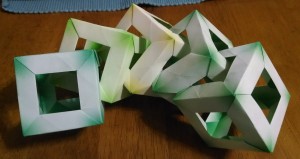
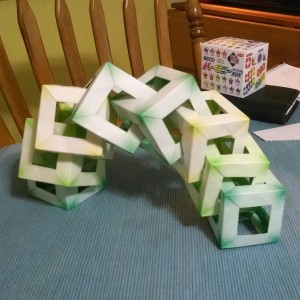
We began with some experimentation.  Folding a few cubes, and making sure that they could interlock, and more importantly, that interlocking them would allow for the curvature needed to make the full wreath.

The green on these cubes is subtle; I was using patterned paper with the four corners tinted, graduating to much paler tints in the center.  You can see the box in the background in the second picture.

In Progress (2/3) Modular WreathEight cubes folder, and a very satisfactory curvature.  Plus making the cubes stand and slither was fun.  I could easily see myself folding a long line of cubes and then just dangling them and waving them about.  The cubes are amazingly resistant to abuse, although when Molly the white demon dog got her teeth on the ninth cube the slobber killed it.

In Progress (3/3) Modular Wreath

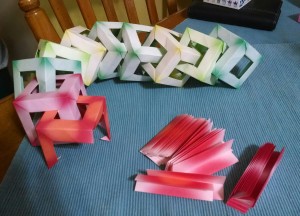
Now in the home stretch; the red modules have been counted and partially folded, and we were off to the races.

Completed Modular Wreath

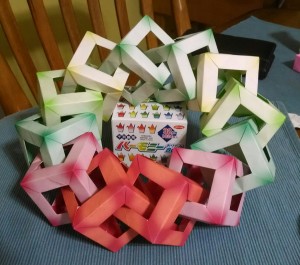
Finally the finished wreath, balanced on the box the paper came in.  And I still have 1024 – 144 = 880 sheets left for more shenanigans.


It’s possible we may be putting up a tree this year.

Playing with modules

Some days, all you have is access to some paper, and time.  Or, in other words, I have a little spare time on my hands but forgot my projects at home.  Oops.

So I’ve gone back to an old hobby, folding paper or more formally known as the art of origami.  Personally, I prefer the kind of origami that uses multiple sheets of paper, rather than a single sheet.  There’s something satisfying about folding a set of modules and combining them into a single finished product that is more than the sum of its parts.

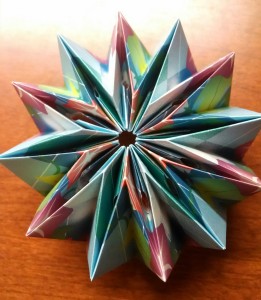
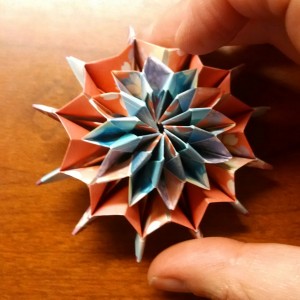
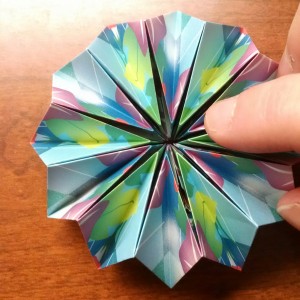
Fireworks Closed Fireworks Opening Fireworks Flipped

For instance, there is the Origami Firework designed by Yama Yamauchi, which consists of simple 12 models and produces a flexiball – a round torus that can be rotated by pushing up in the center from below, and out  along the edges from above (or vice versa).  It’s a wonderful fiddleball when thinking, and the colour combinations possible are endless; you have 12 modules, but what colours you choose, or how you order them, is entirely up to you.  In my case, I used one origami paper on the outside, and a second on the inside, making the contrasts happen.

And before I lose the link, here’s a site with many types of modules that I fully expect and hope to be playing with in the foreseeable future:  http://michal.kosmulski.org/origami/balls.html

How to design patterns

I tend to spend a lot of time fiddling out new patterns, most often for tablet weaving, but also for brickstitch and occasionally blackwork.  In fact, I’ve got blackwork on the brain at the moment after Kim Salazar posted Blackwork Inspiration, an article in which she talks about places to find inspiration.

I realized as I was reading her article that I like designing patterns in tightly constrained spaces.  In tabletweaving, especially when designing patterns designed to be warped up quickly using speed warping, the design is primarily affected by how the tablets turn.  You have essentially three options here; a tablet can turn forwards, backwards, or it can stay idle.  I haven’t really started experimenting with tablet idling yet, so that reduces it to two turns, which can easily be plenty.

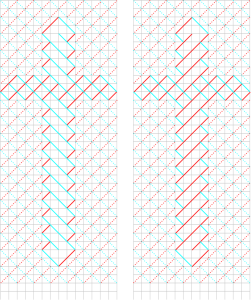
Daggers_14_01Consider for instance an early pattern I called Daggers.  Back when I was graphing this I was using shorthand; each square represents two tablets and two quarter turns.  The colour of the thread is actually indicated by whether the line is solid (colour 1) or dashed (colour 2), and the background colour (colour 3) isn’t shown at all; forward turns are blue and backwards turns are red.

The tablets are warped so that each tablet has, in clockwise direction, colours 1 – 3 – 2 – 3 (although often when I wove it, the background colour and the second colour where the same colour, making the warping 1 – 2 – 2 – 2).  This allows for quick speed warping using the continuous warp method Linda Hendrickson describes in her description of a Continuous Warp (Linda Hendrickson).  After the tablets are all warped, they are set up so that all the cards are threaded in the same direction, and then turned so that colour 1 is – moving from left to right – in the top front hole, top back, bottom back, bottom front, and repeat.  Turning all the cards forward should result in straight diagonals moving to the left.  If the diagonals are jagged, either flip all the cards vertically and reset, or turn every second card two quarter turns.  This is all very similar to setting up for Egyptian Diagonals, except that the tablets are not all threaded two dark, two light.

Dagger on a pink beltIn this version, which is a slightly different pattern where the handle is longer and the guards are much bigger and the background is made with solid coloured diamonds, I was weaving a pink belt; hence the background colour is pink, colour 1 is purple, and colour 2 is white.  And I just noticed I’d left out the dashed lines inside the daggers, so will leave those as an exercise for the reader.

Patterns like this are easy to develop on grid paper; the basic rule for me is to draw out colour 1 first with the following constraints: if the diagonal changes direction, there can be no gap and for the two cards we must go from one diagonal straight to the other.  If the diagonal does not change direction, then there must be a (temporarily) blank square between them.  I can test the design by adding the dotted lines using the same rule.  If there are two parallel diagonal lines there must be a dotted line between them.  And the backgrounds I usually use either the dotted diamonds, or solid diamonds that are properly offset from the main pattern (so that there is room for the dashed lines in between).

Over time I’ve started developing diagrams that use the background (white or gray) to indicate the direction of the turn, and show every thread rather than just the dominant colours, but I find that when I’m just doodling patterns this method suits me just fine.

Embroidery Links

It’s been a quiet house, since Casa Dixie Weaver is embroiled in the new Civ game.  So this week’s update is more of a links fest than anything else.


    • Medieval Silkwork posted a really nice article, back in July, about tassels and Turk’s head knots.  She includes some lovely pictures from extant medieval tassels, and prvious articles include both how to make Turk’s Head Knots and the gimp thread she uses.
    • At Gina – B Silkworks, there’s a new system to make focal beads by rolling up paper and glueing it.  (After which the focal beads can of course be painted, or decorated, at will.)  Gina is the author of “Tak v Bowes”, which is a translation of a manuscript on fingerloop braiding … A manuscript which is sadly out of print.  Poking around the website is fun, as she makes the most gorgeous wrapped buttons.  Sometimes I think her form of wrapped buttons is just another kind of weaving.
    • Opus Anglicanum has started a new stitchalong project; kits come with everything you need, but if you already have the embroidery supplies, all you have to do is download and print the pdfs.  Like last year’s project, she begins with a very good tutorial on the basic covering stitch, including pictures of what the back of the embroidery should look like.