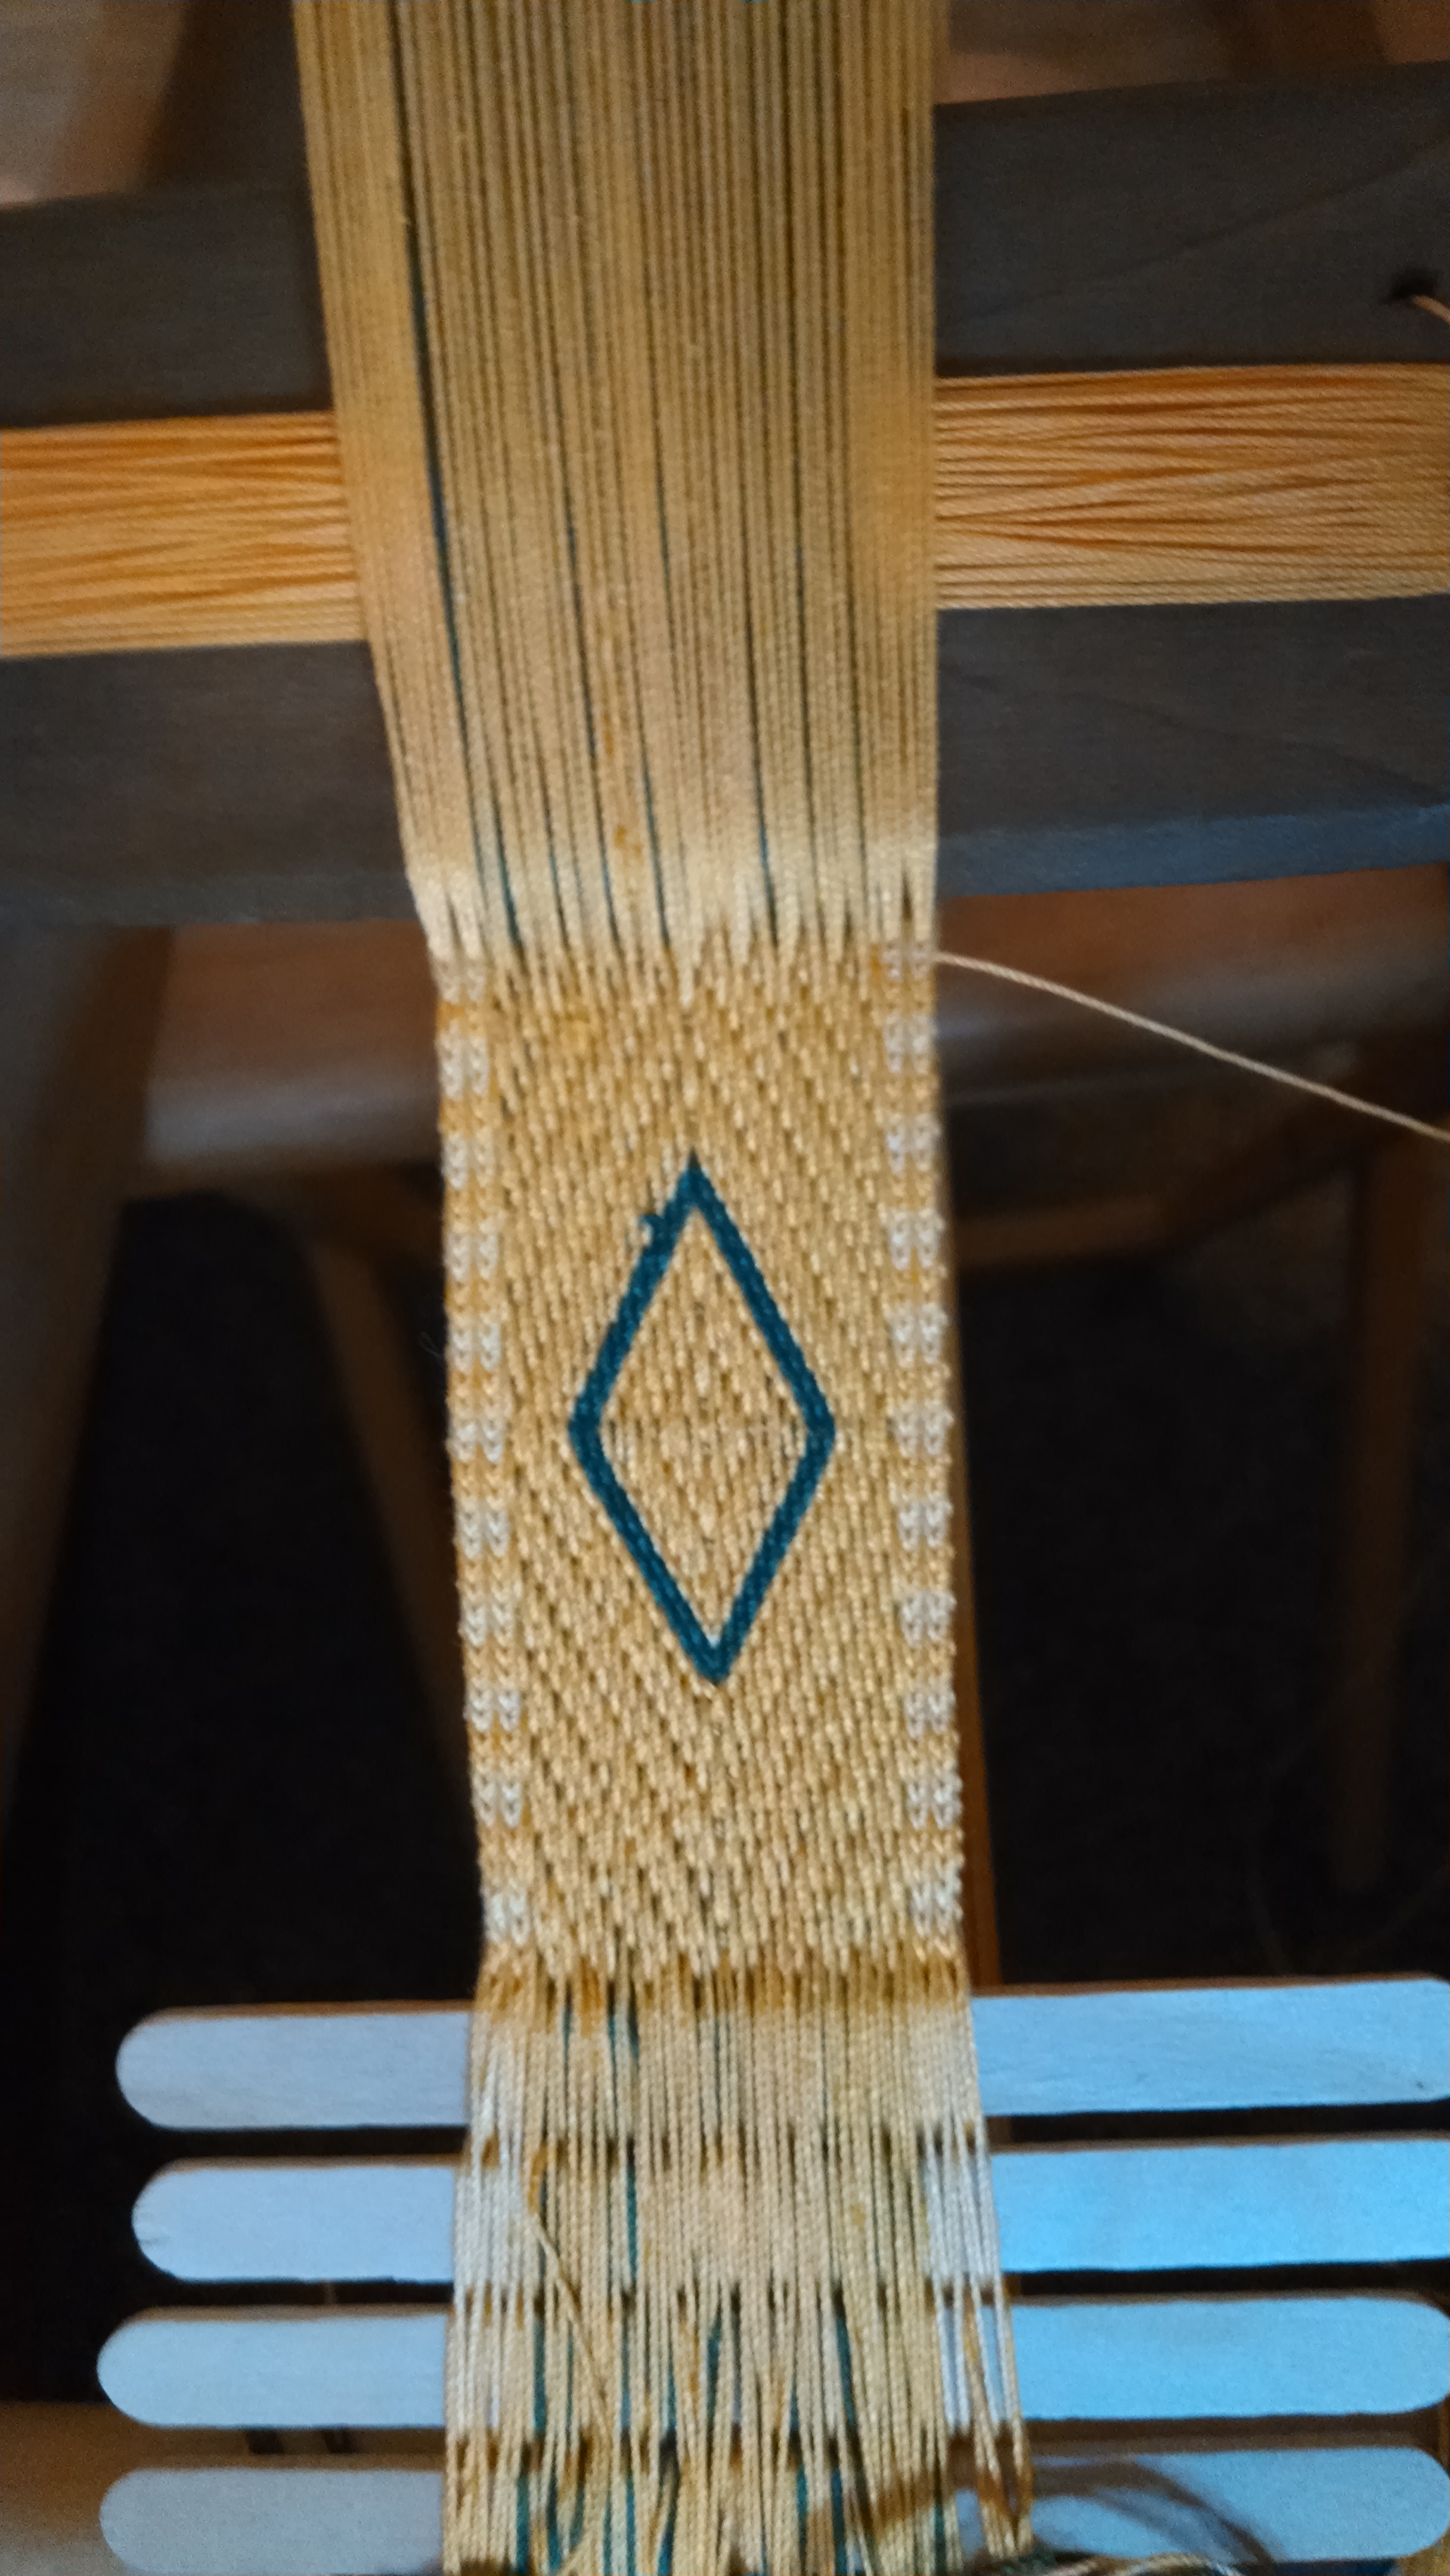
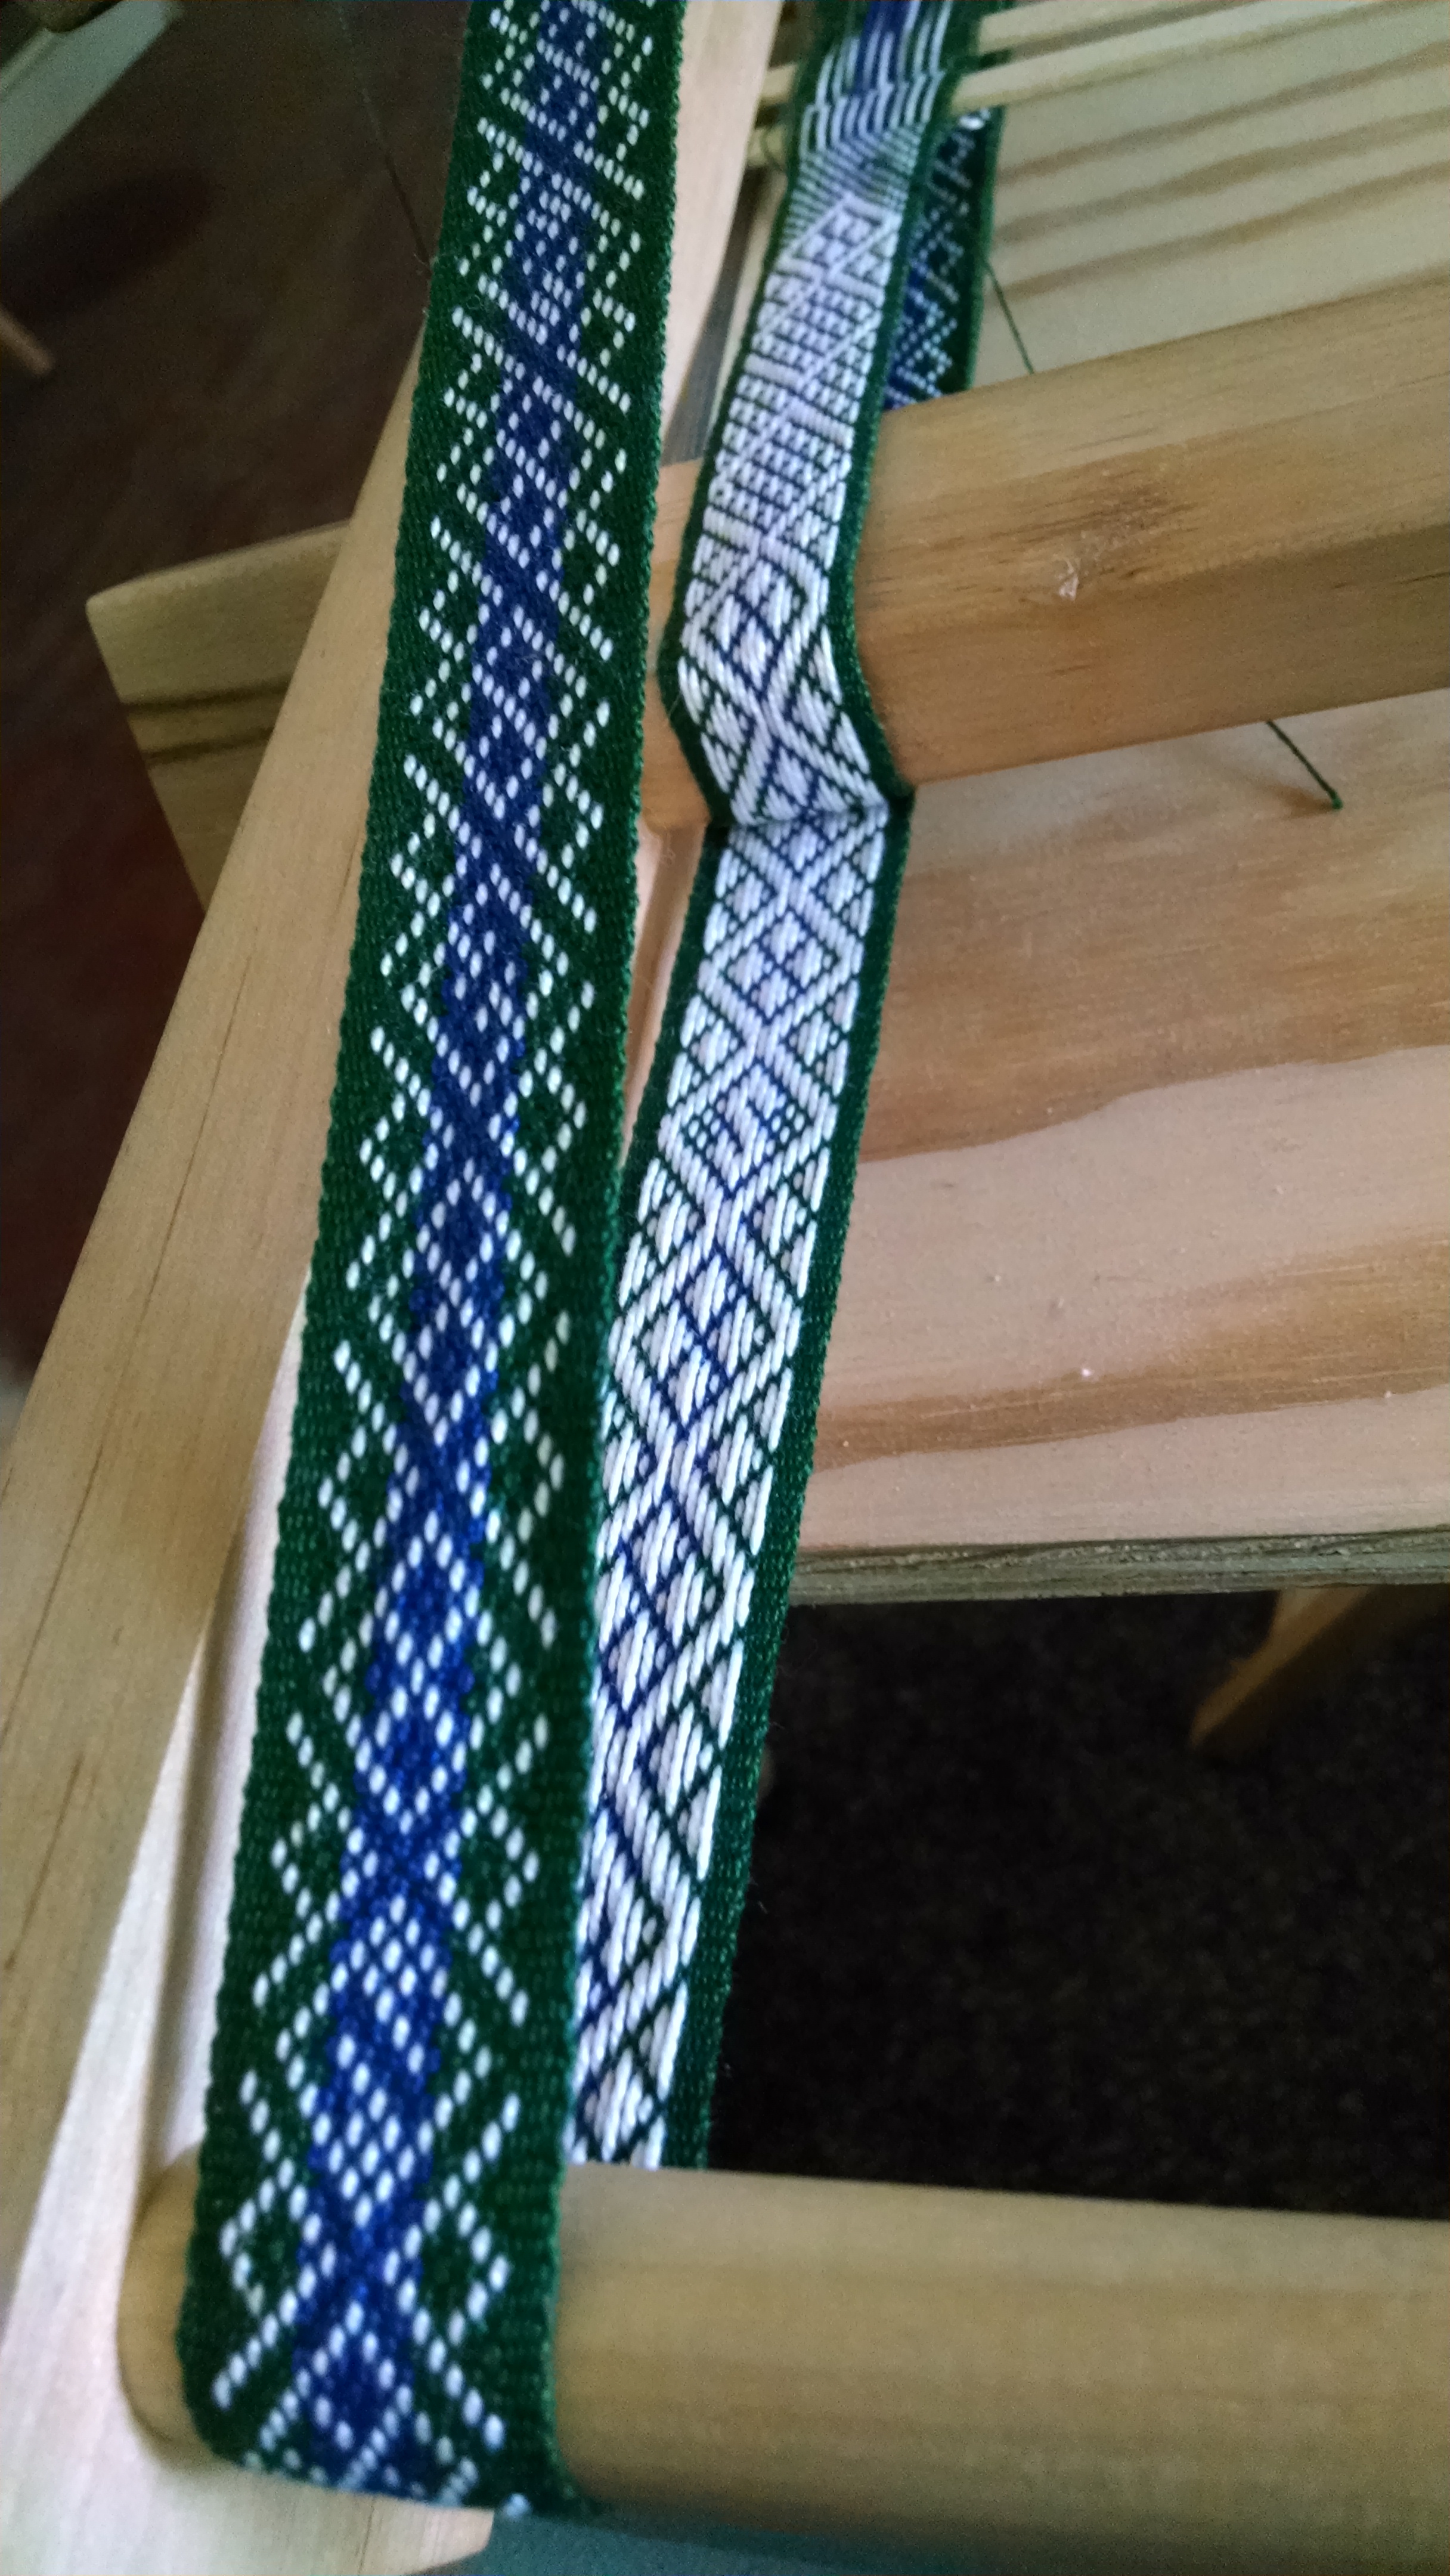
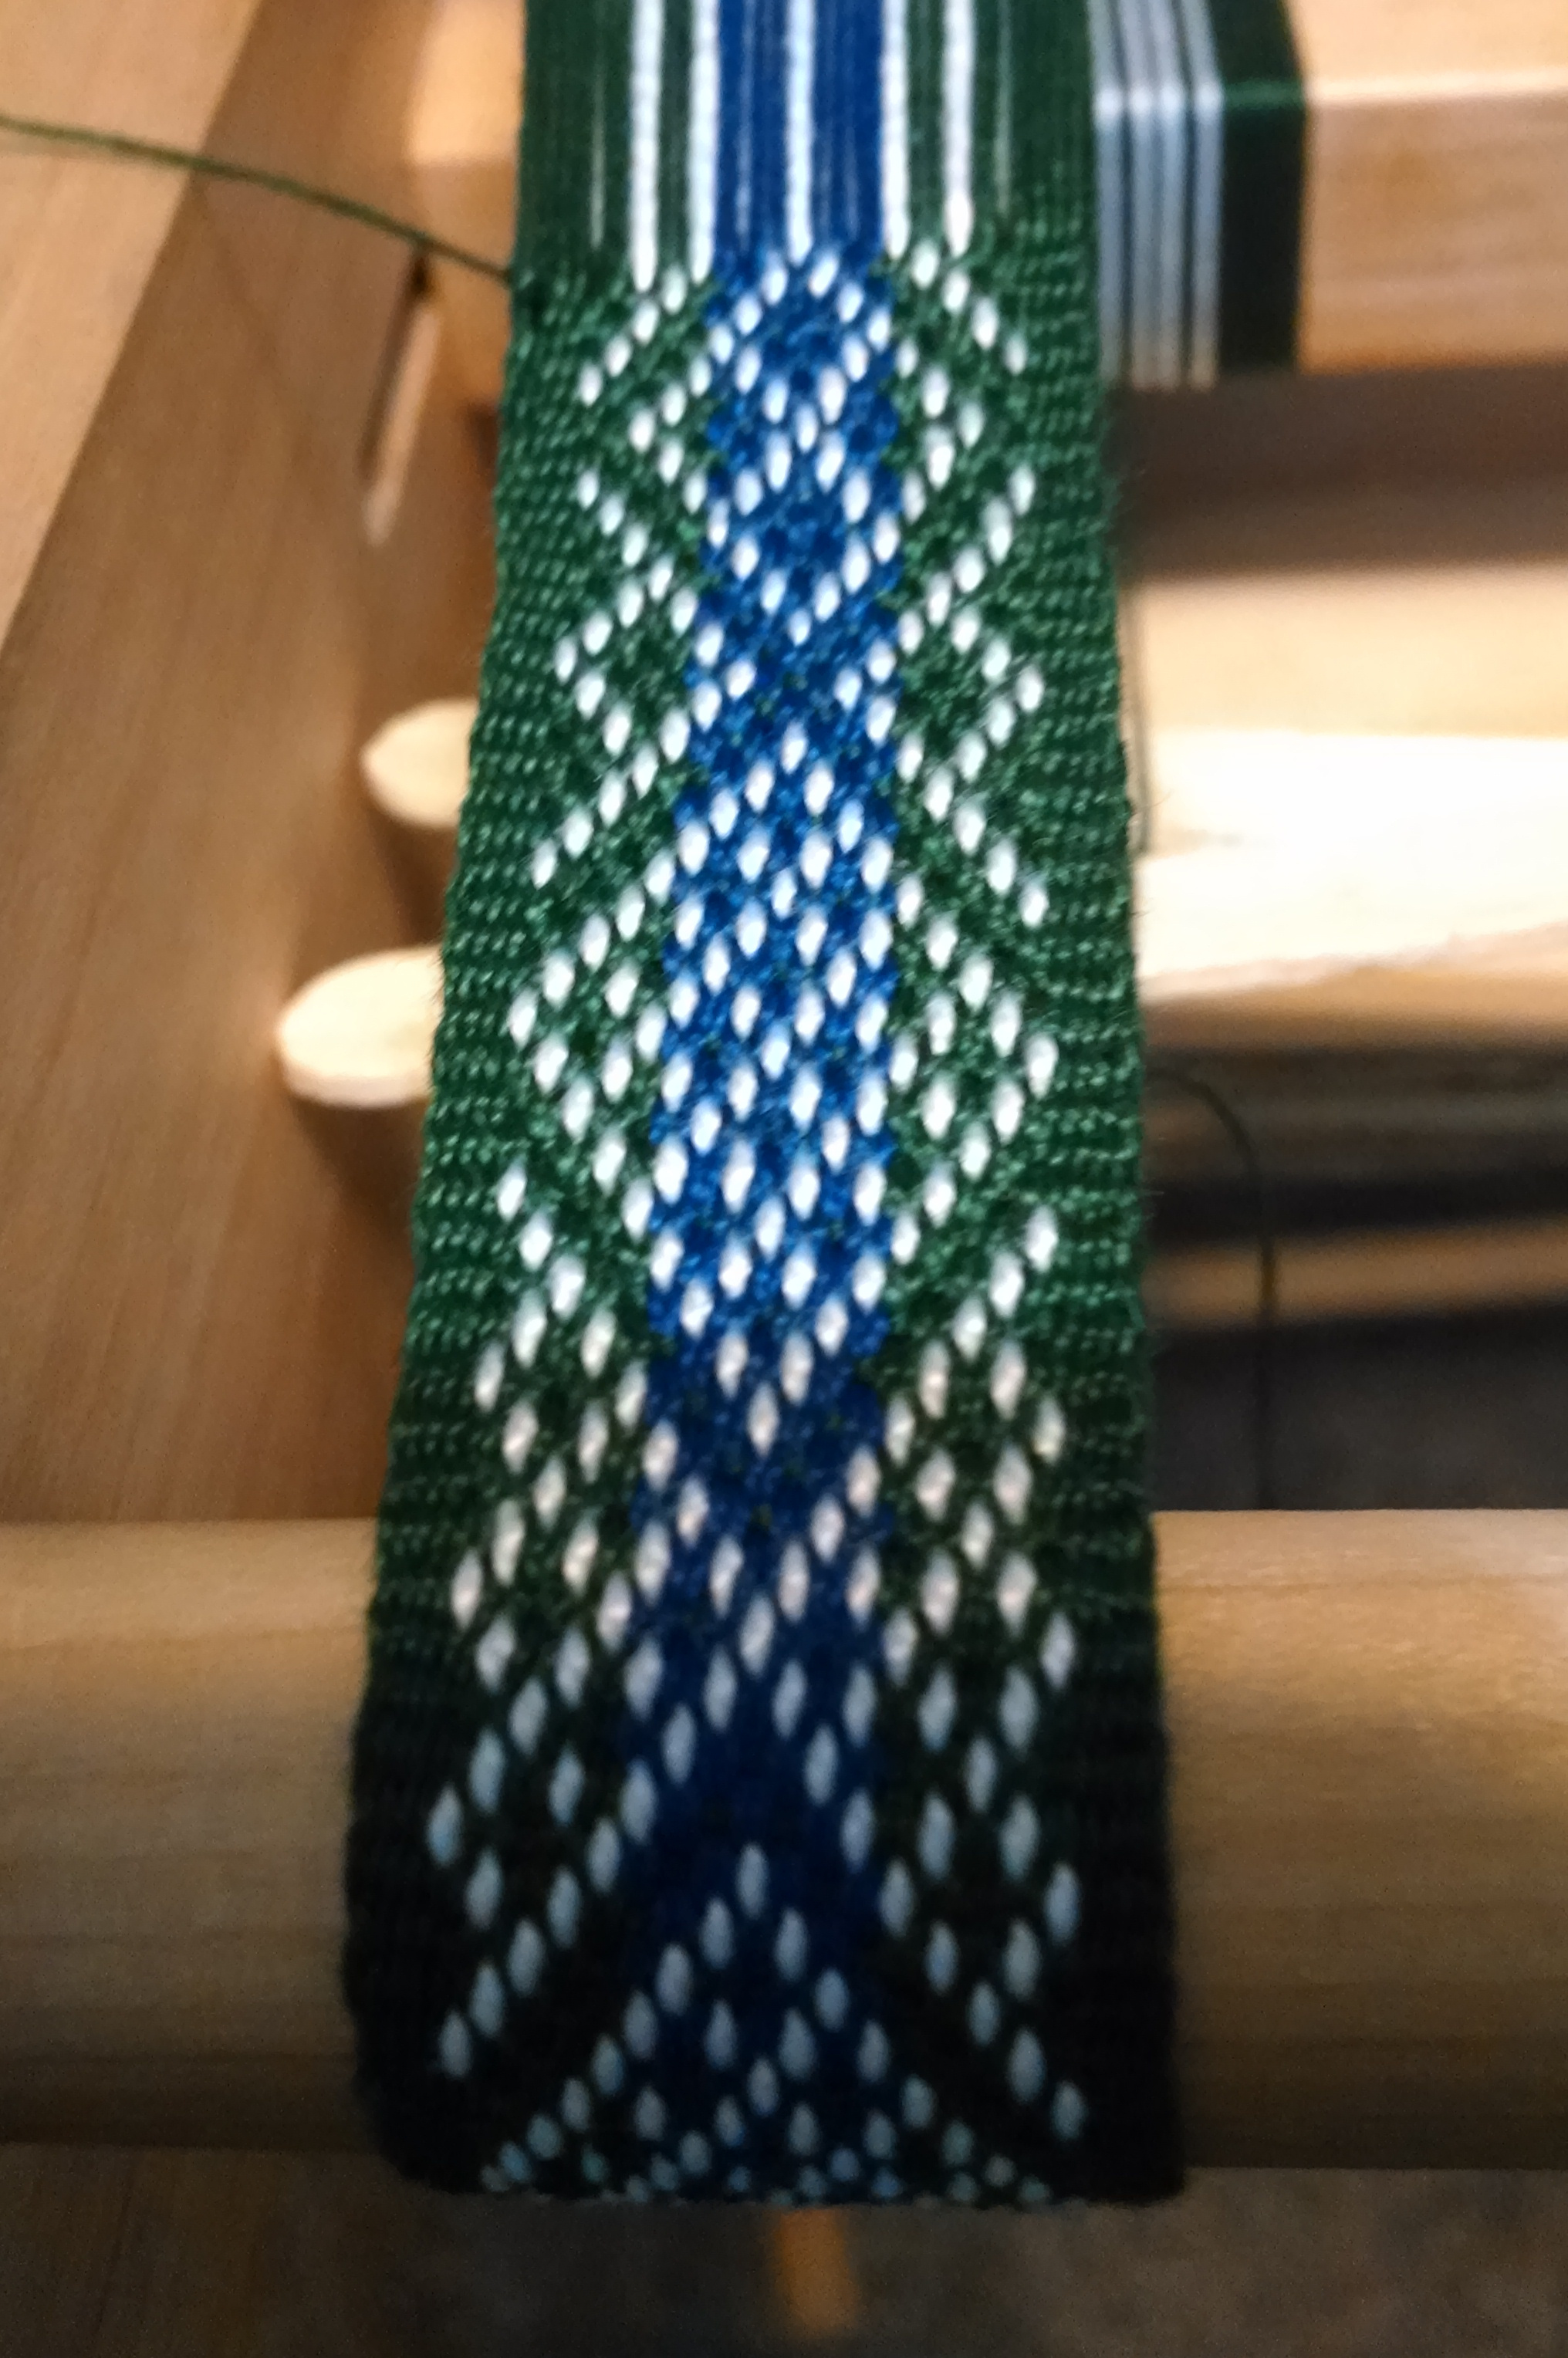
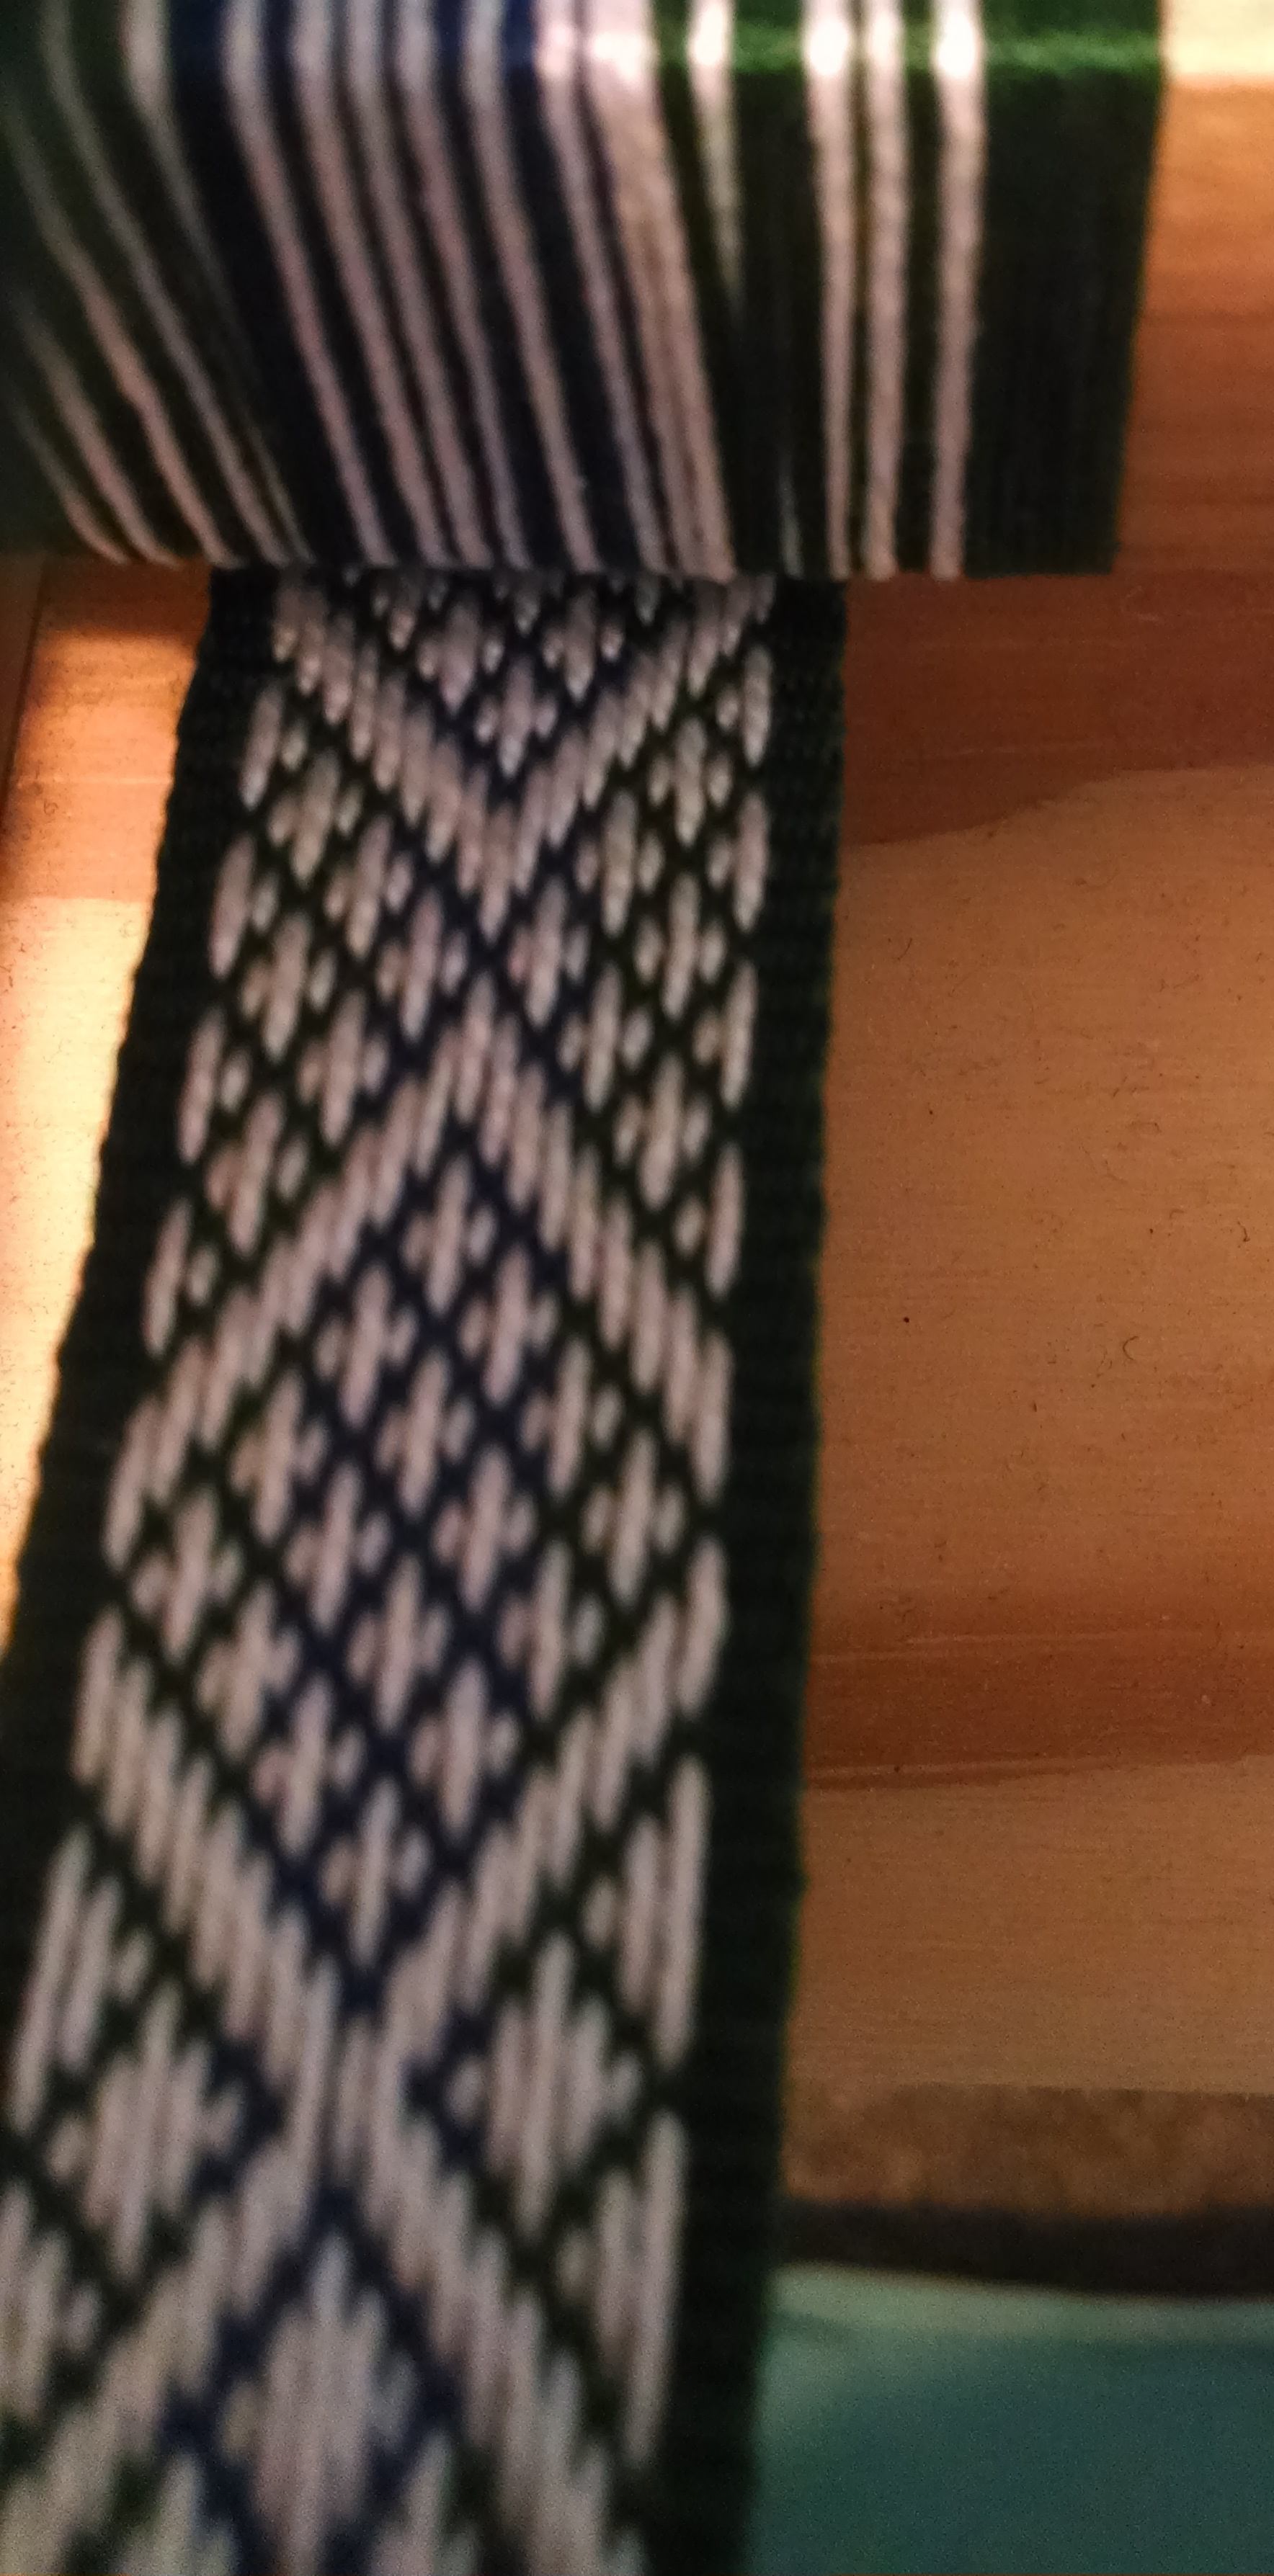
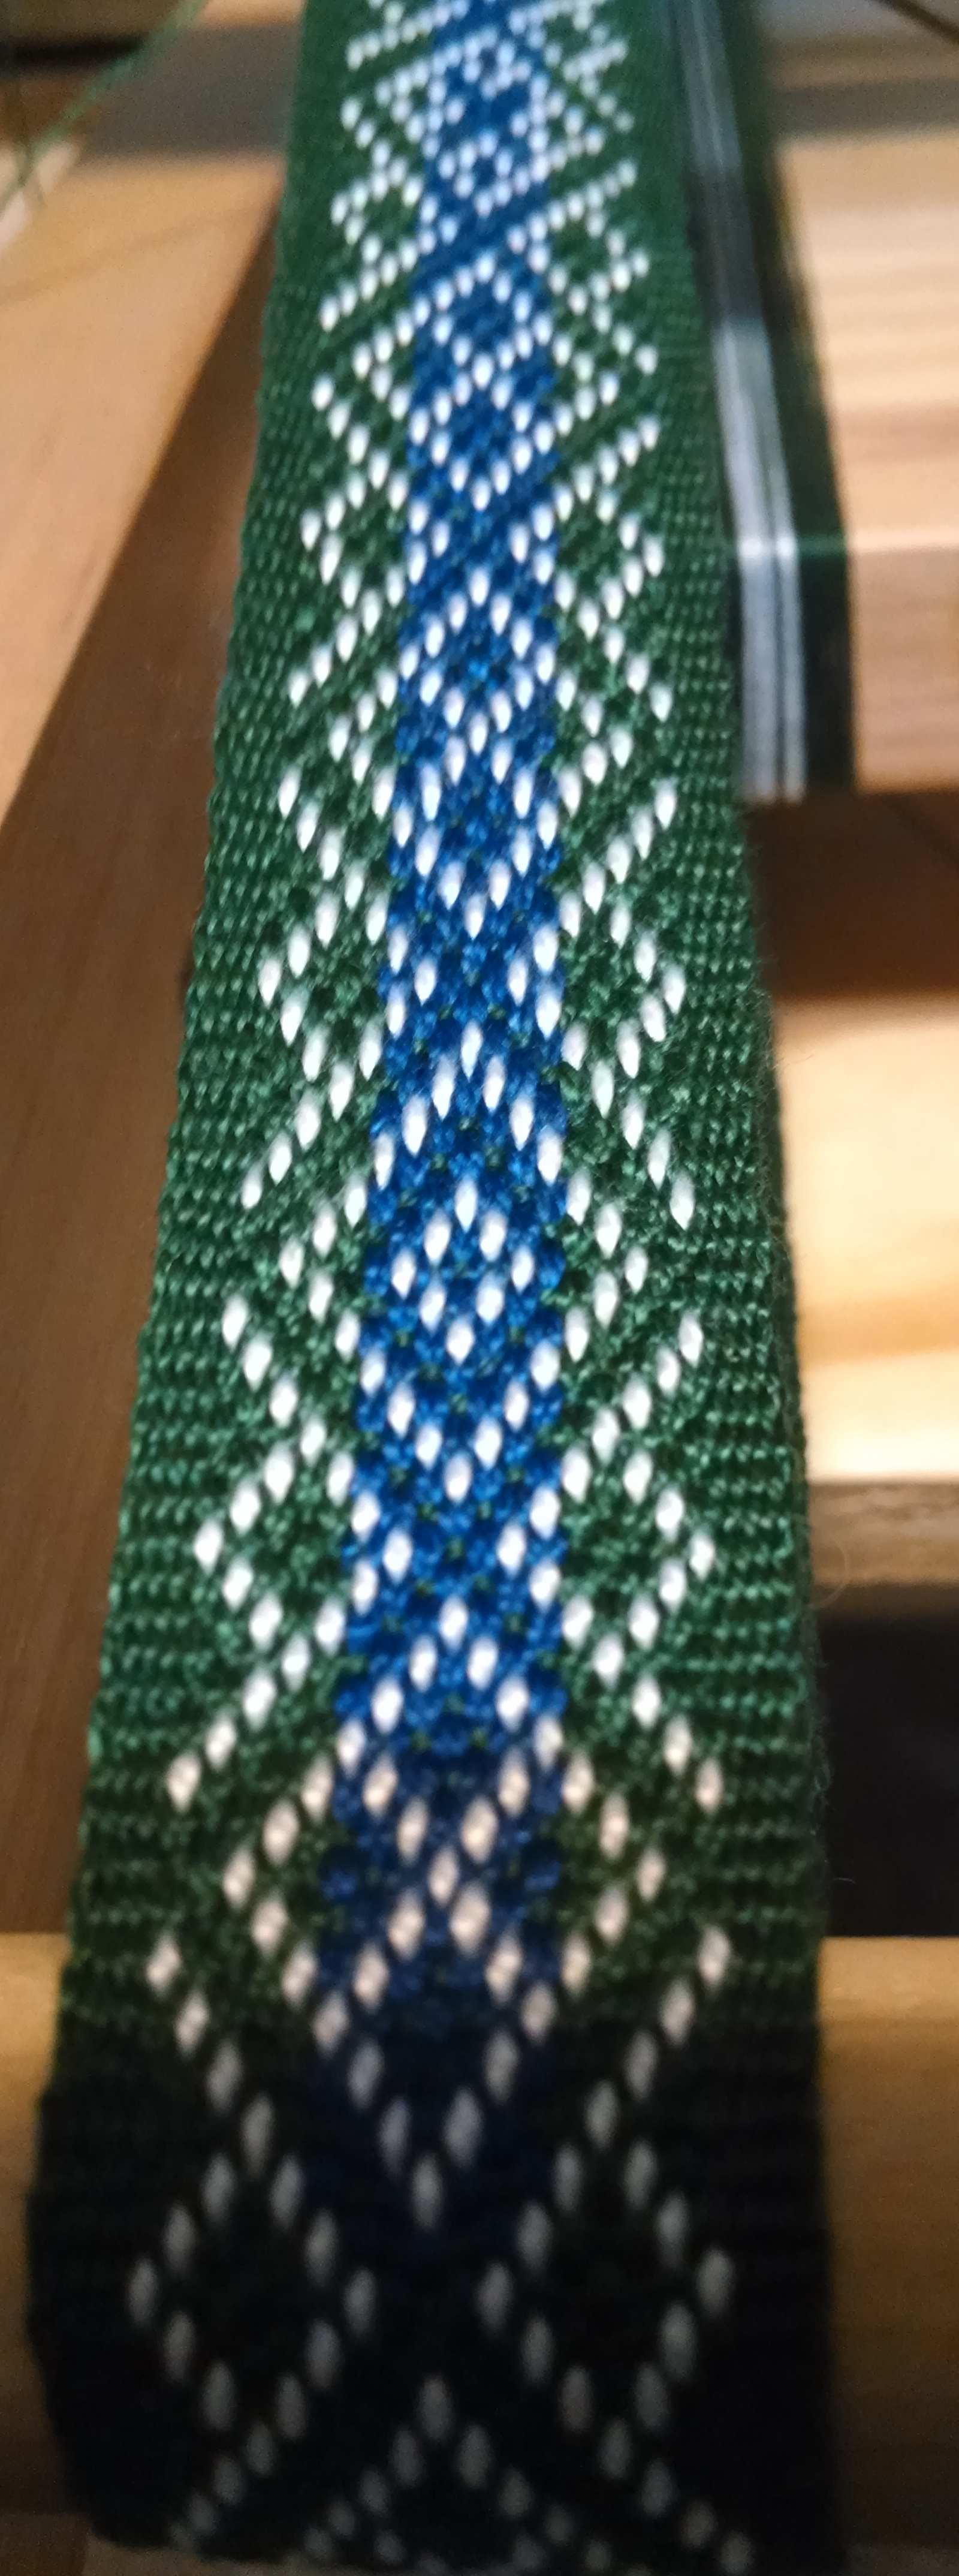
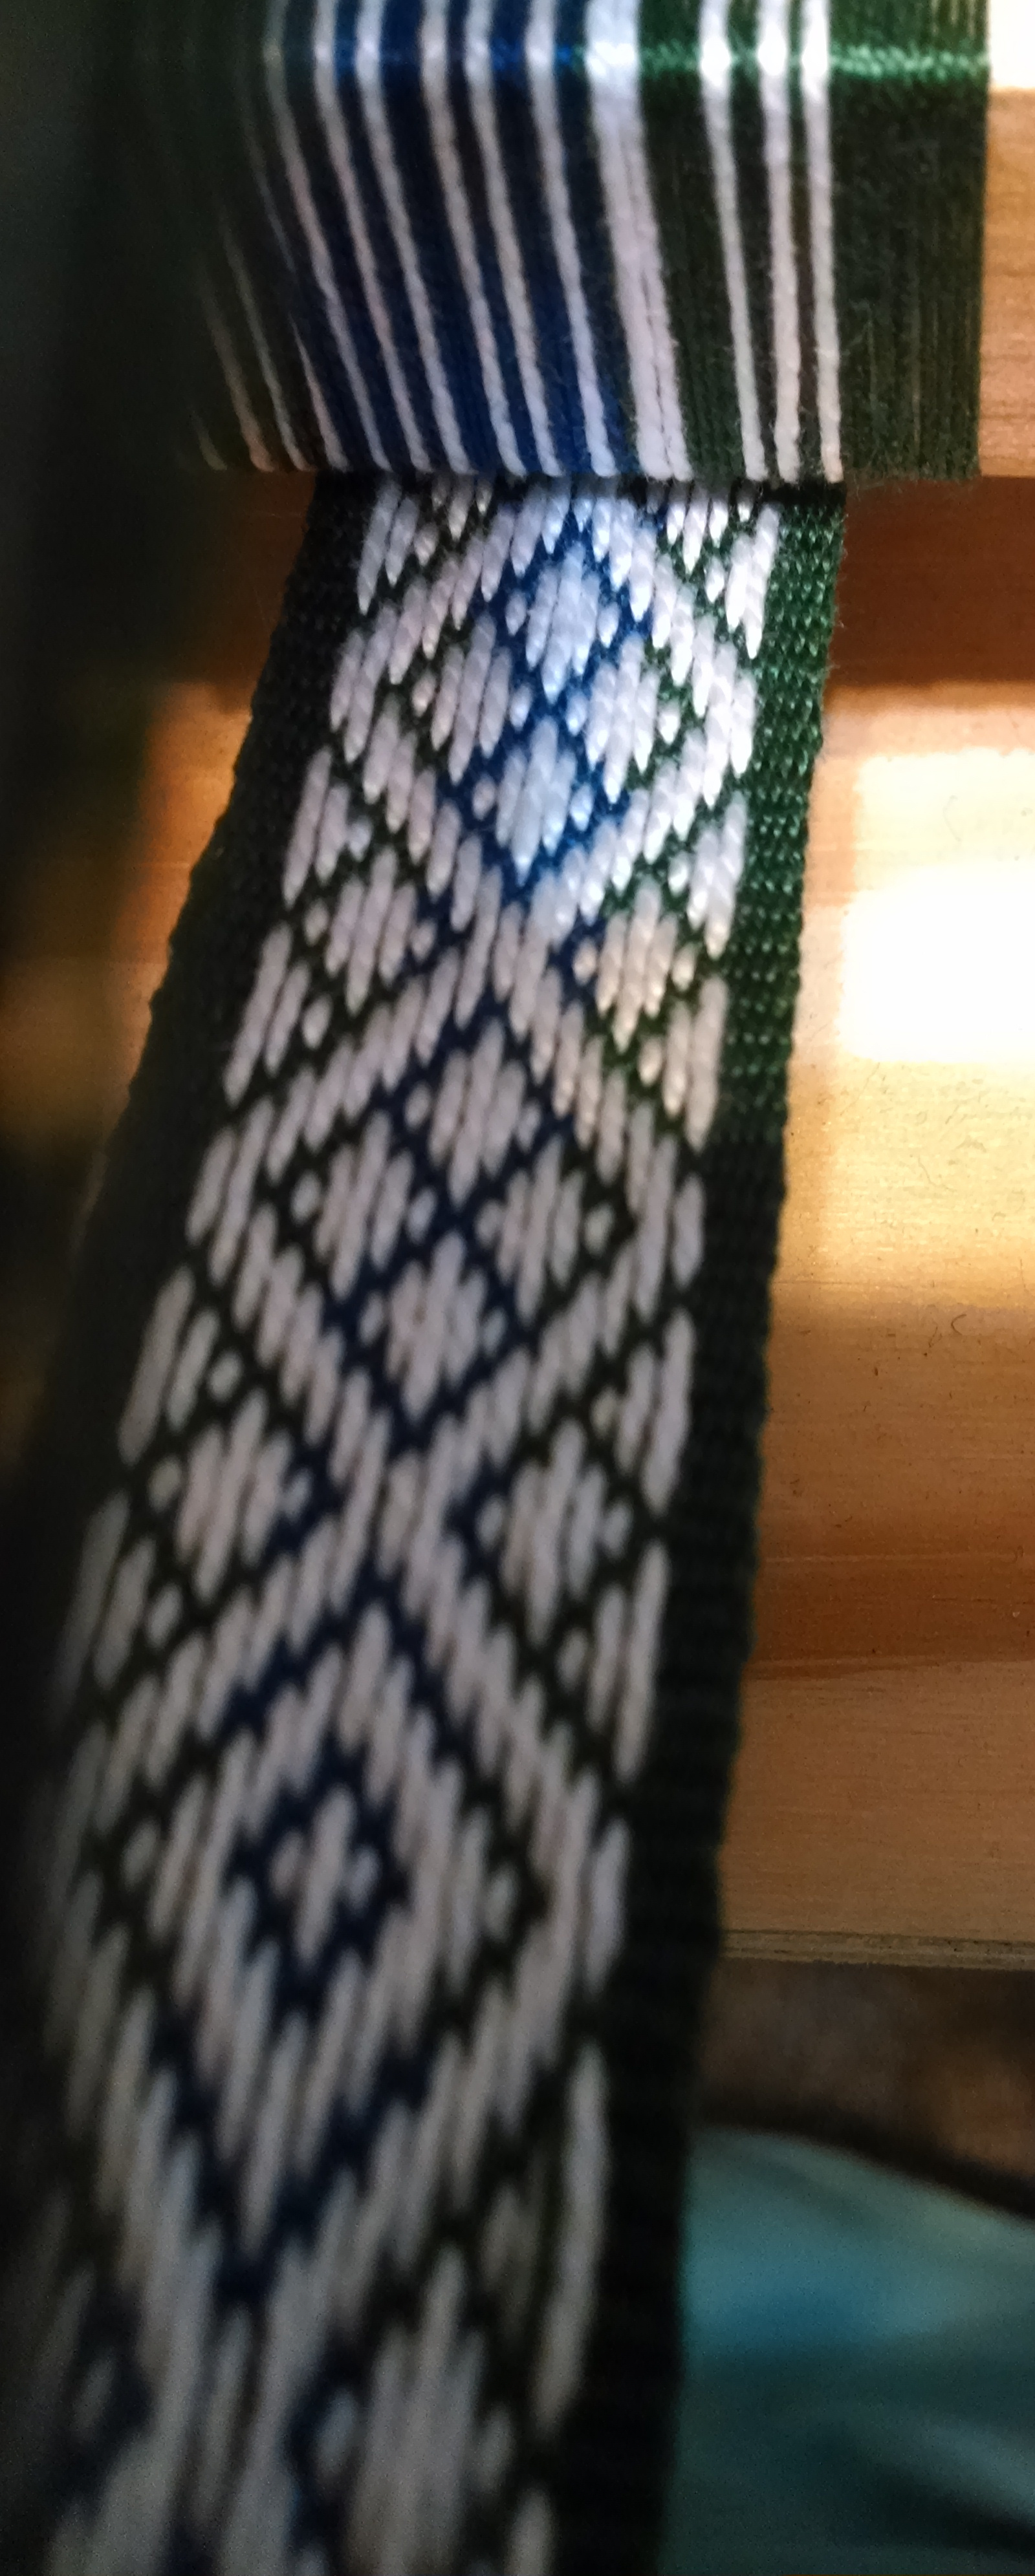
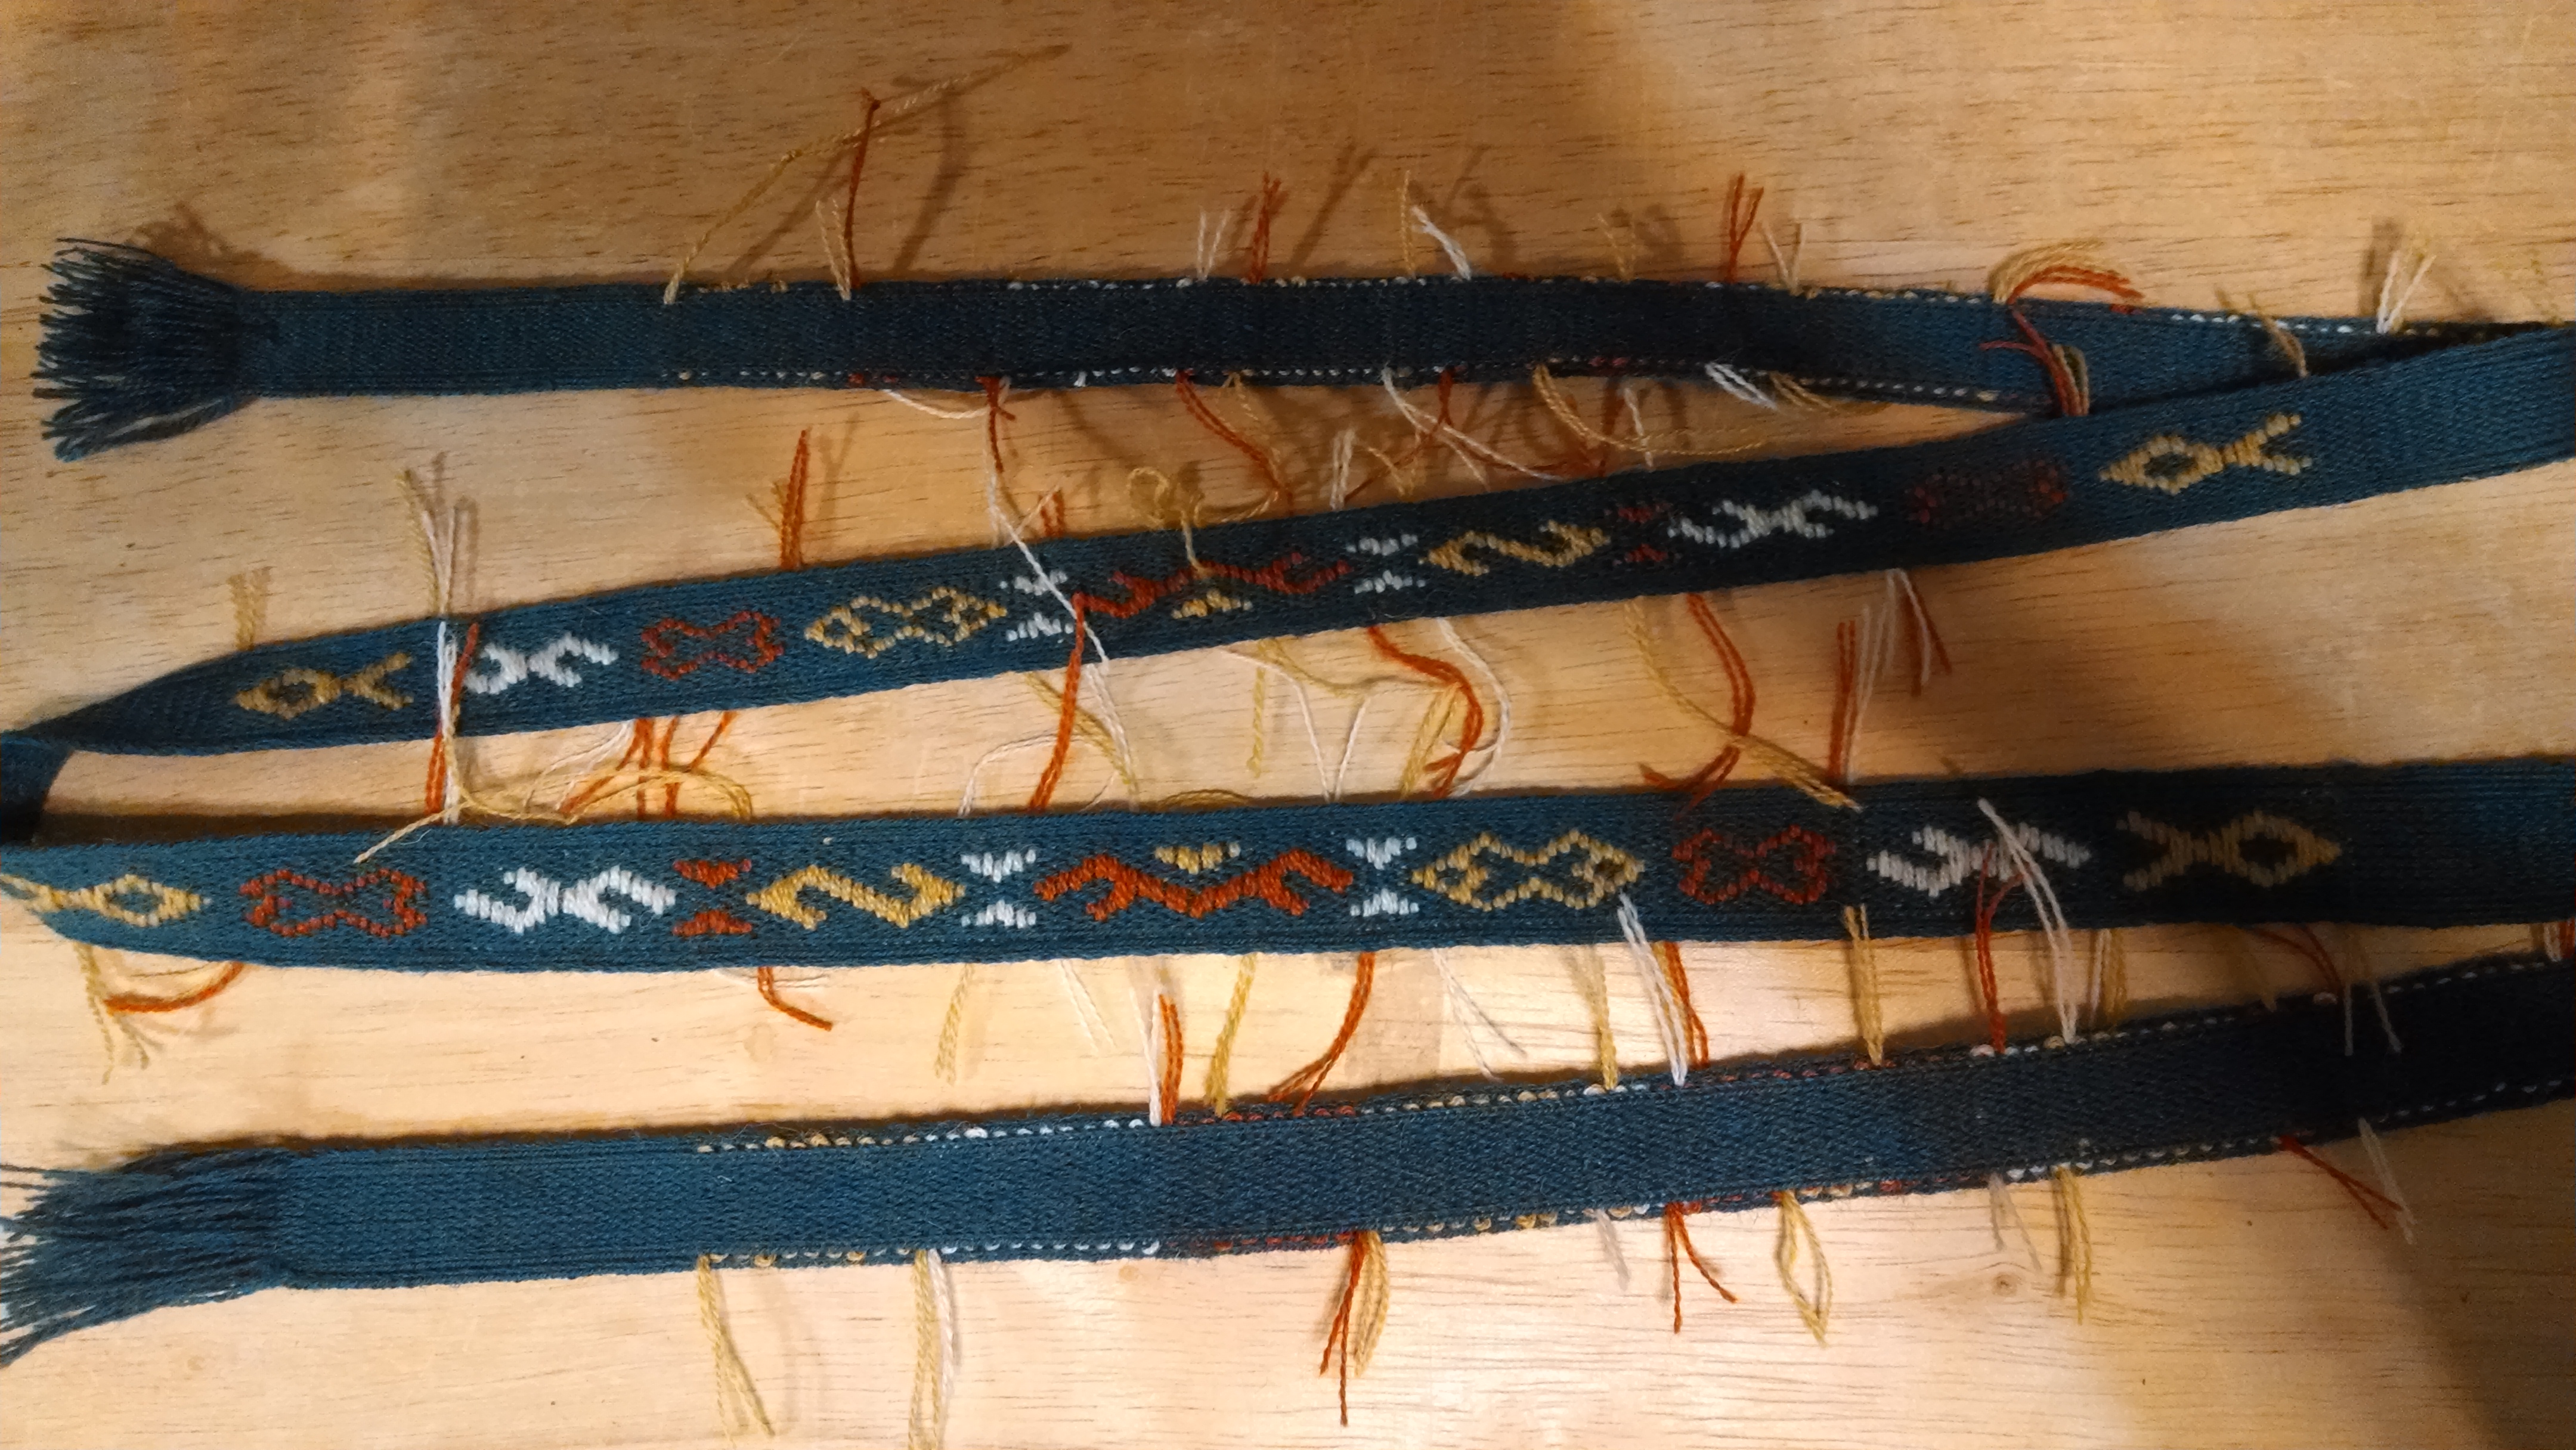
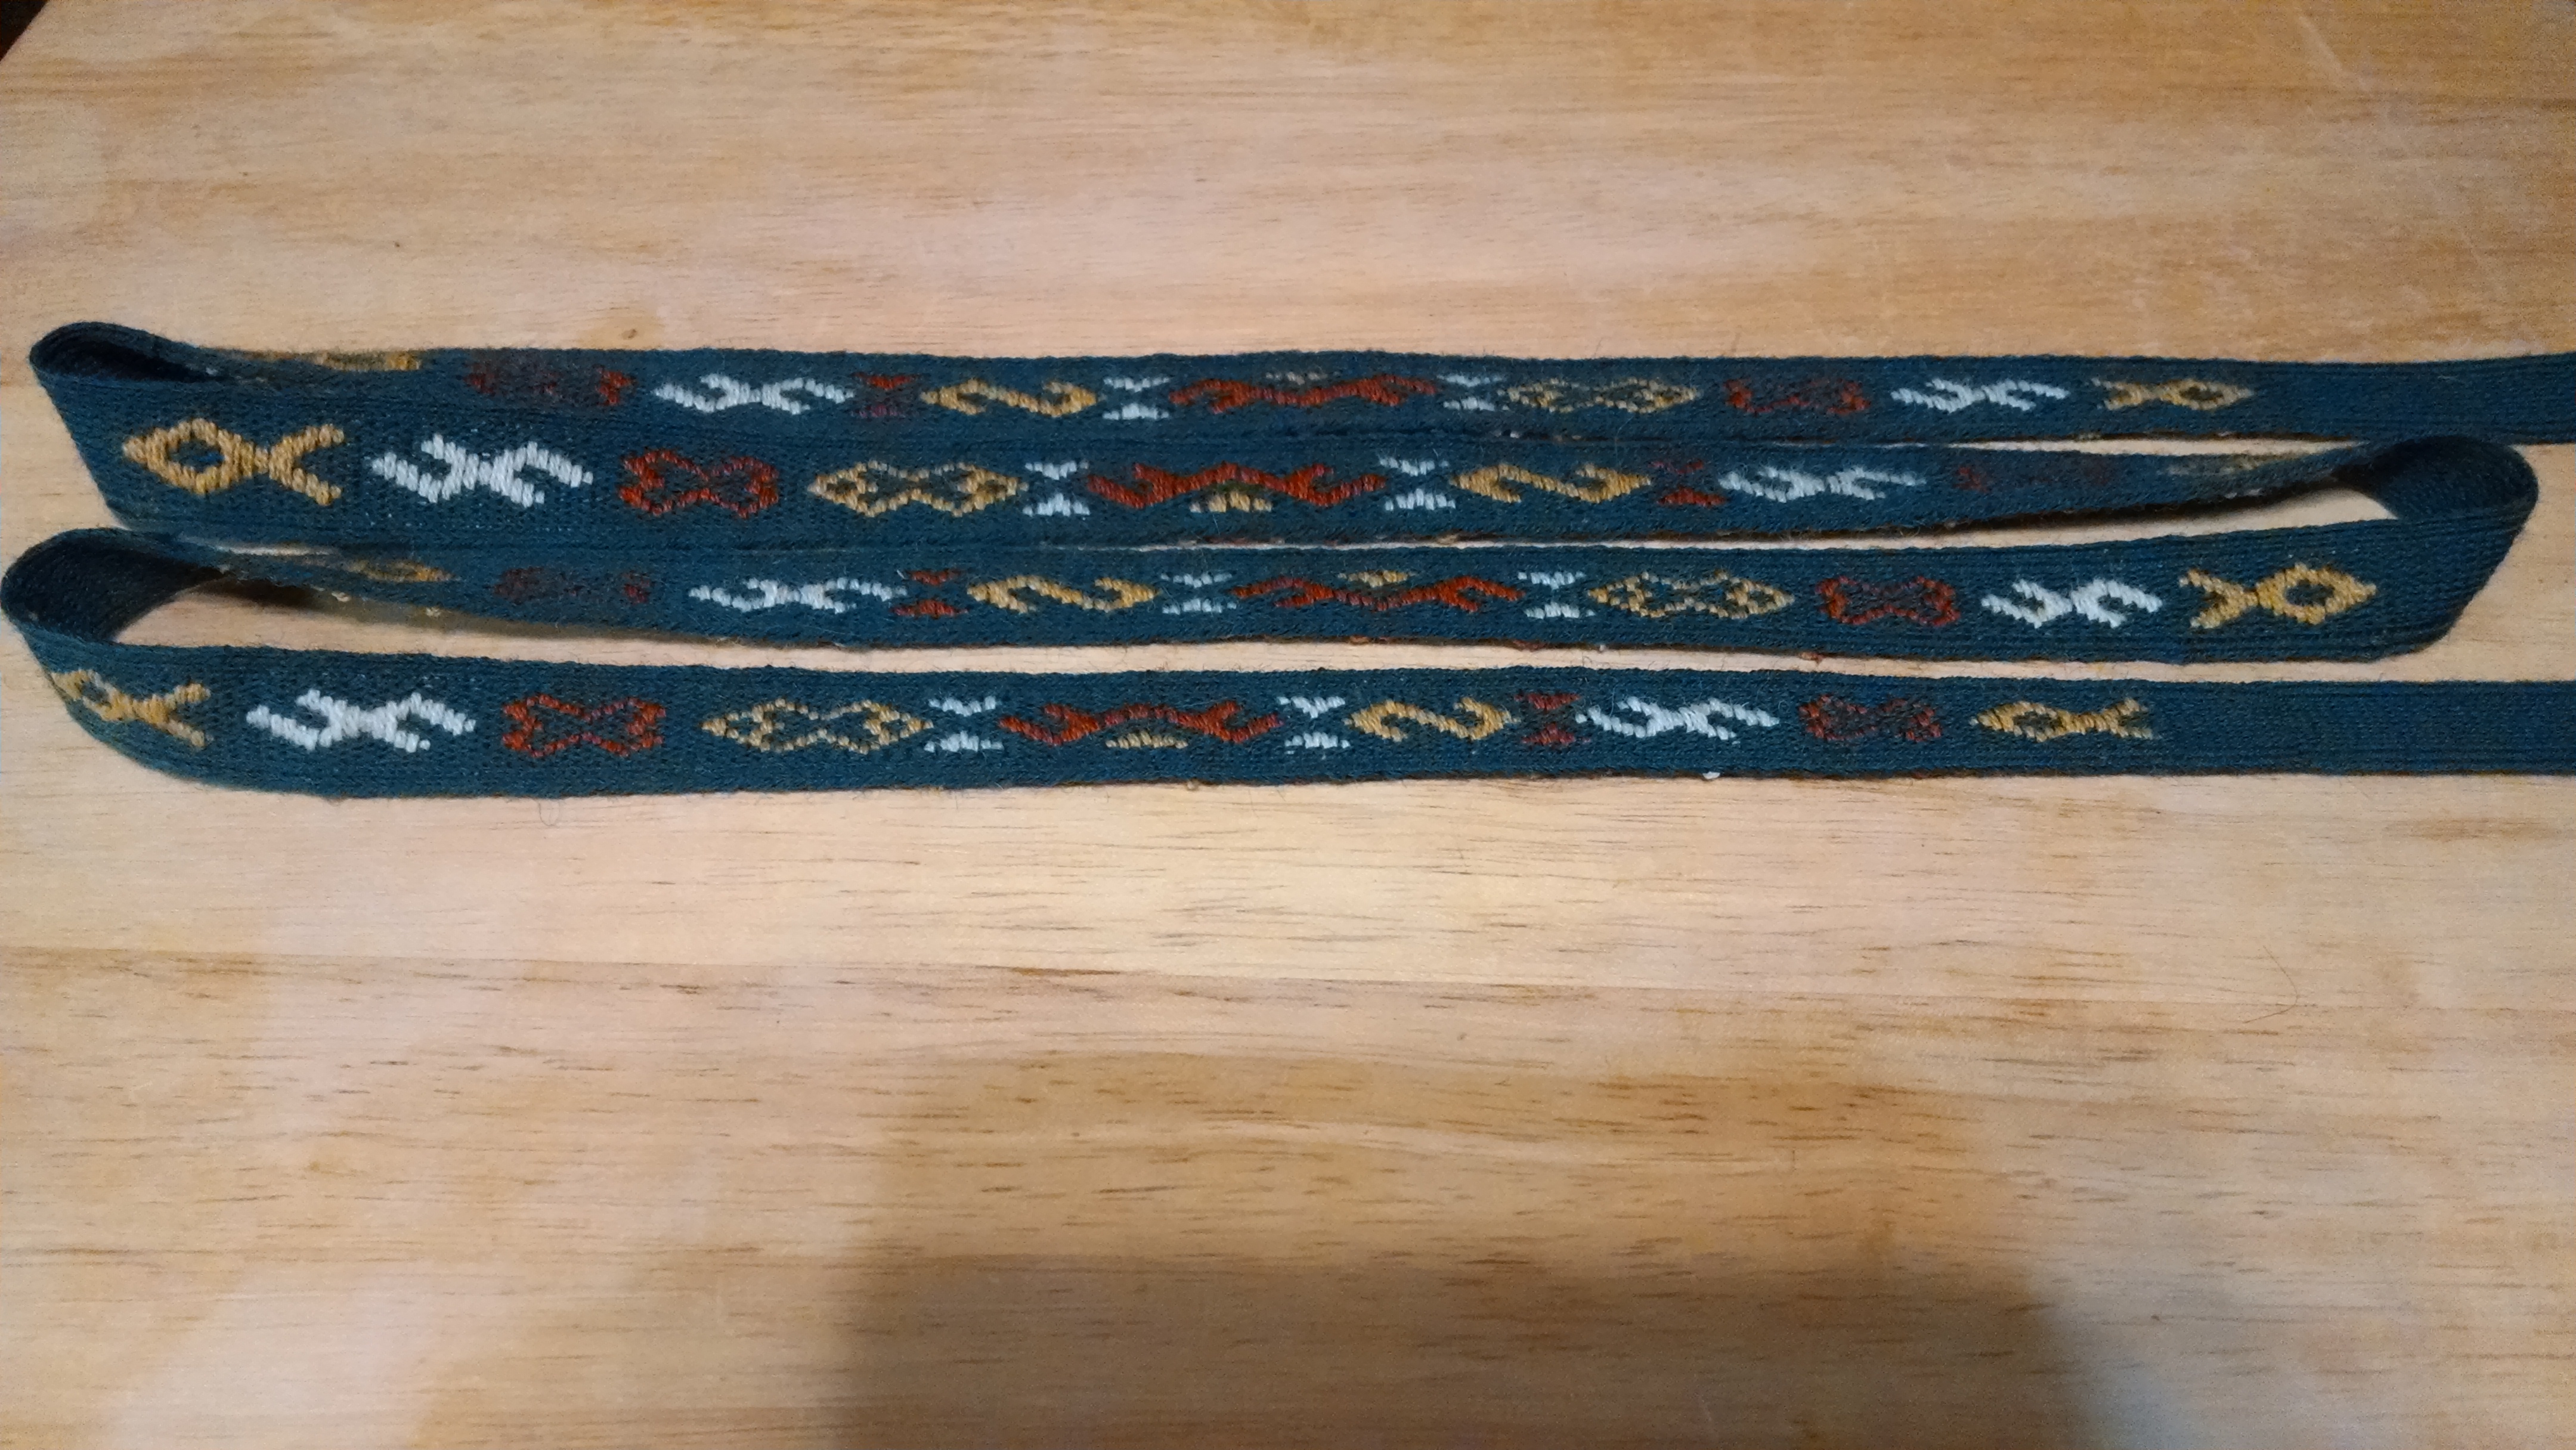
3/1 broken twill is a type of tablet weaving that produces a very pronounced diagonal structure in the weave. This weave is particularly suitable for designs that are very diagonal, and in this case a friend requested a yellow belt with hollow green diamonds. In this article I am going to write how I set up the cards and arranged the turning sequences so that the weaving speed was maximized.
To maximize weaving speed, you need to arrange the cards so that they can be turned as a group, and are manipulated as little as possible. Here, the only manipulation of cards will occur when we flip a card around its vertical axis.
Basic Set up
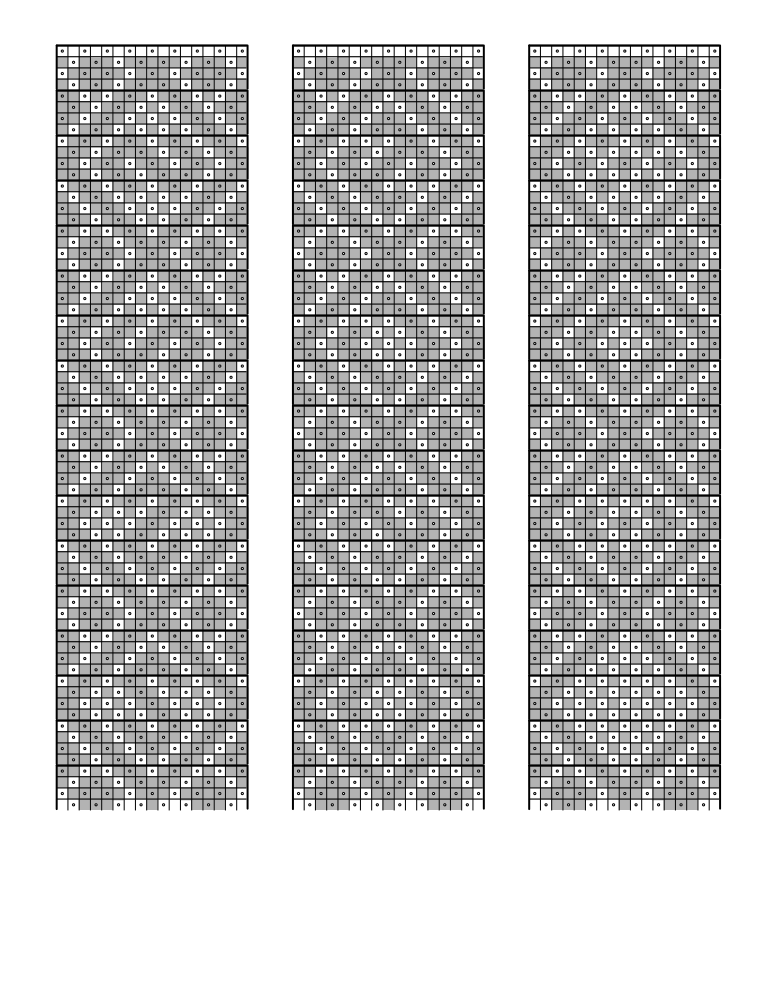
The pattern area consists of 32 cards, each threaded with two dark (green), and two (yellow) threads. For the first 16 cards (counting from the left) we thread the cards as below, where the woven area extends to the left, and the warp to the right, and repeating the cycle of four cards four times (since 4×4=16).
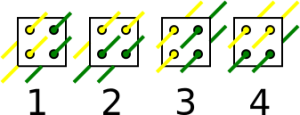
Note that cards 1 and 3 “mirror each other” in that they have the threads going through the same holes, and similarly cards 2 and 4 mirror one another.
For the second set of 16 cards we mirror the first 16 from the centre out, so that card 17 is threaded like 2, card 18 like 1, card 19 like 4 and card 20 like 3, and then keep repeating.
Lastly we divide the cards into two packs we call “Odd and “Even”. The “Odd cards” include all the odd numbered cards from 1 – 15, and all the even numbered cards from 18 – 32. The “Even cards” include all the even numbered cards from 2 – 16 and all the odd numbered cards from 17 – 31. Note that all the “Odd” cards should have the light in the front two holes, and all the “Even” cards should have the light in the top two holes.
Basic Setup (short version):
The cards are all threaded 2 dark, 2 light. Threading alternates in pairs (i.e. SSZZ). Separate the cards out into two packs:
- The Odds include the odd numbered cards between 1 and 16 and the even numbered cards between 17 and 32.
- The Evens include the even numbered cards between 1 and 16 and the odd numbered cards between 17 and 32.
Checking the Setup
If the cards were threaded correctly, all the Odds should all have the light in the front two holes (Top and bottom), the Evens should have all the light threads in the top two holes, and in each of the two packs the threading should now alternate between S and Z.
This position is called the home position. The Odds are in Vertical Front and the Evens are in Horizontal position.
Turning directions
When you first start turning, you want to use the following turning directions. This should produce a structural background consisting of diagonals meeting at a point in the center.
| Pick |
Oddish Pack |
Even Pack |
| 1 |
Forward |
Forward |
| 2 |
Forward |
Back |
| 3 |
Back |
Back |
| 4 |
Back |
Forward |
To reverse the direction of the chevrons, your options are to either flip all the cards in the Even pack when the cards are in the home position or to switch over to the alternate turning sequence, where the Oddish Pack still moves exactly as before, but the Even pack changes directions, resulting in:
| Pick |
Oddish Pack |
Even Pack |
| 1 |
Forward |
Back |
| 2 |
Forward |
Forward |
| 3 |
Back |
Forward |
| 4 |
Back |
Back |
It is important that you flip the cards, or change the turning direction, when the Even pack is in the Horizontal position. Other wise, they all suddenly switch to the foreground colour, which is known as an oops.
Adding the Pattern
After weaving the background for a while, it’s time to start adding the pattern. Colour changes happen by flipping a card on its vertical axis when it is in Vertical position. Hence if the light (yellow) thread was in the two holes closest to you, they would now be in the two holes furthest away after the flip. Also, the threading direction is reversed.
The diamond pattern is very basic. The first change is made after pick 3: the two center cards – both in the Evenish decl – are flipped. Then the next turn is made. (If the points do not make a V, undo the turn, unflip the cards, and weave picks 4 and 1.)
On the next pick, the Oddish cards are in vertical position: flip the middle 2 cards. They will be the cards just to the outside of the central cards in the Evenish deck. Weave the next pick.
On the next pick the Evenish cards are in vertical position. Flip the cards outside the 2 previously flipped cards, and unflip the previously flipped cards. Weave the next pick.
Keep repeating the flipping of the next outwards cards (and unflipping the current cards) until you reach the width you want. I’m going to assume that you kept expanding the diamond until the Evenish cards are in horizontal position and you are about to weave pick 1. Instead of flipping cards, switch from one set of turning directions to the other.
After this first pick, again flip cards as you did before, but instead of flipping the next card to the outside, flip the next card to the inside. (You’re walking the diamond back to a point.) And keep going till all the cards are unflipped again.
If you decide not to unflip cards as you go along you will get a solid coloured diamond instead.