Some Actual Inkle Weaving …

‘Tis the day after Thanksgiving and it was more than time to unwarp the loom; I had tried to set up for some inkle weaving, but had horribly miscounted, and nothing was working right, and I’d put up the loom (on the top of a six foot bookcase so it would stop taunting me) until I was ready to face it.
And today it was finally cool enough on the porch to enjoy sitting outside in the fresh, fragrant air and unwind the warp onto four cones while admiring the lizards as they hunted bugs.  The joys of living in the south definitely preclude snow.
Threading Pattern
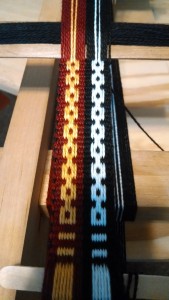
Closeup of Chains and startAfter unwarping, I warped up a simpler set-up as seen in this pattern.  The yellow and white threads are the pattern threads, and the background is red and black.  With simple inkle weaving I end up with short yellow and white bars on a red and black background.

However, add a few extra loops and we can turn this into something more interesting.  One set of loops went around pattern strings 1, 2, 5, and 6 of each colour, and the other went around pattern strings 3 and 4.  Now when inkle weaving, you alternately push the open strings below and above the heddled strings to make the shed.  But to make this pattern, when the open strings are pushed down, the loops are pulled back up to create floats.  By alternating between sets of loops, I could create squared off boxes, that look like chains if you tilt your head sideways a little.
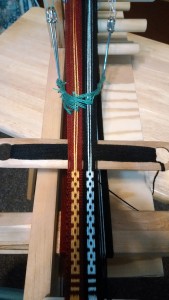


IMG_20151127_150644801In this picture showing more of the loom, you can see how I’ve run large kilt pins through the two sets of supplemental loops so that I only have to grab one pin or the other as needed.

Now all I need to do is find a good tv-show to marathon, and I can finally finish this weaving project.
A little bit of this, a little bit of that …

First off, I’ve been finding interesting articles all week, and collecting them, so without further adieu, a few links:

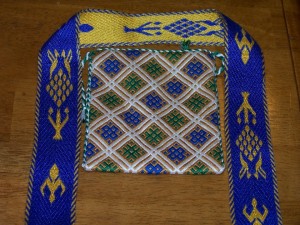
Secondly, I’ve been (unsuccessfully) trying to design knotwork in the Snartemo 4 colour technique, but in the process ended up digging out a lot of my old 3/1 broken twill notes. So here a very brief explanation of how I weave 3/1 broken twill.

In 3/1 broken twill, patterns will have a light and a dark colour. Each of the pattern tablets is threaded with two light and two dark colours, just as one does for doubleface.  But then, using Collingwood’s 2 pack method, the cards are divided into two groups: the odd numbered cards form one group, and the even numbered cards form the other. Each group turns as a whole; colour changes are created by flipping a card around its vertical axis – which reverse the threading – rather than by changing turning direction.


Setting up the two groups:

  • In each group flip the cards as needed so that they alternate S and Z threading.
  • In the odd group, turn the cards so that the background colour goes through the two holes closes to the weaver.  This is the “vertical” position, because the two holes threaded with the background colour are one above the other (aka vertical if the warp is held horizontal).
  • In the even group, turn the cards so that the background colour goes through the two top holes.  This is the “horizontal” position, because the two holes threaded with the background colour are beside each other (aka horizontal if the warp is held horizontal)

Turning Directions:

The cards are turned in a few turn repeat.  Each of the two groups moves 2F/2B, but there is an offset because of the differing starting positions.  Repeating this turning should yield a solid-coloured band with a structural diagonal.

Turn Odd Group Even Group
1 Forward Forward
2 Forward Back
3 Back Back
4 Back Forward

Patterns:

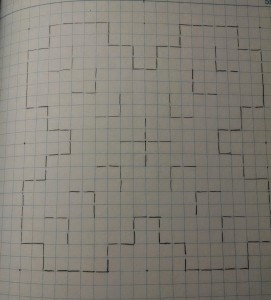
250152_198275326971392_2012513524_nI draw my patterns on a rectangular grid with a brick like pattern; Tree with Birds Pattern is a  pattern that uses 32 cards, but because of the symmetry the setup is modified slightly so that the second set of 16 cards completely mirrors the setup of the first 16 cards

In the pattern, each column represents one card over all the many turns; each rectangle represents that card for two turns.  Note how the odd and even rectangles are offset, because of the offset turning directions.  In the right side of the pattern you can see the changes needed for the colour changes; if the next rectangle switches from white to grey or vice versa, flip the card.
But that would give you some ugly edges, so sometimes we also need to flip the card when the colour is horizontal rather than vertical.  Those flips are represented in the left half of the pattern by the blue < in a rectangle.

Zen and the Art of Celtic Knots

I spent a lot of time drawing Celtic Knots this summer, in a little journal.  It helped me meditate, as it were.  And it’s been a while.  But the journal was here, lunch time was here, and my embroidery was a 10 minute drive away.

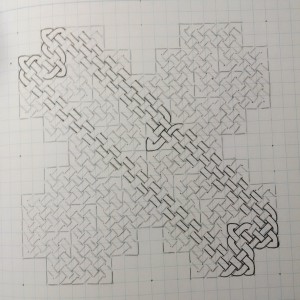
I have been reading about Fresnel lenses, and wondered what would happen if I started similar structures in a knot.  This first knot is still fairly straightforward, and I already have several ideas on how I can expand/improve it for the next version.  So let’s look at the in-progress pictures where I’m using the method described in the Celtic Knots Class Handout.

Basic skeleton
Basic skeleton drawn in pencil on graphic paper.
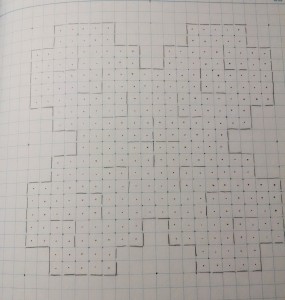
Added dots
Adding dots in the center of every square.
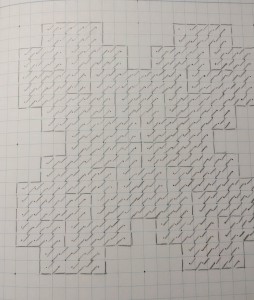
Added ribbons in one direction
Adding ribbons in one direction; each ribbon has two sides that each go from a point in the center of a square to a corner square.
Added ribbons in second direction
Adding ribbons in the second direction.
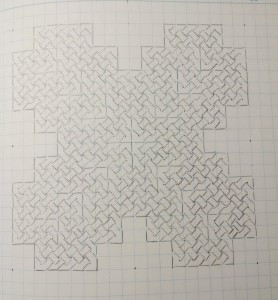
Begin inking the ribbons
Now that all the ribbons have been penciled in, I begin inking the ribbons, and now I follow one ribbon around the knot at a time.

Folding a Christmas Wreath

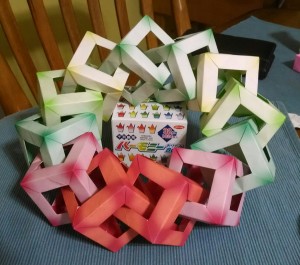
This past week I was seized by the inexplicable need to make Christmas Decorations.  Or perhaps you could say that Christmas was my excuse for folding 144 identical modules (12 modules per cube, 12 cubes …) and combining those cubes into a wreath.

In Progress (1/3) Modular Wreath

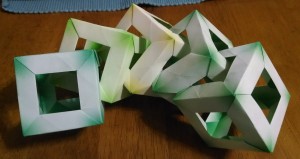
We began with some experimentation.  Folding a few cubes, and making sure that they could interlock, and more importantly, that interlocking them would allow for the curvature needed to make the full wreath.

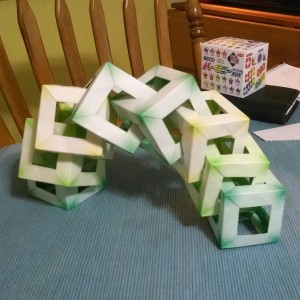
The green on these cubes is subtle; I was using patterned paper with the four corners tinted, graduating to much paler tints in the center.  You can see the box in the background in the second picture.

In Progress (2/3) Modular WreathEight cubes folder, and a very satisfactory curvature.  Plus making the cubes stand and slither was fun.  I could easily see myself folding a long line of cubes and then just dangling them and waving them about.  The cubes are amazingly resistant to abuse, although when Molly the white demon dog got her teeth on the ninth cube the slobber killed it.

In Progress (3/3) Modular Wreath

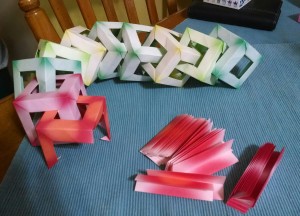
Now in the home stretch; the red modules have been counted and partially folded, and we were off to the races.

Completed Modular Wreath

Finally the finished wreath, balanced on the box the paper came in.  And I still have 1024 – 144 = 880 sheets left for more shenanigans.


It’s possible we may be putting up a tree this year.