Playing with Quilting Block designs – Field of Flowers

So for Christmas this year I acquired a modular pinloom from a seller on etsy (https://www.etsy.com/shop/TotaLoom). The looms are modular, with pin bars and angled corner pieces, so that you can arrange it into hexes and diamonds, and squares, etc. (The angles I have so far are 60, 90, and 120 degrees.) Of course, then the question becomes what to make. I started with making diamonds with some yellow acrylic I had left over from mom’s visit.

And then this morning I started noodling about patterns. This pattern block uses the hexagon as it’s main inspiration, although all the shapes are variations of the hexagon so that they can all be woven with the continuous warp approach. I’m calling this one the Field of Flowers, and I’m thinking I can vary the fields by using different colours.

Resizing a pouch – adjusting the pattern

It started with the green pouch …

So it started with the green pouch, which was knitted on 000 needles with 2/18 merino wool, and each side was 33 stitches wide. The green pouch is a cute little pouch, and the other side is actually a reverse image colour wise, as you can see in the picture below where the needles are rearranged so that the eventual side seam is in the center of the picture.

In progress, you can see the colour change happening on the side seam.

So in the new blue and white pouch I had some design choices to make. For starters, I wanted to make it larger, so decided I would use larger needles – 00 rather than 000 – and I would have three pattern repeats across a side rather than two. Switching the needle size results in a slightly less dense fabric after finishing; when I knit this wool the 000 ends up being just a little tight. The 00 size is hitting a sweet spot; 0 produces a light and flowy fabric that is not ideal for pouches. (So now I have to train Sammie to stop eating the pink knitting needles, those being the size 00 ones.)

So I was just going to grab the previous pattern and insert an extra flower. Easy. The original pattern is 33 stitches wide – 2 times 16 and a 1 stitche repeat on the edge, so just add another 16 stitches making each side 49 stitches wide.

It wasn’t until I’d knitting past the row of 6 florets on the top that I grabbed the graphed pattern and realized my mistake. In the original pattern the flowers are not in the middle of each half of the pouch, but are a little closer to the center. Adding another flower means adding 13 stitches, not 16. But I was already half an inch into the pouch, which means I’d been knitting for well over an hour. Time to pull out the inkscape again and fix the problem.

The new and improved flowers pattern

So this pattern looks a little odd because of the dots on the left side; that’s the 49th stitch which didn’t fit on the graph but is there. (Since someone asked, as always, the pattern is knitted from the bottom up, which is a habit I developed while tablet weaving. It doesn’t matter much either way, but knitting it top down results in the little crosses not looking like fleur de lys.) The green line, by the way, is the dividing line between two of the four needles holding stitches. I knit these using 5 double pointed needles, so each side of the pouch is 2 needles wide.

Playing with 12 harness patterns

So while I’ve been quiet here, I’ve finally been weaving on the 12 harness Leclerc.  The design of the loom, it turns out, has some major, and annoying, flaws. Worst is the way I can’t adjust the harnesses so that the string, traveling from back to front beam, lies flat.  Since the heddle eyes are below this level, the strings all come off the backbeam, slant down, go through the heddle, and then slant back up.  There’s enough distance between the first and twelfth harness that when all the harnesses are down there’s a visible deformation … And there’s tension issues, too.  Between that, and getting the loom warped, and then trying to fix it, it took a little longer to get weaving than I had hoped.

But as long as I’m weaving relatively narrow ware, and am careful, I can make it work. So I’ve been working on the rug mugs. In this picture you can see the pattern below, as well as previous pattern. The warp’s path was particularly problematical when the higher-numbered harnesses were down. The edges are not ideal (I keep meaning to weight those two edges, and then I keep forgetting, but …)


The pattern I used for the latest rug mug is an earlier variation of the one on the left.  The other challenge of that pattern is that in some places there are floats over 5 strings.

So the next two mug rugs are going to be a) the left pattern, and then b) the right pattern.

And I’m still playing with the same warp so I haven’t changed the threading through the heddles on the harnesses at all.  There is still so much room to play here …

Planning the First Voyageur Mug Rugs

So last night my new 12 shaft Voyageur Leclerc table loom arrived.  Unpacking her was an adventure; she was packed in a wood shipping crate in a cardboard box, with much tape.  Pity the customs inspector who had to open her up.  (Although I don’t think anyone did, actually.  She arrived ship shape and bristol clean, as it were.)

So my first project is going to be a series of mug rugs.  My goal is to experiment with the weave structures, so I’ve measure up about 5 yards, give or take, of 4/8 superwash wool (which is heat resistant and flame resistant).  79 ends, which I will be using at 12 ends per inch.  One copy of the pattern is 22 threads, so this gives me enough room for 3 repeats, with about 5 threads on each end.

So patterns.  Turns out you can do a lot with 12 harnesses … The following are just a small collection of possible patterns, all warped identically.  It’s how the harnesses are lifted and in what order that makes all the difference …


So much twill …

Playing with Weaving Drafts

So I’ve been idly daydreaming, along with friends, about getting looms with moar harnesses! And wondering how much of a difference it would make, and how I could draft patterns for it …

And I like brick-work.  One of the first patterns I worked out how to tablet-weave from first principles was the woven in version of Birka strapwork.  So here, for my first case of many harness pattern drafting, I present the 8 and 12 harness versions of birka strapwork.  Now all I need is the loom to weave them by …

Developing these was actually an interesting exercise in Escherian tilings; you have an 8×8 (or 12×12) grid that’s tiled horizontally and vertically, and so you want to set it up so that the repeats tile nicely.

Noodling with an MMM WWW Threading

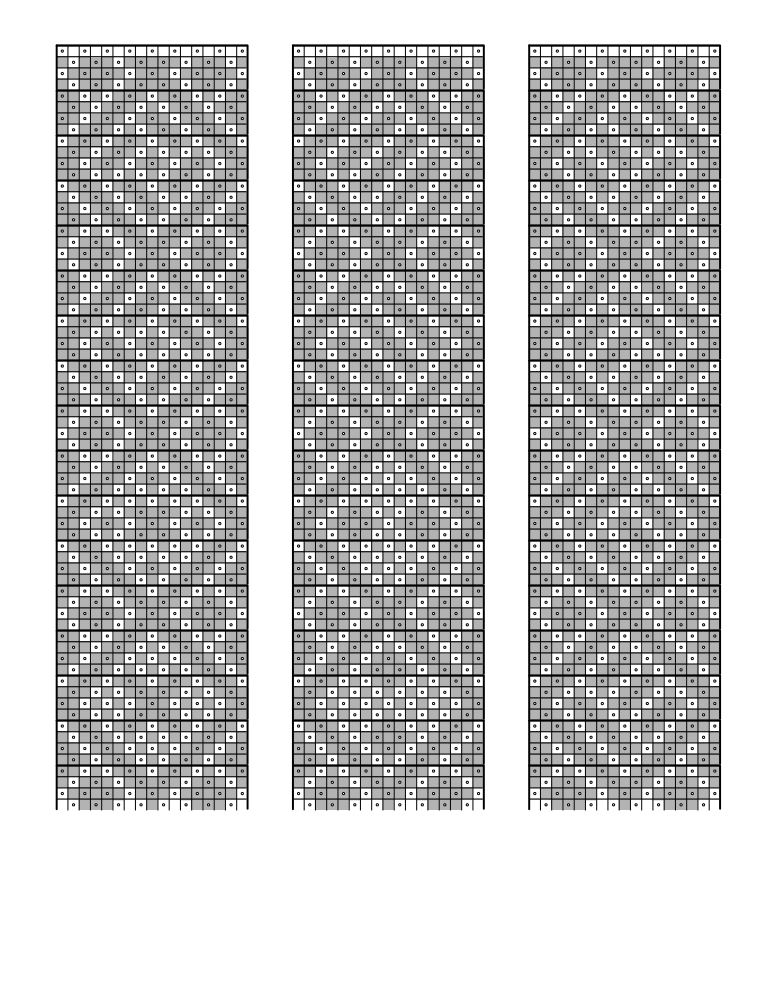
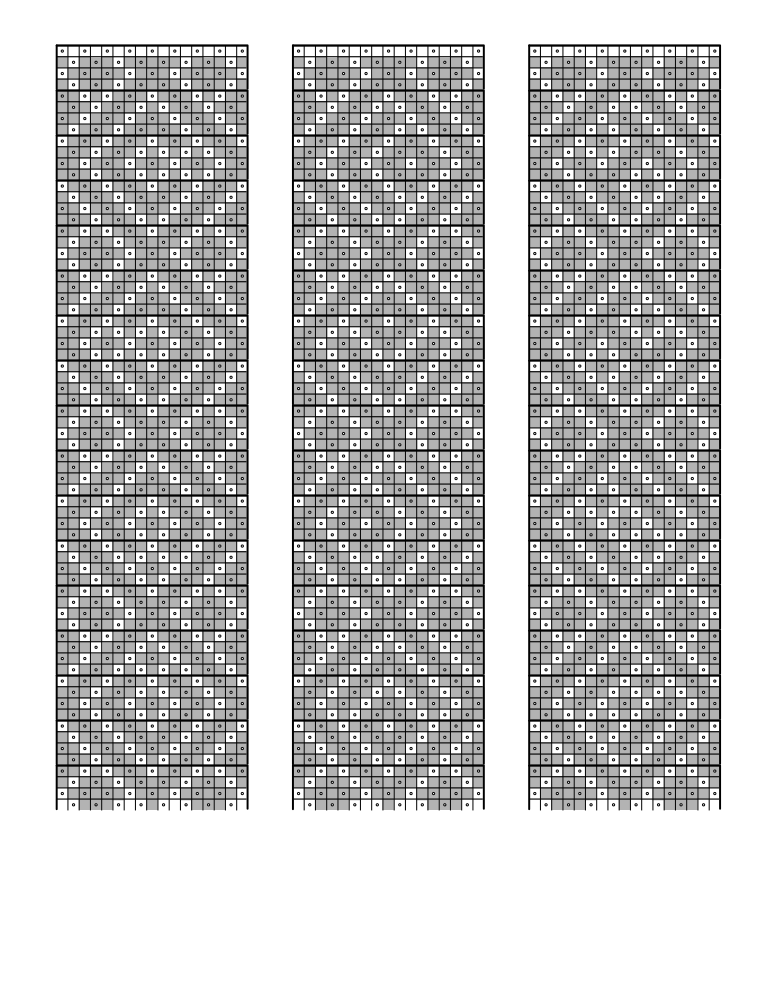
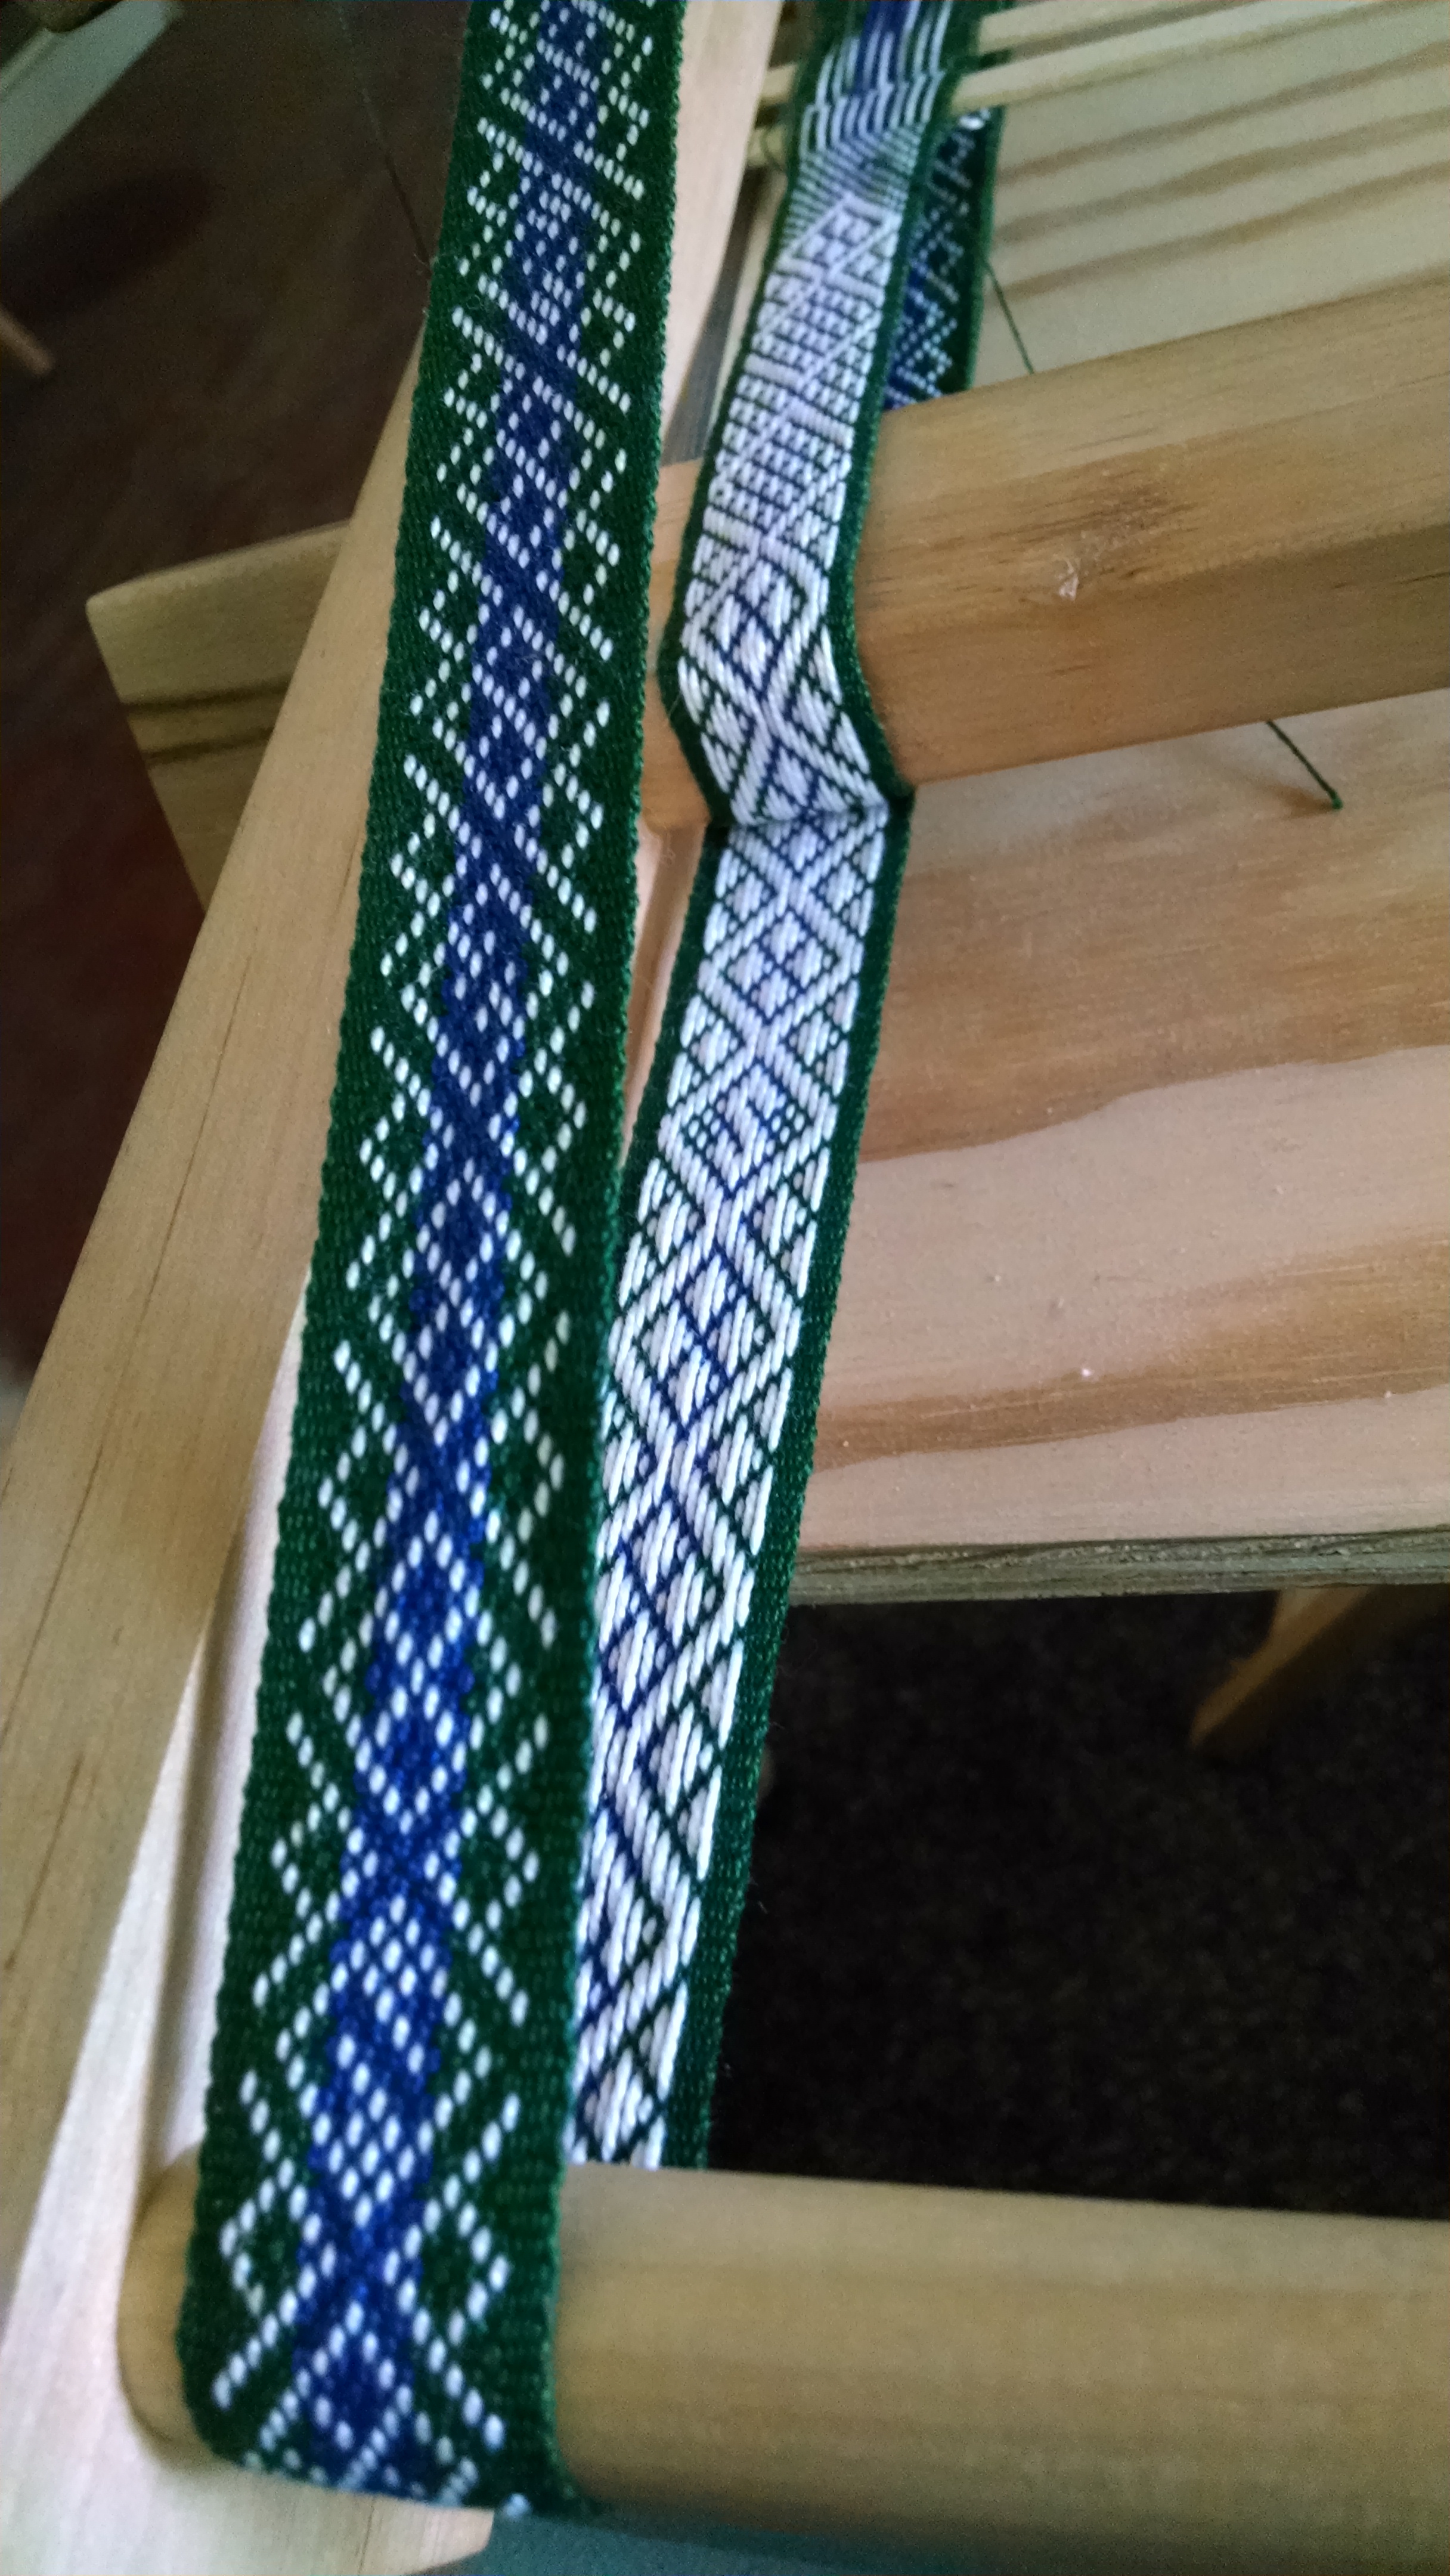
An M-W threading is named for the threading through the heddles, which looks like repeating Ms and Ws on the form. The pattern I was playing with is a modified M W, where each M and W has three high (or low) points.  I’ve warped up umpty yards (he warp was measured for a sampler, so … I forget?), and enough ends for 8 repeats, warped alternating 2 olive repeats and 1 tan repeat.  The goal is to vary the weft in multiple projects.  Unfortunately I forgot to photograph the first two stretches, where the weft was respectively burgundy, and white, so that will have to wait until it comes off the loom.

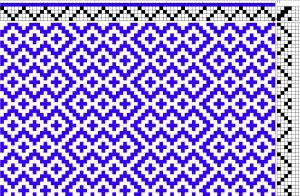
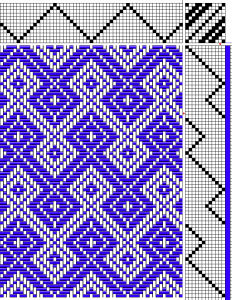
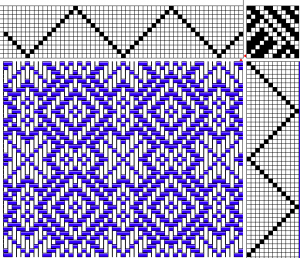
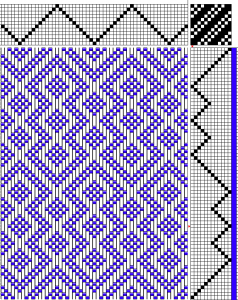
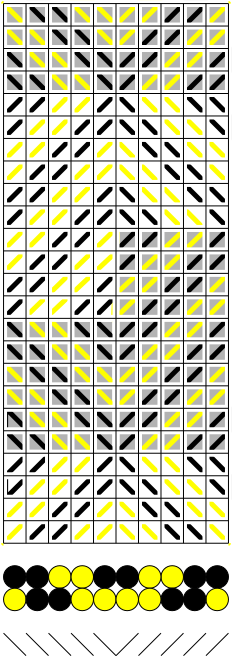
Once the threading through the headings was decided, and going with a simple twill tie up, the next step is to decide the treadling. (I.e. in which order do the four harnesses get raises, or in what order are the treadles pressed?)  This first version looks more complicated than it actually is, mostly because I didn’t pick the best starting point.

In a simple twill weave, the treadling is 1-2-3-4 and repeat.  A twill diamond pattern, on the other hand, will treadle 1-2-3-4 followed by 3-2-1-4 for a 8 line pattern.  In my way of thinking, that would be a 4 row diamond.  In the pattern above, we have a 6-row diamond twill: 4-1-2-3-4-1 followed by 4-3-2-1-4-3.  This looks confusing at first, but by thinking of it as a six row diamond, I can reuse the muscle memory from previous projects.

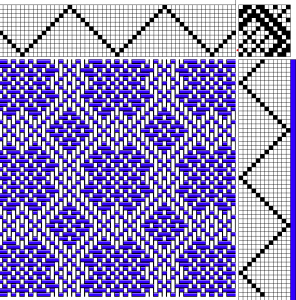
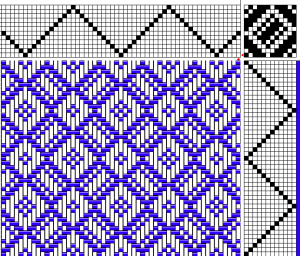
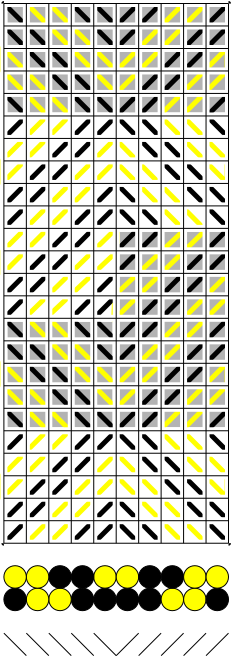
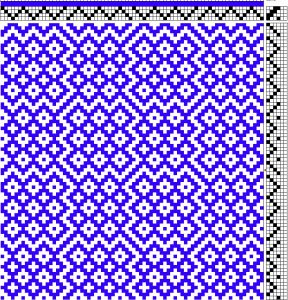
On the other hand, the pattern looked very horizontal; it’s hard to make striped with just diamonds, but by golly I managed.  Also; I had woven two 19 or so inch lengths, and was bored.

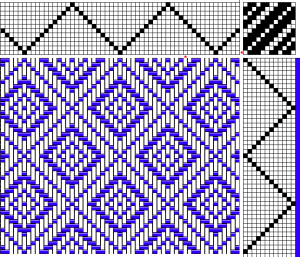
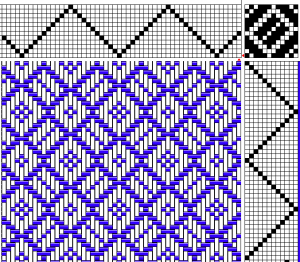
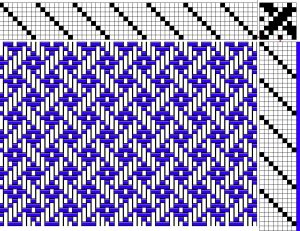
Time to start playing with alternating treadlings.  This is where I once again thank my husband for the gift of a lovely piece of software (Fiberworks Bronze) which allows me to both typeset and change patterns up quickly and easily.  I’m still far from adept at pattern design, but the software lets me experiment with different treadlings really, really quickly.

My first idea was to treadly the same way as the heddles were threaded in extended Ms and Ws.  As it turned out, that gave a slightly unbalanced pattern and I experimented a little more, resulting in this pattern.

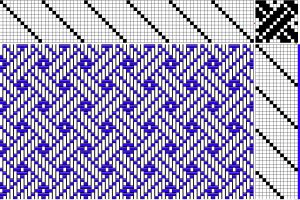
Oddly enough, I didn’t realize that this is still an extended MW treadling, except that if the extended M’s are treadled just as they’re threaded, the extended W’s are shifted one over, resulting in a 3-2-1-4-1-2-3 effect.  There’s exactly 1 extra treadling (using 4) between the M’s and W’s which makes this pattern again really easy to memorize.  Plus there’s lots of visual cues in the weaving, of course.

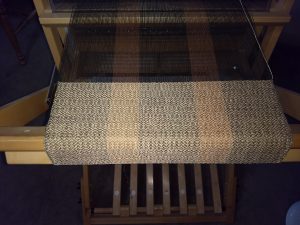
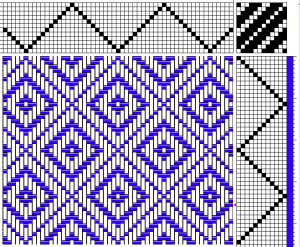
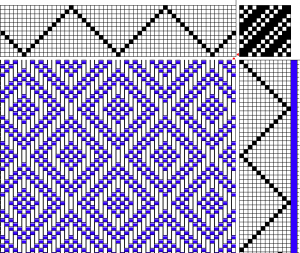
So what does the fabric look like? The weft is a lighter brown than the tan warp, keeping the pattern visible (albeit more subtle) on the tan stripes. As well, the edges are the best I’ve had on this yardage yet; there’sa floating selvage on both sides, but here I’m always treadling an even treadle when entering from the right, where in the previous bitsy bobs I always entered from the right on an odd treadle.  Funny the different that can make.
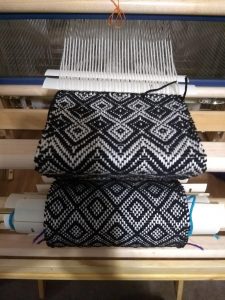
Playing with Baltic Pickup style inkle weaving (Part 3)

I’ve had a few requests about the rest of the Baltic pickup style patterns I came up with.  Like the previous, these are all woven on the same warp, and again, the patterns are designed so that you are always pushing threads down from the upper row and never lifting threads up from the lower row.  This speeds up the weaving immensely.

Variations 2Variations 3Variations 4
And that’s when I realized that two of the patterns are duplicated, but a little judicious work with a pencil will fix that quite easily.  🙂

Pulling a Pattern from a Picture

So a friend of mine asked me about the trim in https://www.pinterest.com/pin/120400990016540518/, which is a picture (source unknown, because pinterest) of the neckline of a tunic that has been embroidered and embellished by trim.

Looking at the trim, you can see that the outermost three cards on each edge have been threaded with four threads of the same colour; 2 cards are tan next to the pattern, the outermost card is all black.  Now when I first saw the picture I couldn’t see it up-close, so I didn’t notice that the inner pattern was actually three colours (each card has 2 white, 1 black and 1 dark blue thread), but the pattern is obviously based on the Egyptian Diagonals technique using 10 cards.

Weaving Reversed S keysWeaving S KeysMy first stab at the pattern; the 10 cards are each threaded identically with 2 dark and 2 light, and then arranged so that if all the cards were turned forwards you would get chevrons pointing up.  You can see the starting position below the squares: the two circles represent the colours of the threads in the two top holes; bottom row is closest to the weaver, top row is furthest from the weaver, and the | or / indicates the direction the string travels through the card.

The pattern is read bottom to top, where each square is one column, each row of squares = 1 turn of the pattern.  When the square’s background is grey, the card turn backwards towards the weaver; when it’s white the card turns forwards away from the weaver.  As you can see, most of the time the cards turn together, but there is a central part of the pattern where half the cards turn in one direction and the other half turn in the opposite direction.  It is because of these central 4 rows that the pattern is not twist neutral which is why – if using an inkle loom or similar to weave the trim – a weaver will often alternate between the two versions of the trim, since weaving one copy of each will result in a twist neutral pattern.

Note that the bottom and top 4 rows are not included in the repeat.

s_keys_2s_keys_2_reversedStill, looking at the picture, this pattern made the crossover point of the black X’s awfully narrow, and looking more closely at the picture I could see the crossover point should be wider.  Which is an easy fix: by making the repeating portion of the pattern one row shorter top and bottom, the X’s crossover point becomes wider.  It also fixes the width of the black dots at the sides, which was previously too wide.

(And here the top and bottom 5 rows are not part of the repeat.)

Playing with Baltic Pickup style inkle weaving (Part 2)

Baltic Pickup GamesSo I spent some time this weekend playing with the Baltic inkle pickup warp.  The rules of the game were simple: two repeats of the simple diamond with the 4 interior diamonds, alternating with a diamond with some other free-styled pattern.

By keeping the edging pattern between the diamonds and the outer diamond’s dimensions consistent, the band feels cohesive, even though every third diamond is something else.  Below are 16 possible variations I came up with, while enjoying a Columbo marathon.

Variations on a ThemeOh, and just one more thing … there are 25 places where the warp thread can be pushed down, or not, inside the diamond.  That means that there are 2^25= 33554432 possible combinations, but I’m guessing that many of them lack pleasing symmetries.


Back of the envelop suggests that requiring symmetry along one diagonal reduces the possibilities to about 2^10+2^5=1024+32=1056 (the places below the diagonal line plus the diagonal line), but then the diagonal line can itself be flipped …  But the “S” figures are flipped around a vertical or horizontal line; so there are 4 possible axis of symmetry, so 4*1056= 4224 possible combinations that are symmetric.

In short, back of the envelop suggests that I’m going to run out of warp before I run out of possibilities.