(Right after I started planning out 10 days of posts, I got hit by the crud, so these posts will be a bit delayed. Sigh.
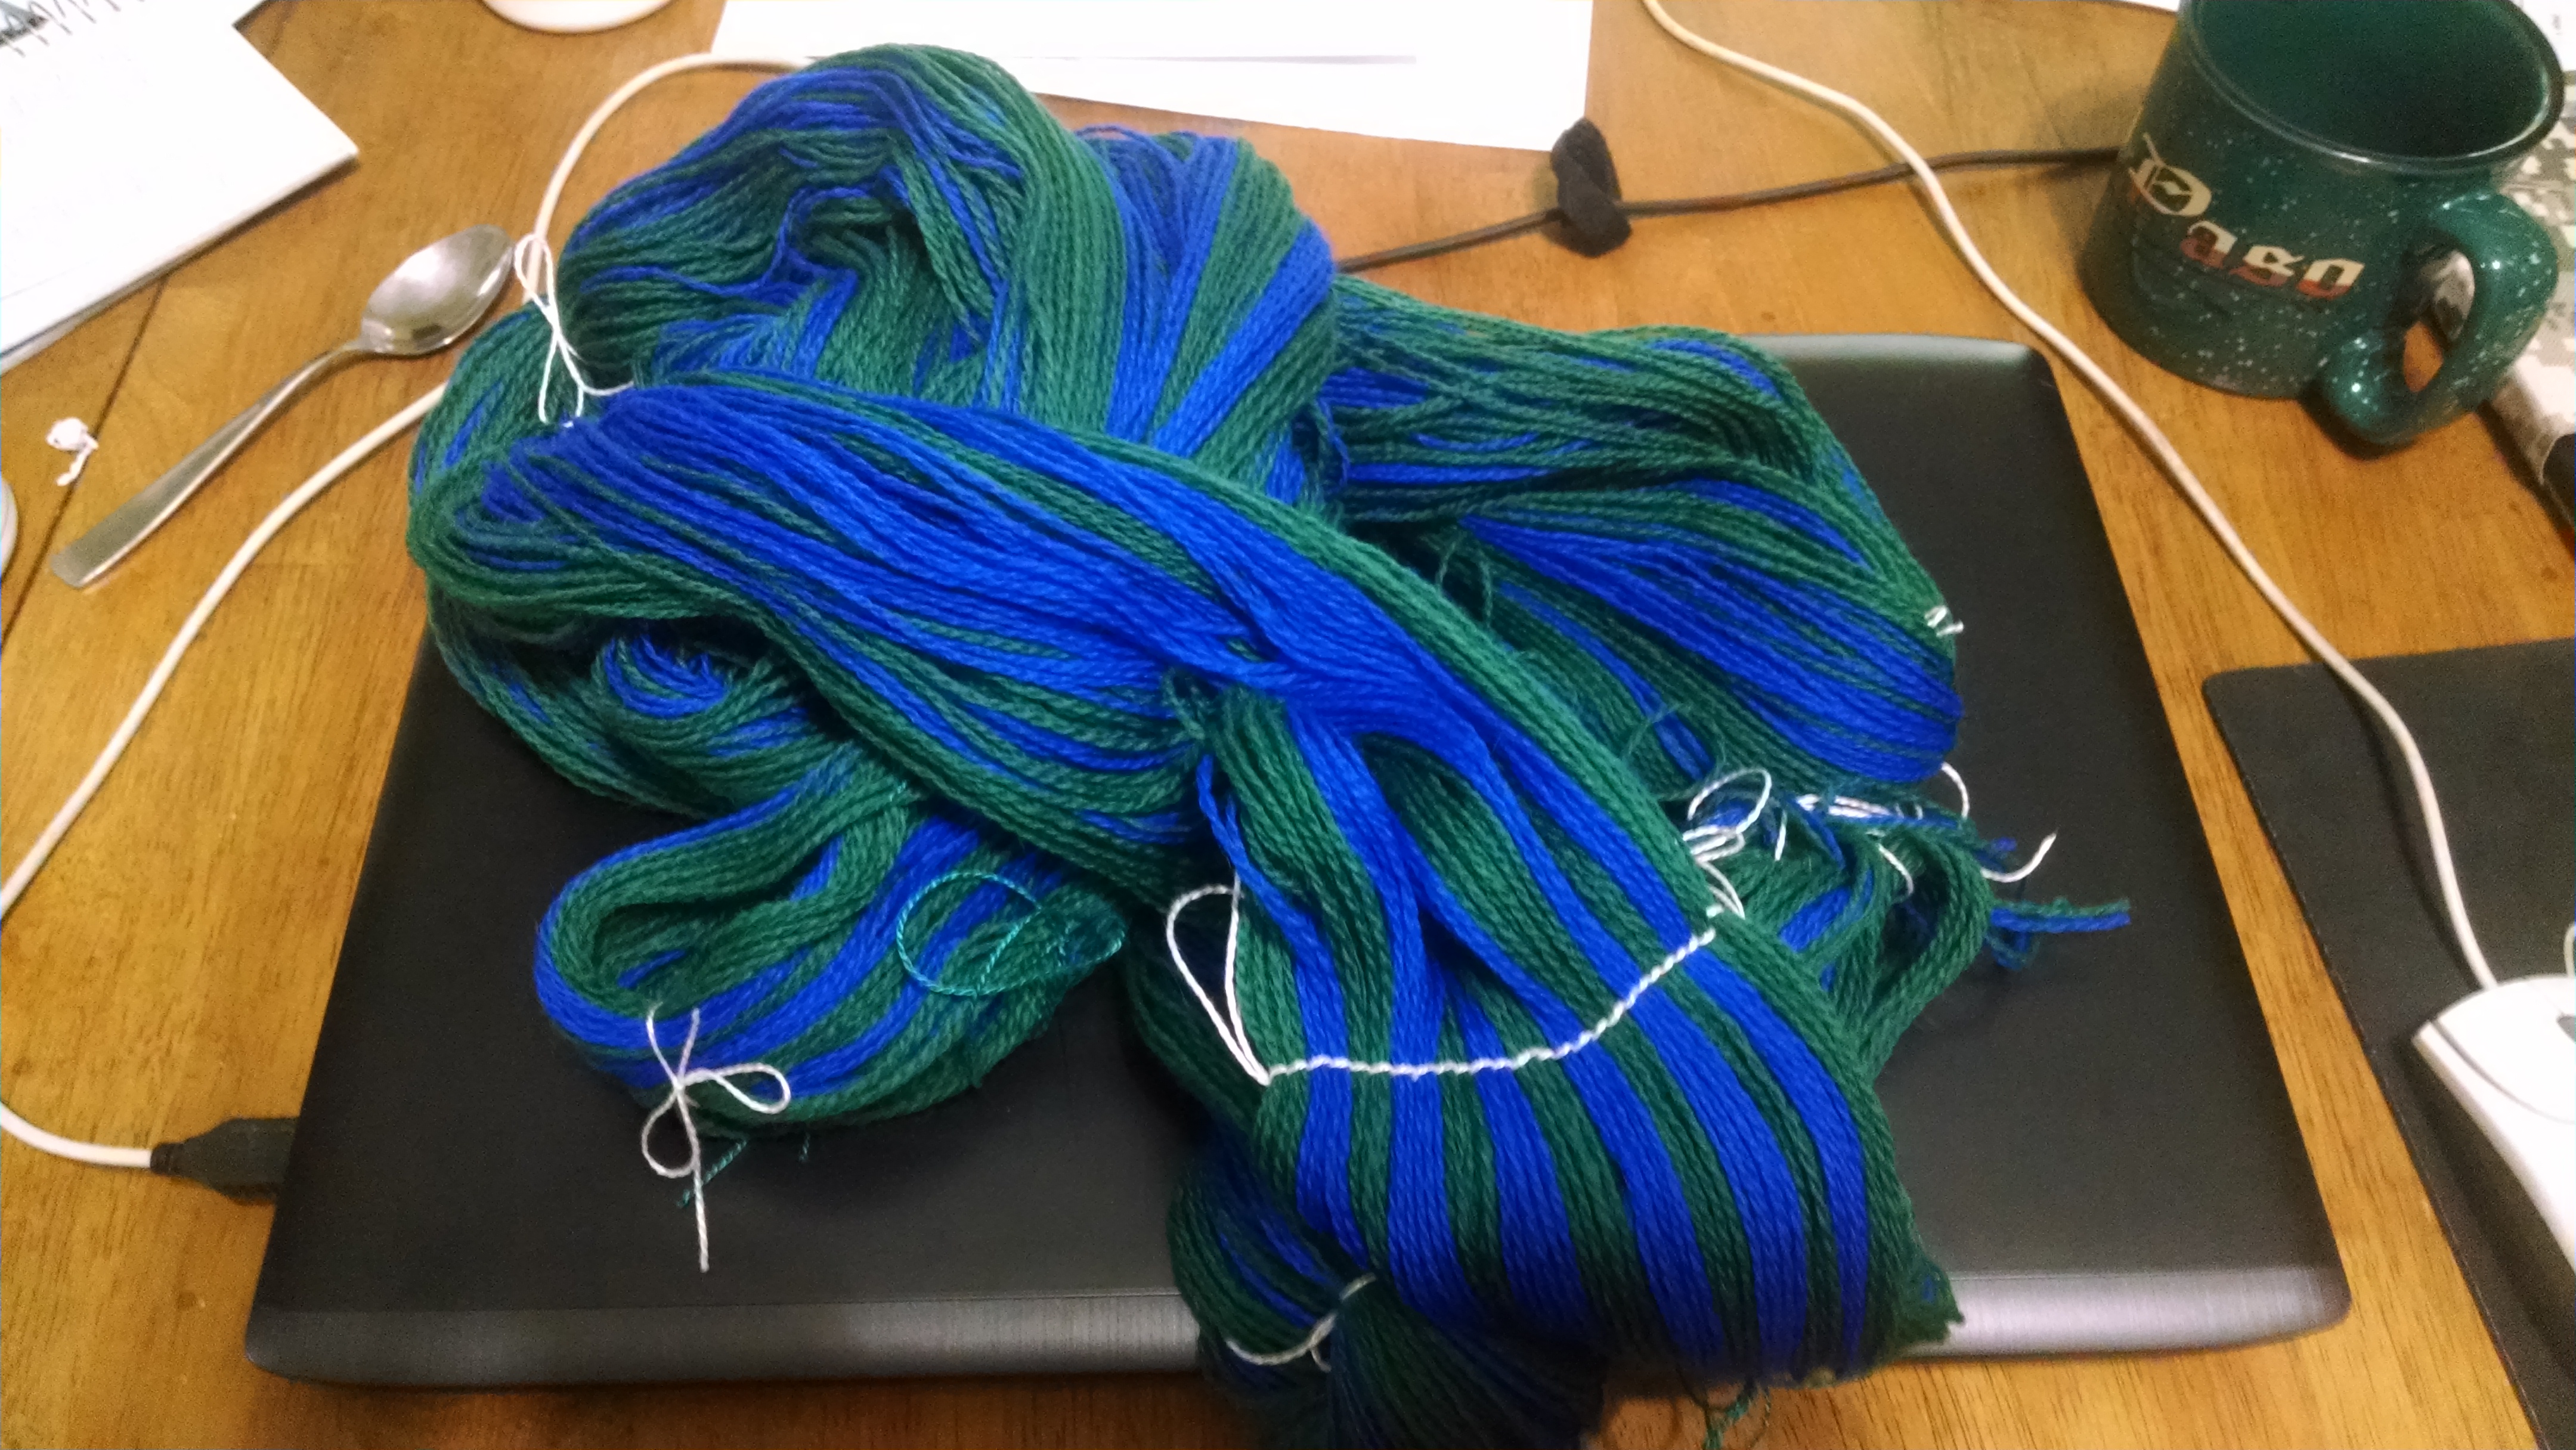
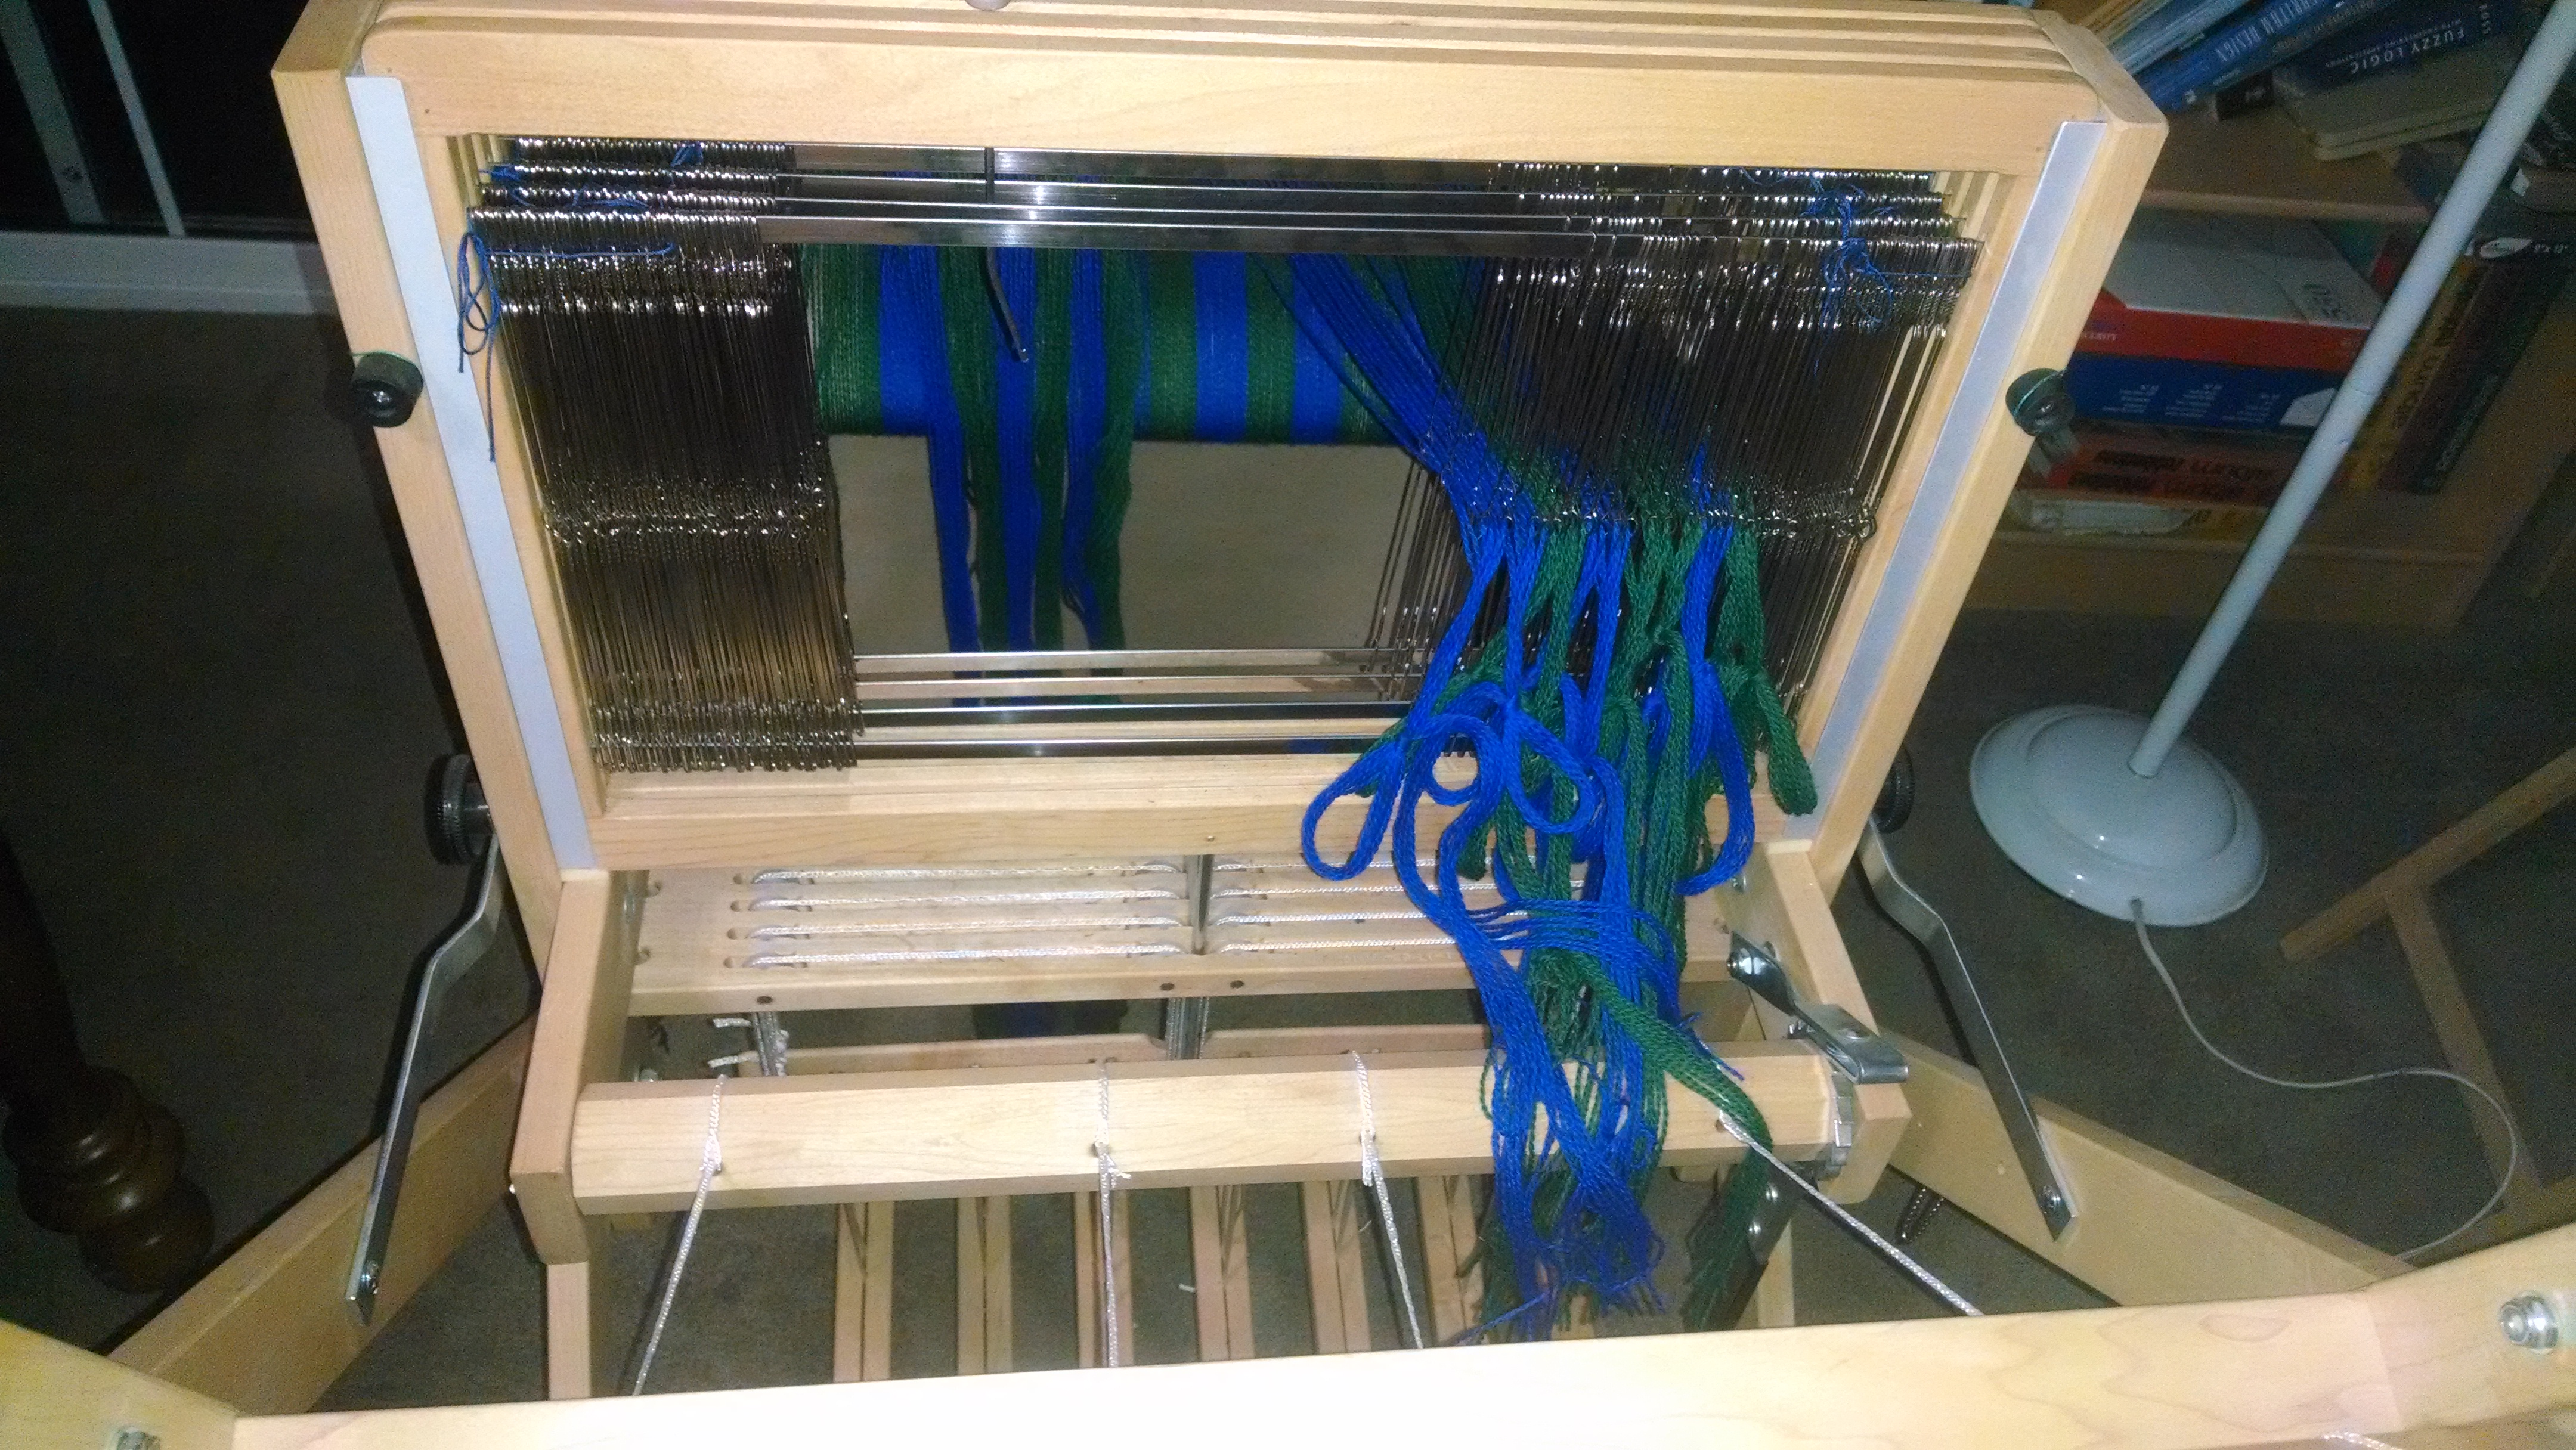
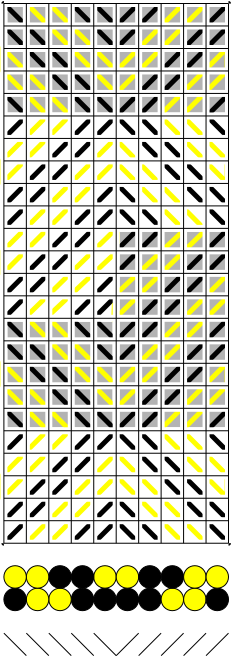
At Gulfwars this year, I picked up a lovely little 4 harness loom – a Wolf Pup LT. It’s got an 18 inch weaving width, which is perfect for sampling and trying to work out how patterns work. That, along with a copy of Anne Dixon’s The Handweaver’s Pattern Directory, meant that I could start experimenting with patterns. First weaving some of the many many patterns in her book, and eventually moving on to my own. (Not there yet.)
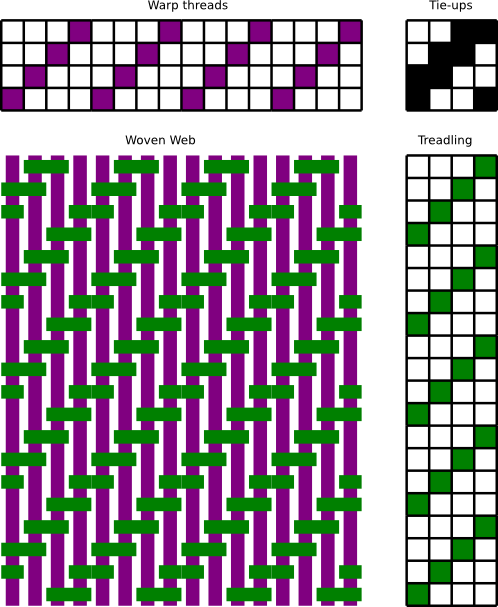
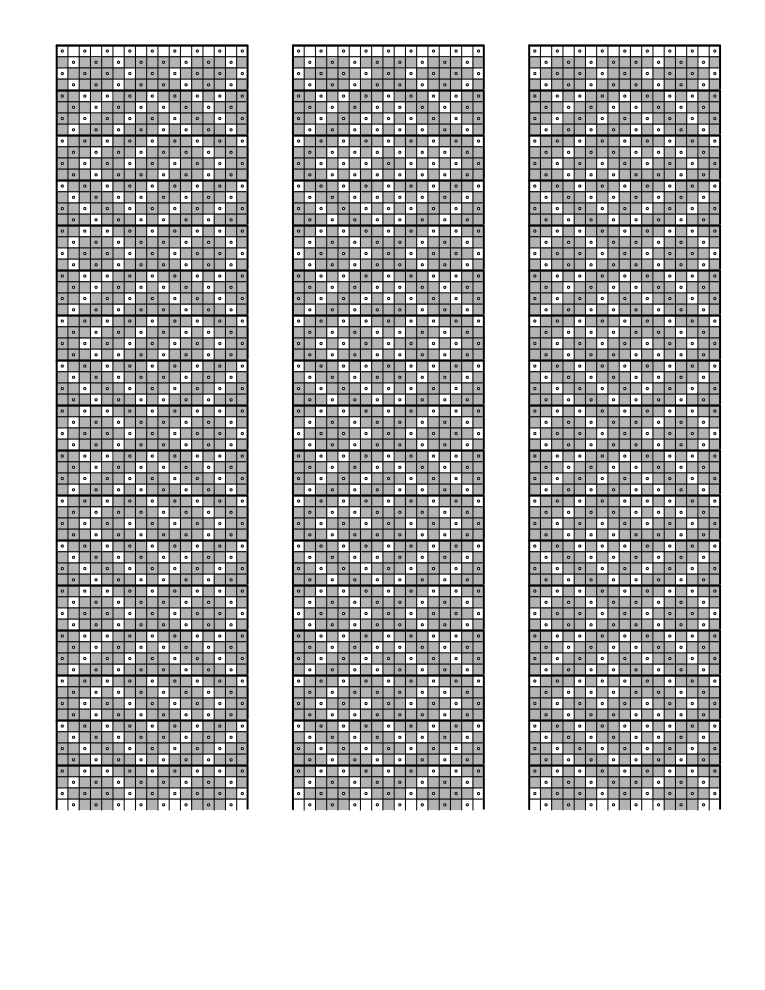
So today I’m going to talk a little about patterns. Now the way they’re drafted in her book, you have the threading along the top, the treadling (which treadles are pressed for each row) along the right hand side, and the tie-ups (which harnesses are lifted when a treadle is pressed) in the top right hand corner.
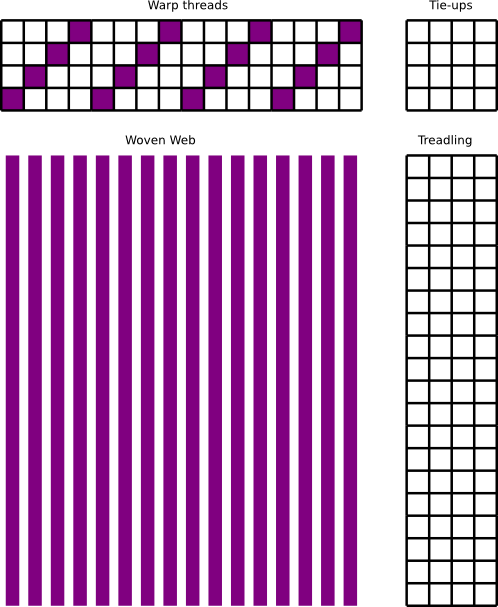
Consider for instance 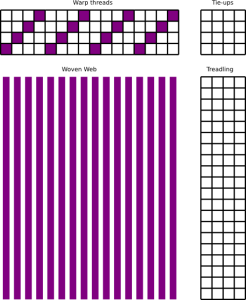 this set up. Here the tie-ups and treadling aren’t listed yet, and all we’re concerned with is the warp threads. The warp threads grid is structured as follows: each row represents one of the harnesses, and each column represents one thread. For now, each thread will be controlled by only one harness.
Later when I’m trying out more complicated patterns I may switch to a different type of heddle. The loom currently uses eye heddles which means that the thread high is controlled by the harness; if the harness goes up, so does the thread, and if the harness stays down … the thread can’t rise. If I use an open heddle, lifting the harness will raise the thread, but lowering the harness won’t force the thread down.
In any case, in this set up the threads are set up so that from left to right you have one thread each through harness 1, 2, 3, and 4, and then you repeat.
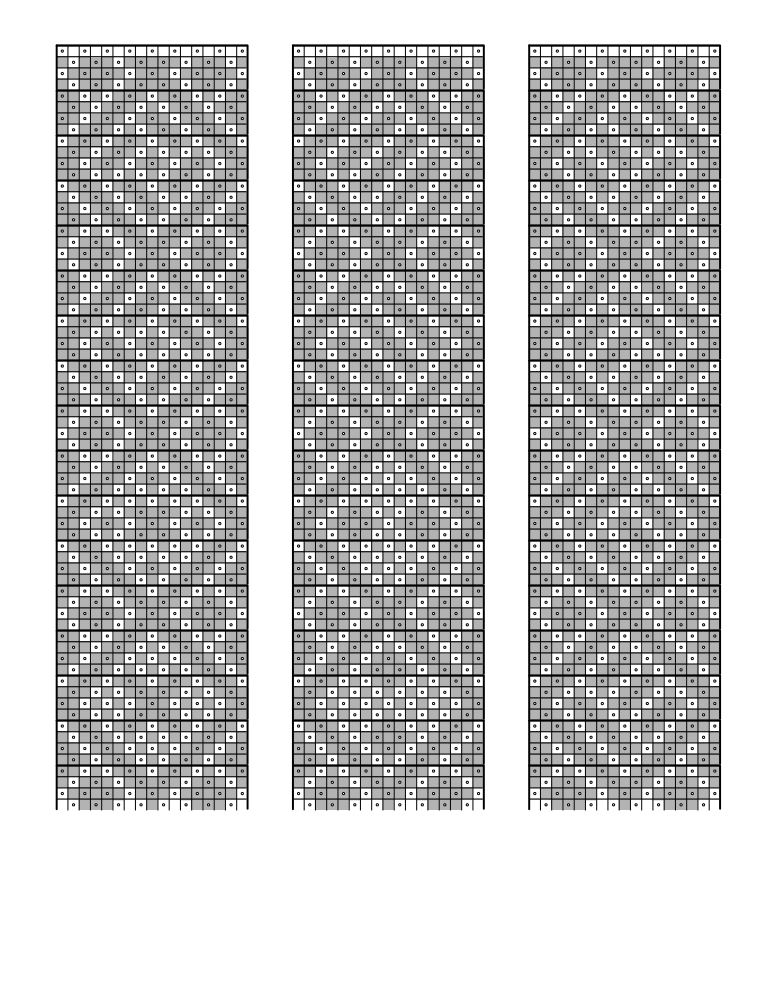
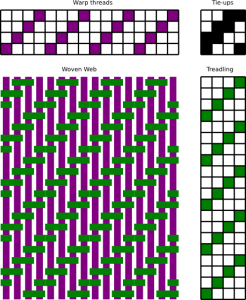 Now we add the tie-ups and the treadling. This is a standard 2/2 twill tie up: the first treadle lifts harnesses 1 and 2, the second lifts harness 2 and 3, then the third lifts 3 and 4, and the last lifts 4 and 1.
The treadling is actually read from the bottom up, since when weaving on modern looms you usually weave away from you. (On standing looms it would be quite plausible to read the pattern from the top down. Unlike cardweaving there’s no twist to worry about, so either way would work.)
The nice thing about this setup is that as long as the twill goes in the same direction, you can just keep treading 1-2-3-4 over and over. (Or for a twill in the other direction, 4-3-2-1 repeated ad nauseum.)
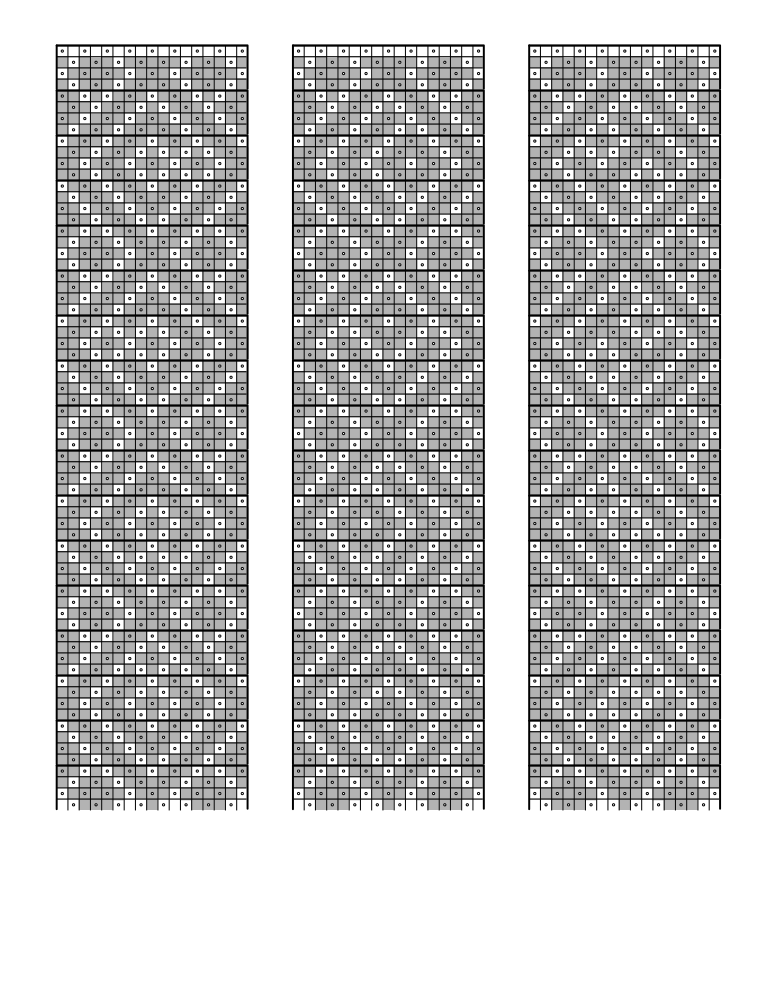
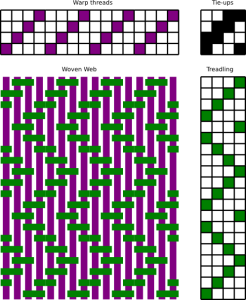 But let’s say, for the sake of argument, you want diagonals that change direction after every fourth throw of the shuttle. You can start with 1-2-3-4 for the first four rows, but following that up with 4-3-2-1 gives an odd effect (or rather, you end up unweaving what you just wove, unless you have a floating selvage), so that doesn’t really work.
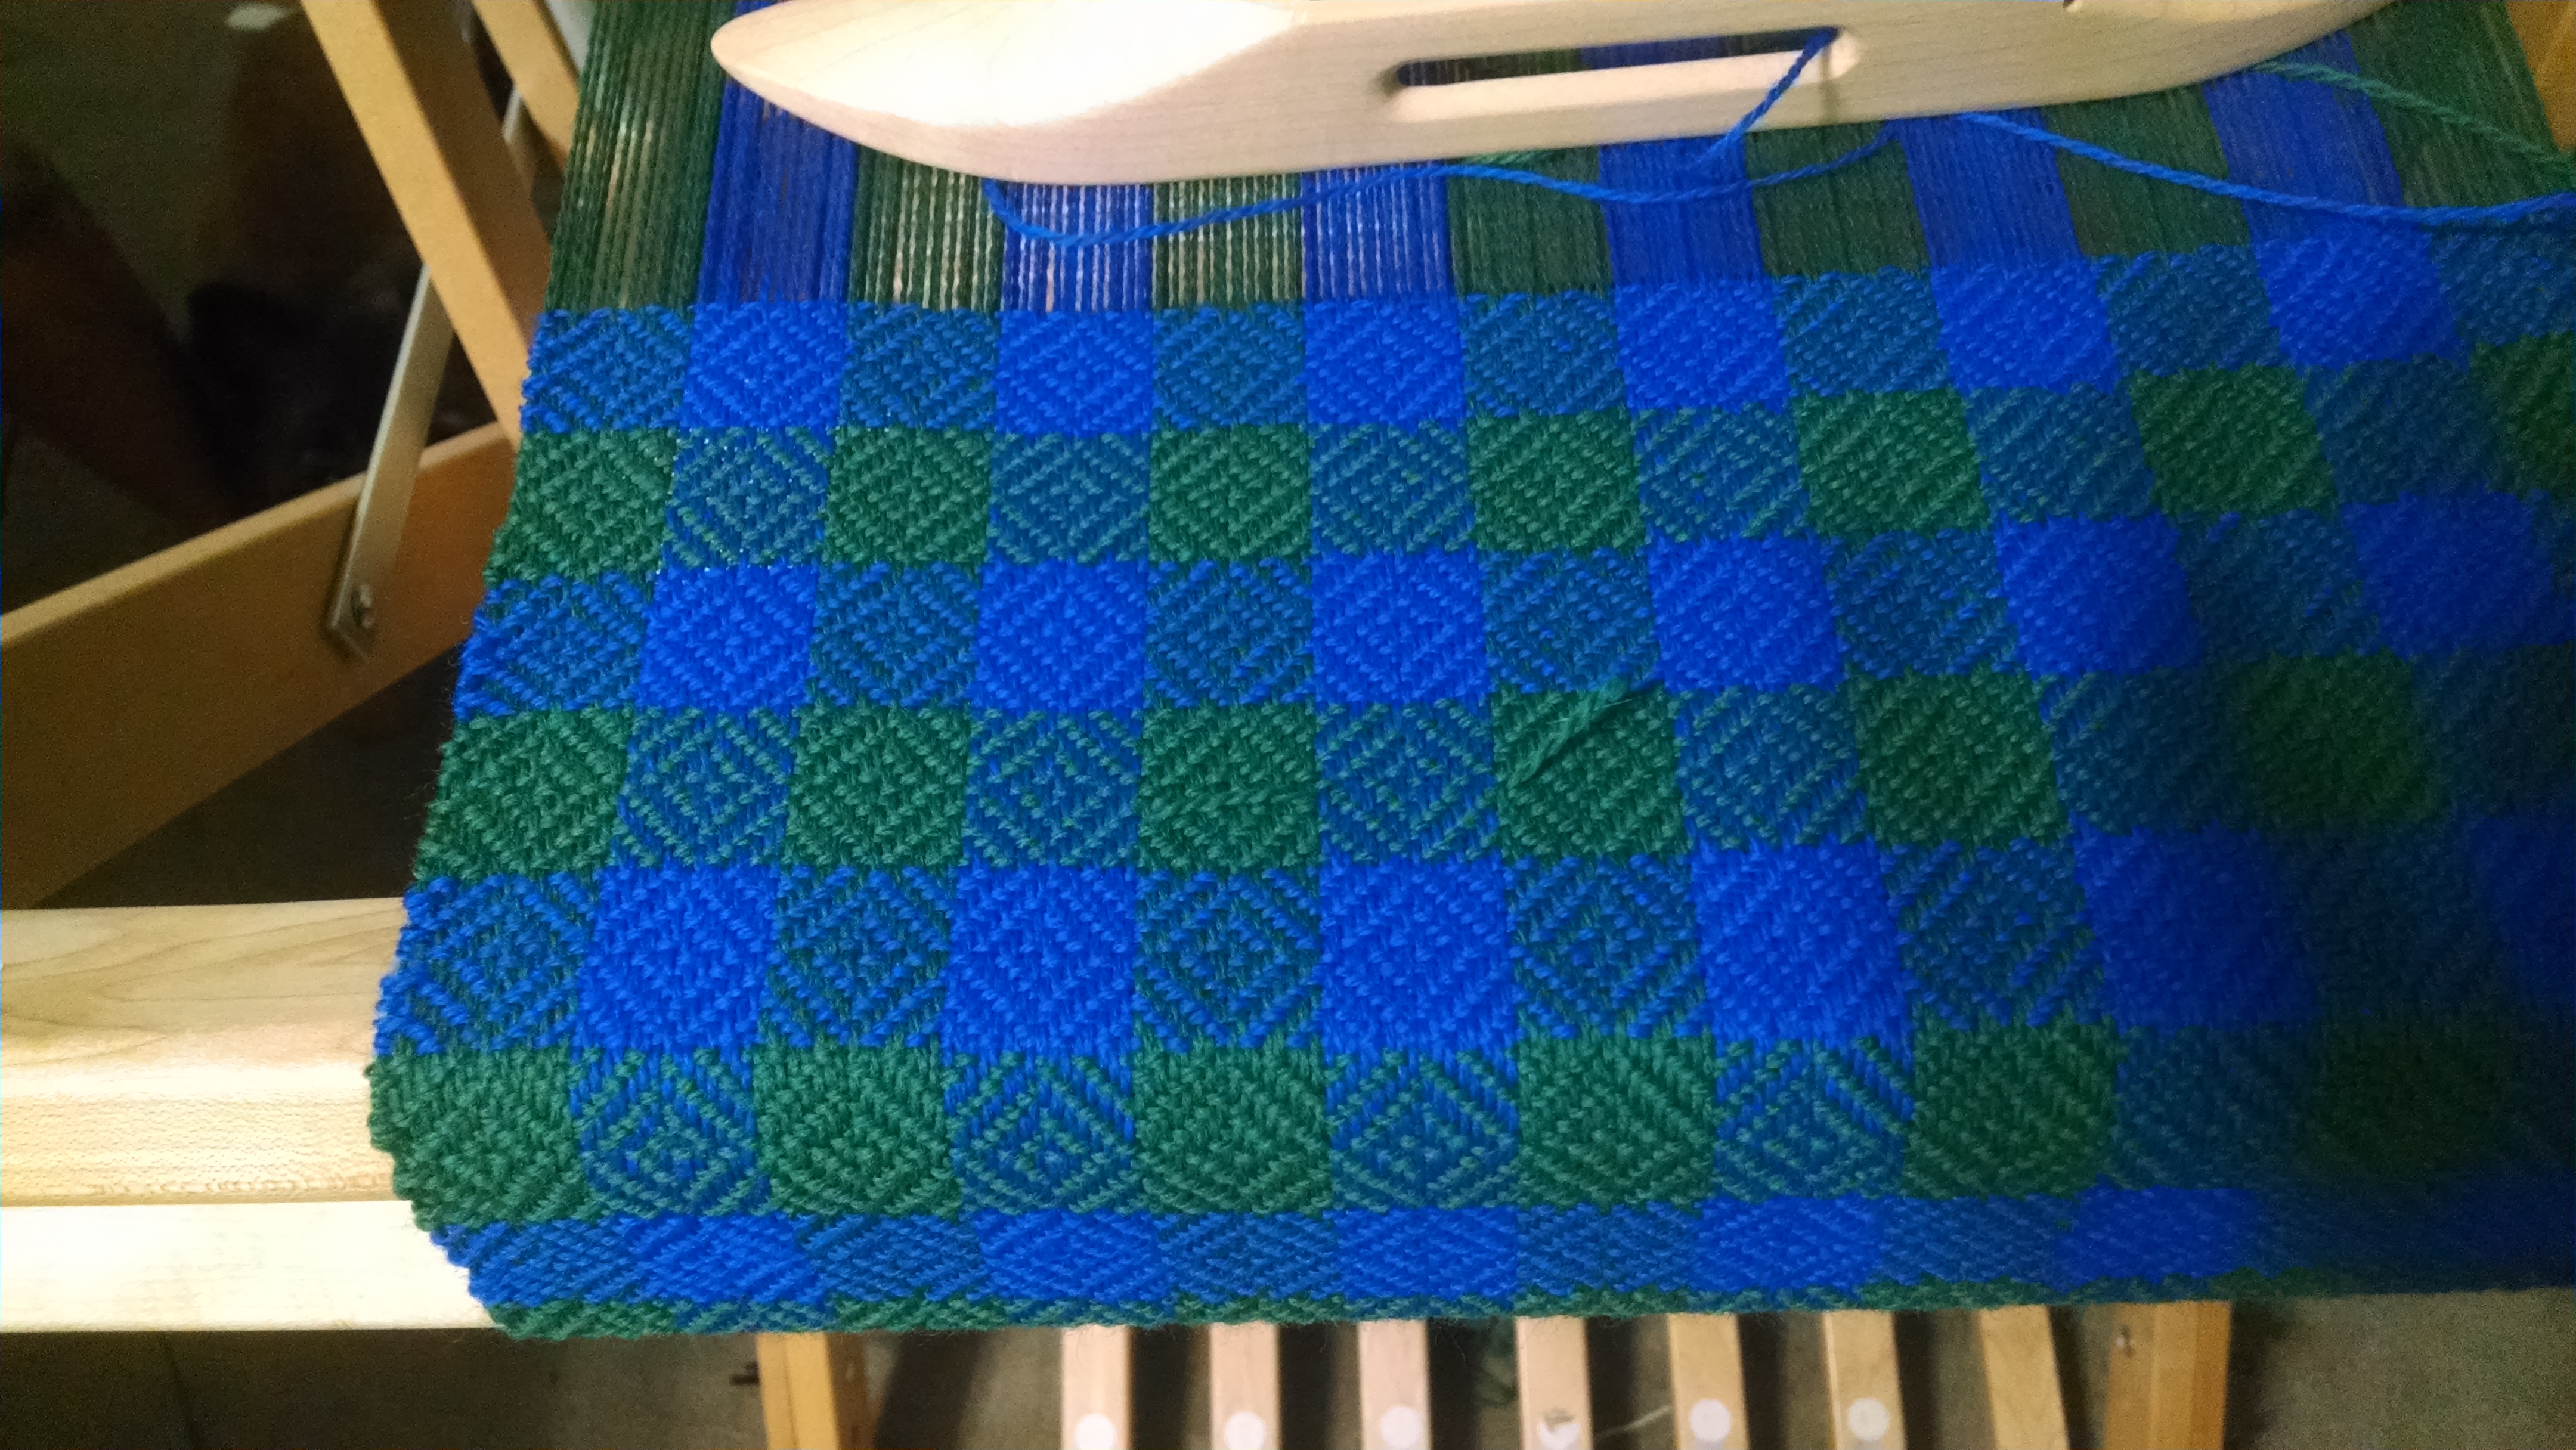
Instead, when you reverse the direction of twill, you will weave 4 rows, but start with 3-2-1-4 , and by doing that you get a lovely zig zag.
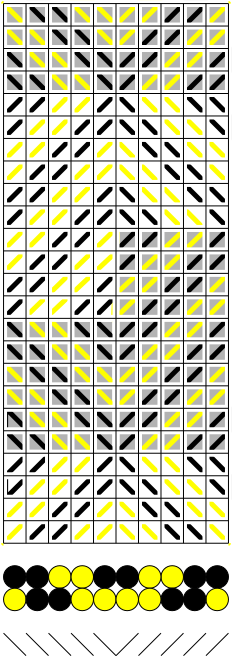
But notice the long stretches of purple thread on the edges? Those are – as I discovered on my first piece – going to be a problem because the weft won’t go out to the very edge. The simplest solution is a “floating selvage”, which is an extra warp string on each side that isn’t passed through any heddles. Then while weaving, you push the shuttle underneath the first free floating string, and over the second on the far side, so that the shuttle always ends up going around the selvage strings on each side.
For an even nicer edge, you could use multiple selvage strings, but I confess, I haven’t figured out how to tie them into the harnesses yet to get some sort of tabby weave. Having two extra harnesses would really come in handy here.