So for Christmas this year I acquired a modular pinloom from a seller on etsy (https://www.etsy.com/shop/TotaLoom). The looms are modular, with pin bars and angled corner pieces, so that you can arrange it into hexes and diamonds, and squares, etc. (The angles I have so far are 60, 90, and 120 degrees.) Of course, then the question becomes what to make. I started with making diamonds with some yellow acrylic I had left over from mom’s visit.
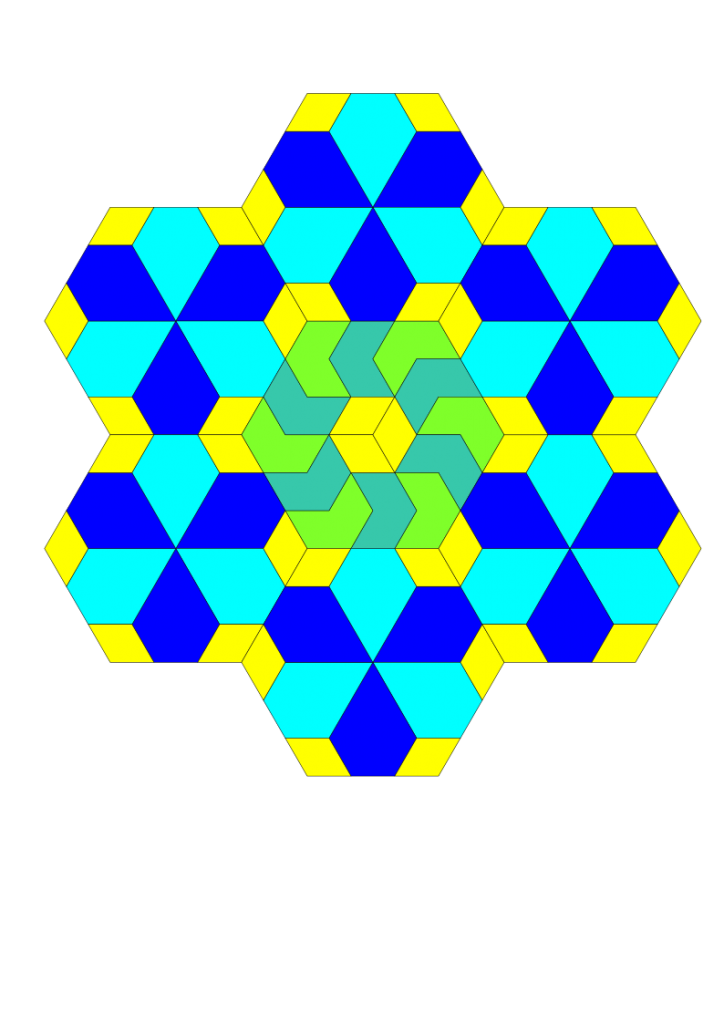
And then this morning I started noodling about patterns. This pattern block uses the hexagon as it’s main inspiration, although all the shapes are variations of the hexagon so that they can all be woven with the continuous warp approach. I’m calling this one the Field of Flowers, and I’m thinking I can vary the fields by using different colours.
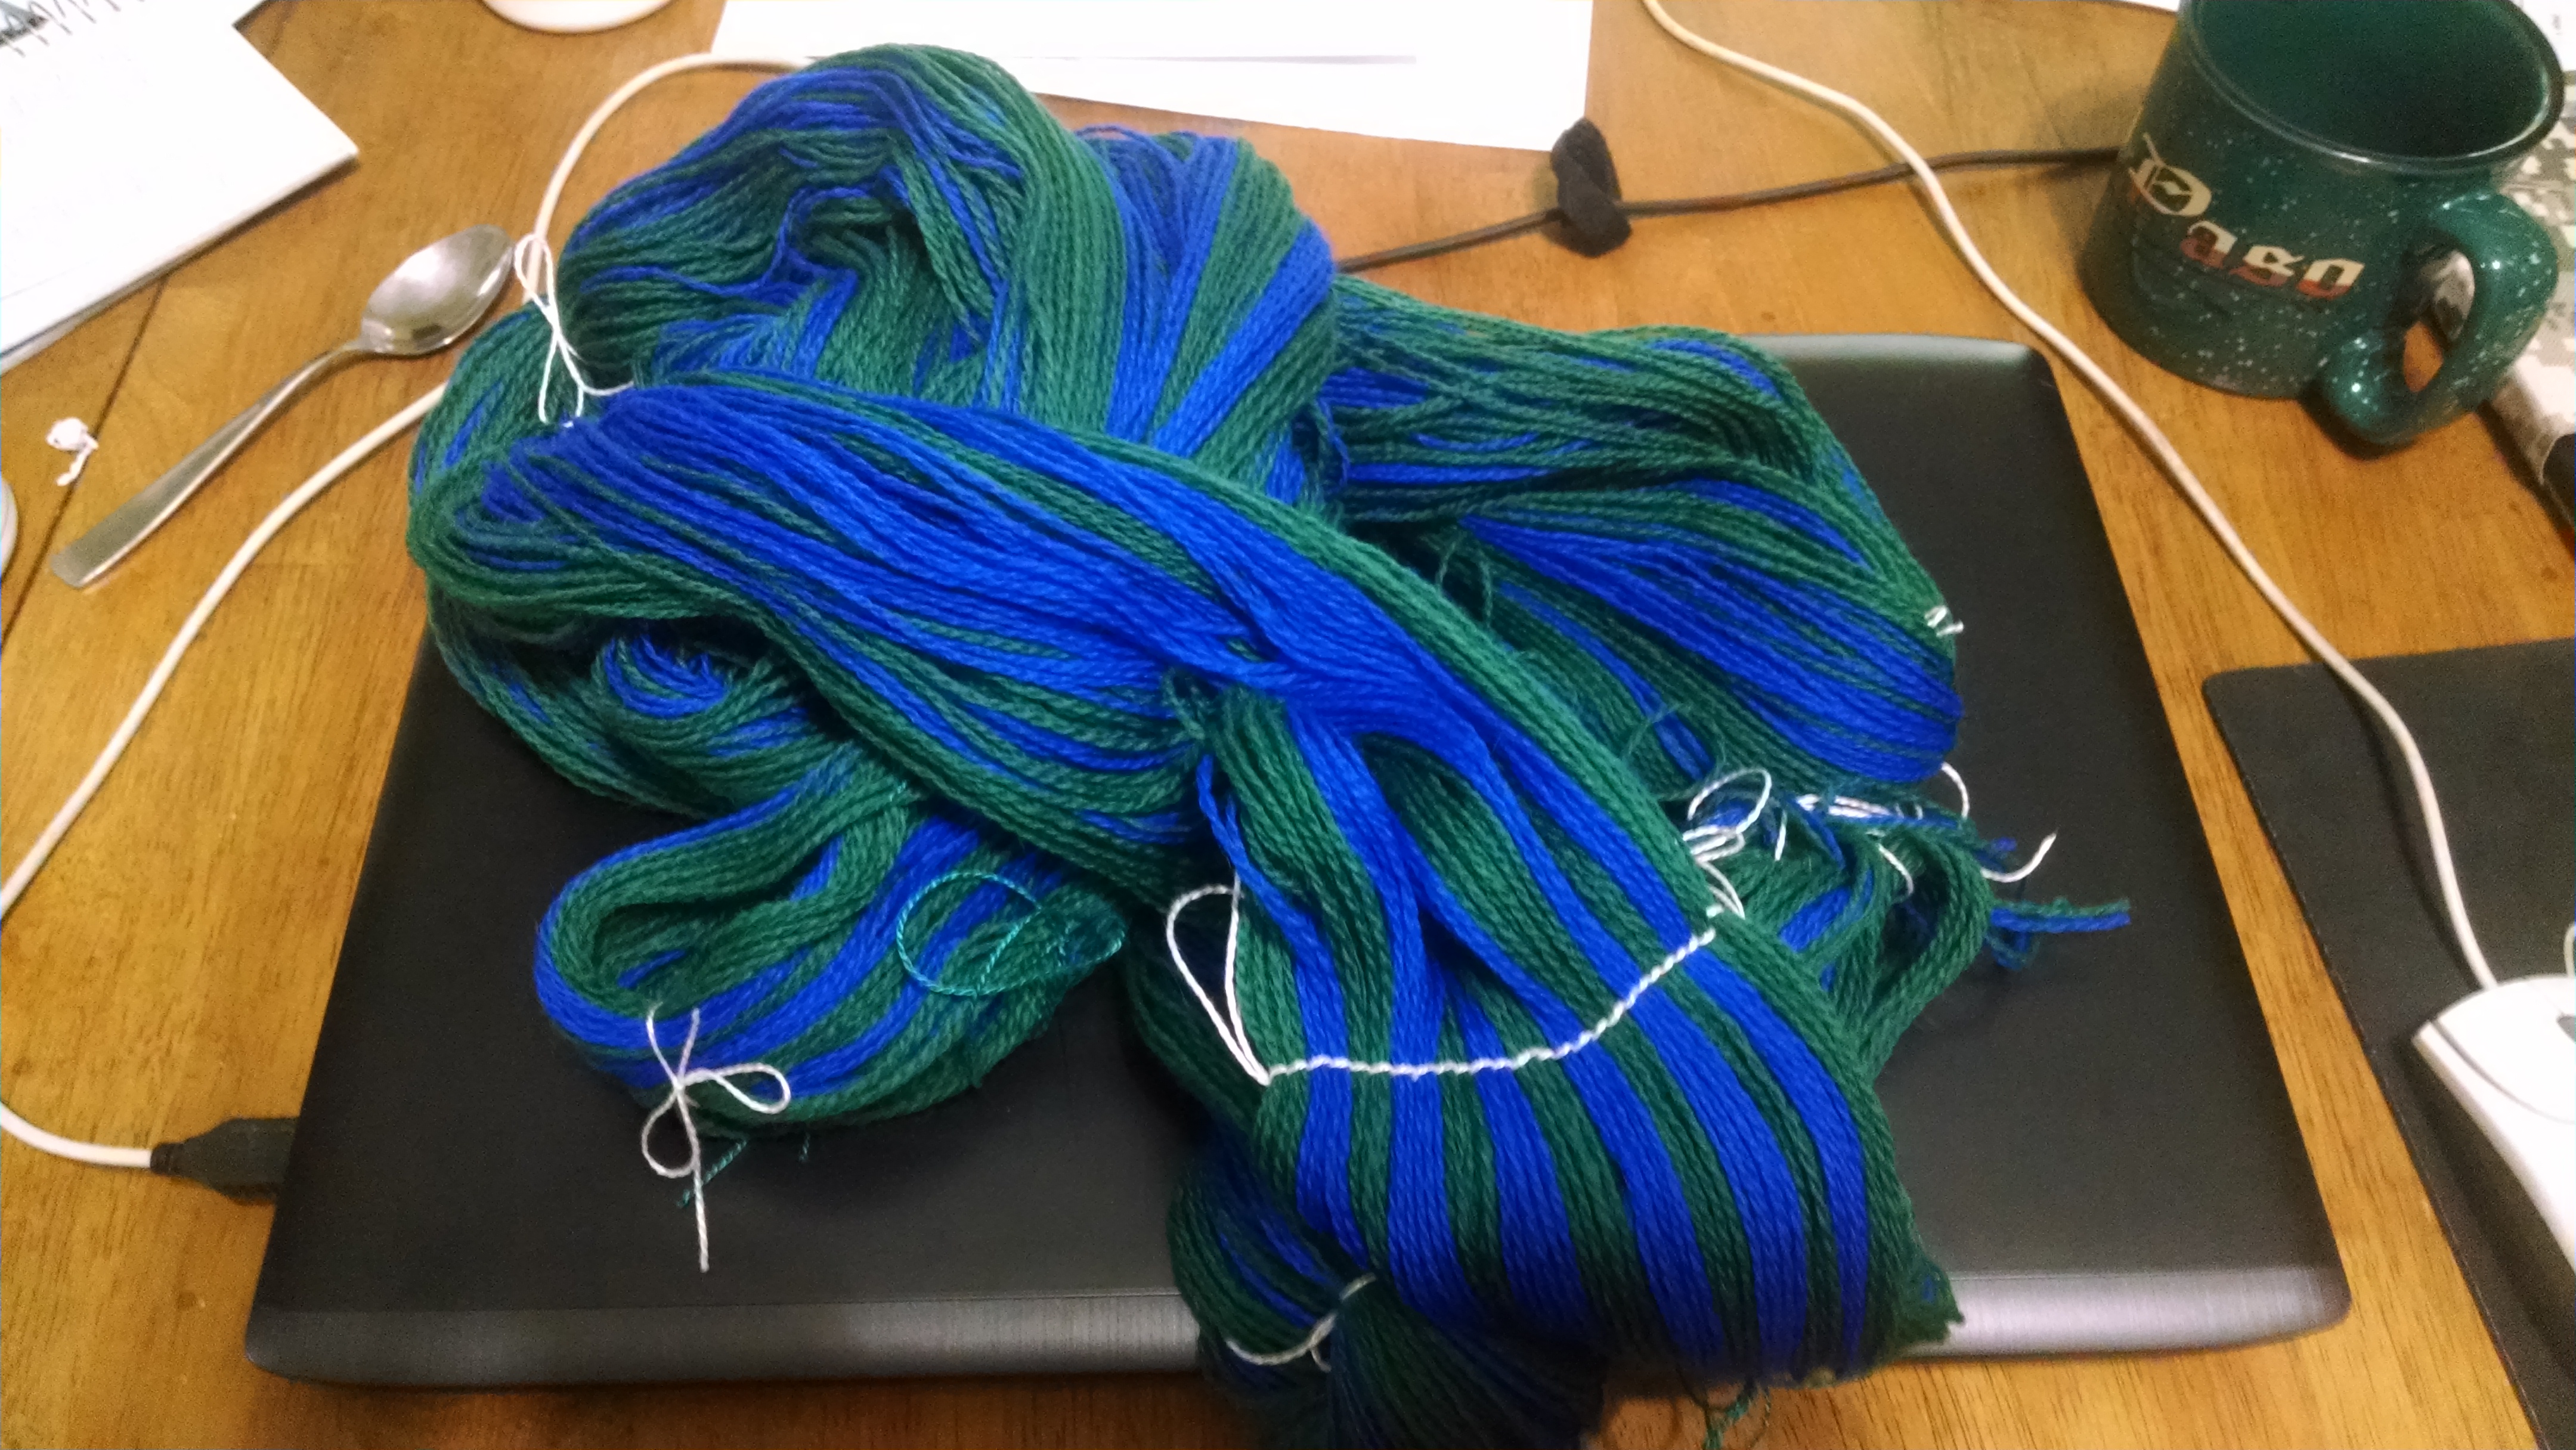
These are notes for a project currently on my 4 harness loom. The wool I’m using is 8/2 Jaggerspun wool, from the Maine line, in royal blue and dark green. I wanted to make fabric that was stripey and that displayed the broken twill diamonds encountered in Viking weaving. The final fabric will be used to make a bag with Hedeby handles, as described in https://nattmal.wordpress.com/2015/05/14/haithabu-bag/. Unlike her bag, however, I will be using a tabletwoven rather than a leather strap.
The measured warp: 208 eights, in 13 groups of 16, to produce a striped fabric.
Step 1 was to measure out the warp. As a computer programmer, binary in all its glories is very attractive, so I decided the diamonds would be 16 threads wide, and 16 picks high. Sizes can vary of course. So I measured out 13 strips of 16 ends each, on the horizontal warping mill; to make counting easier, the white thread groups the warp in bundles of 8 threads each. This allows me to easily stretch the threads across the width of the backbeam using the raddle. Since the epi for this wool is listed as 15-18 for twill, I decided to start with 16 epi, so the diamonds should be about an inch square.
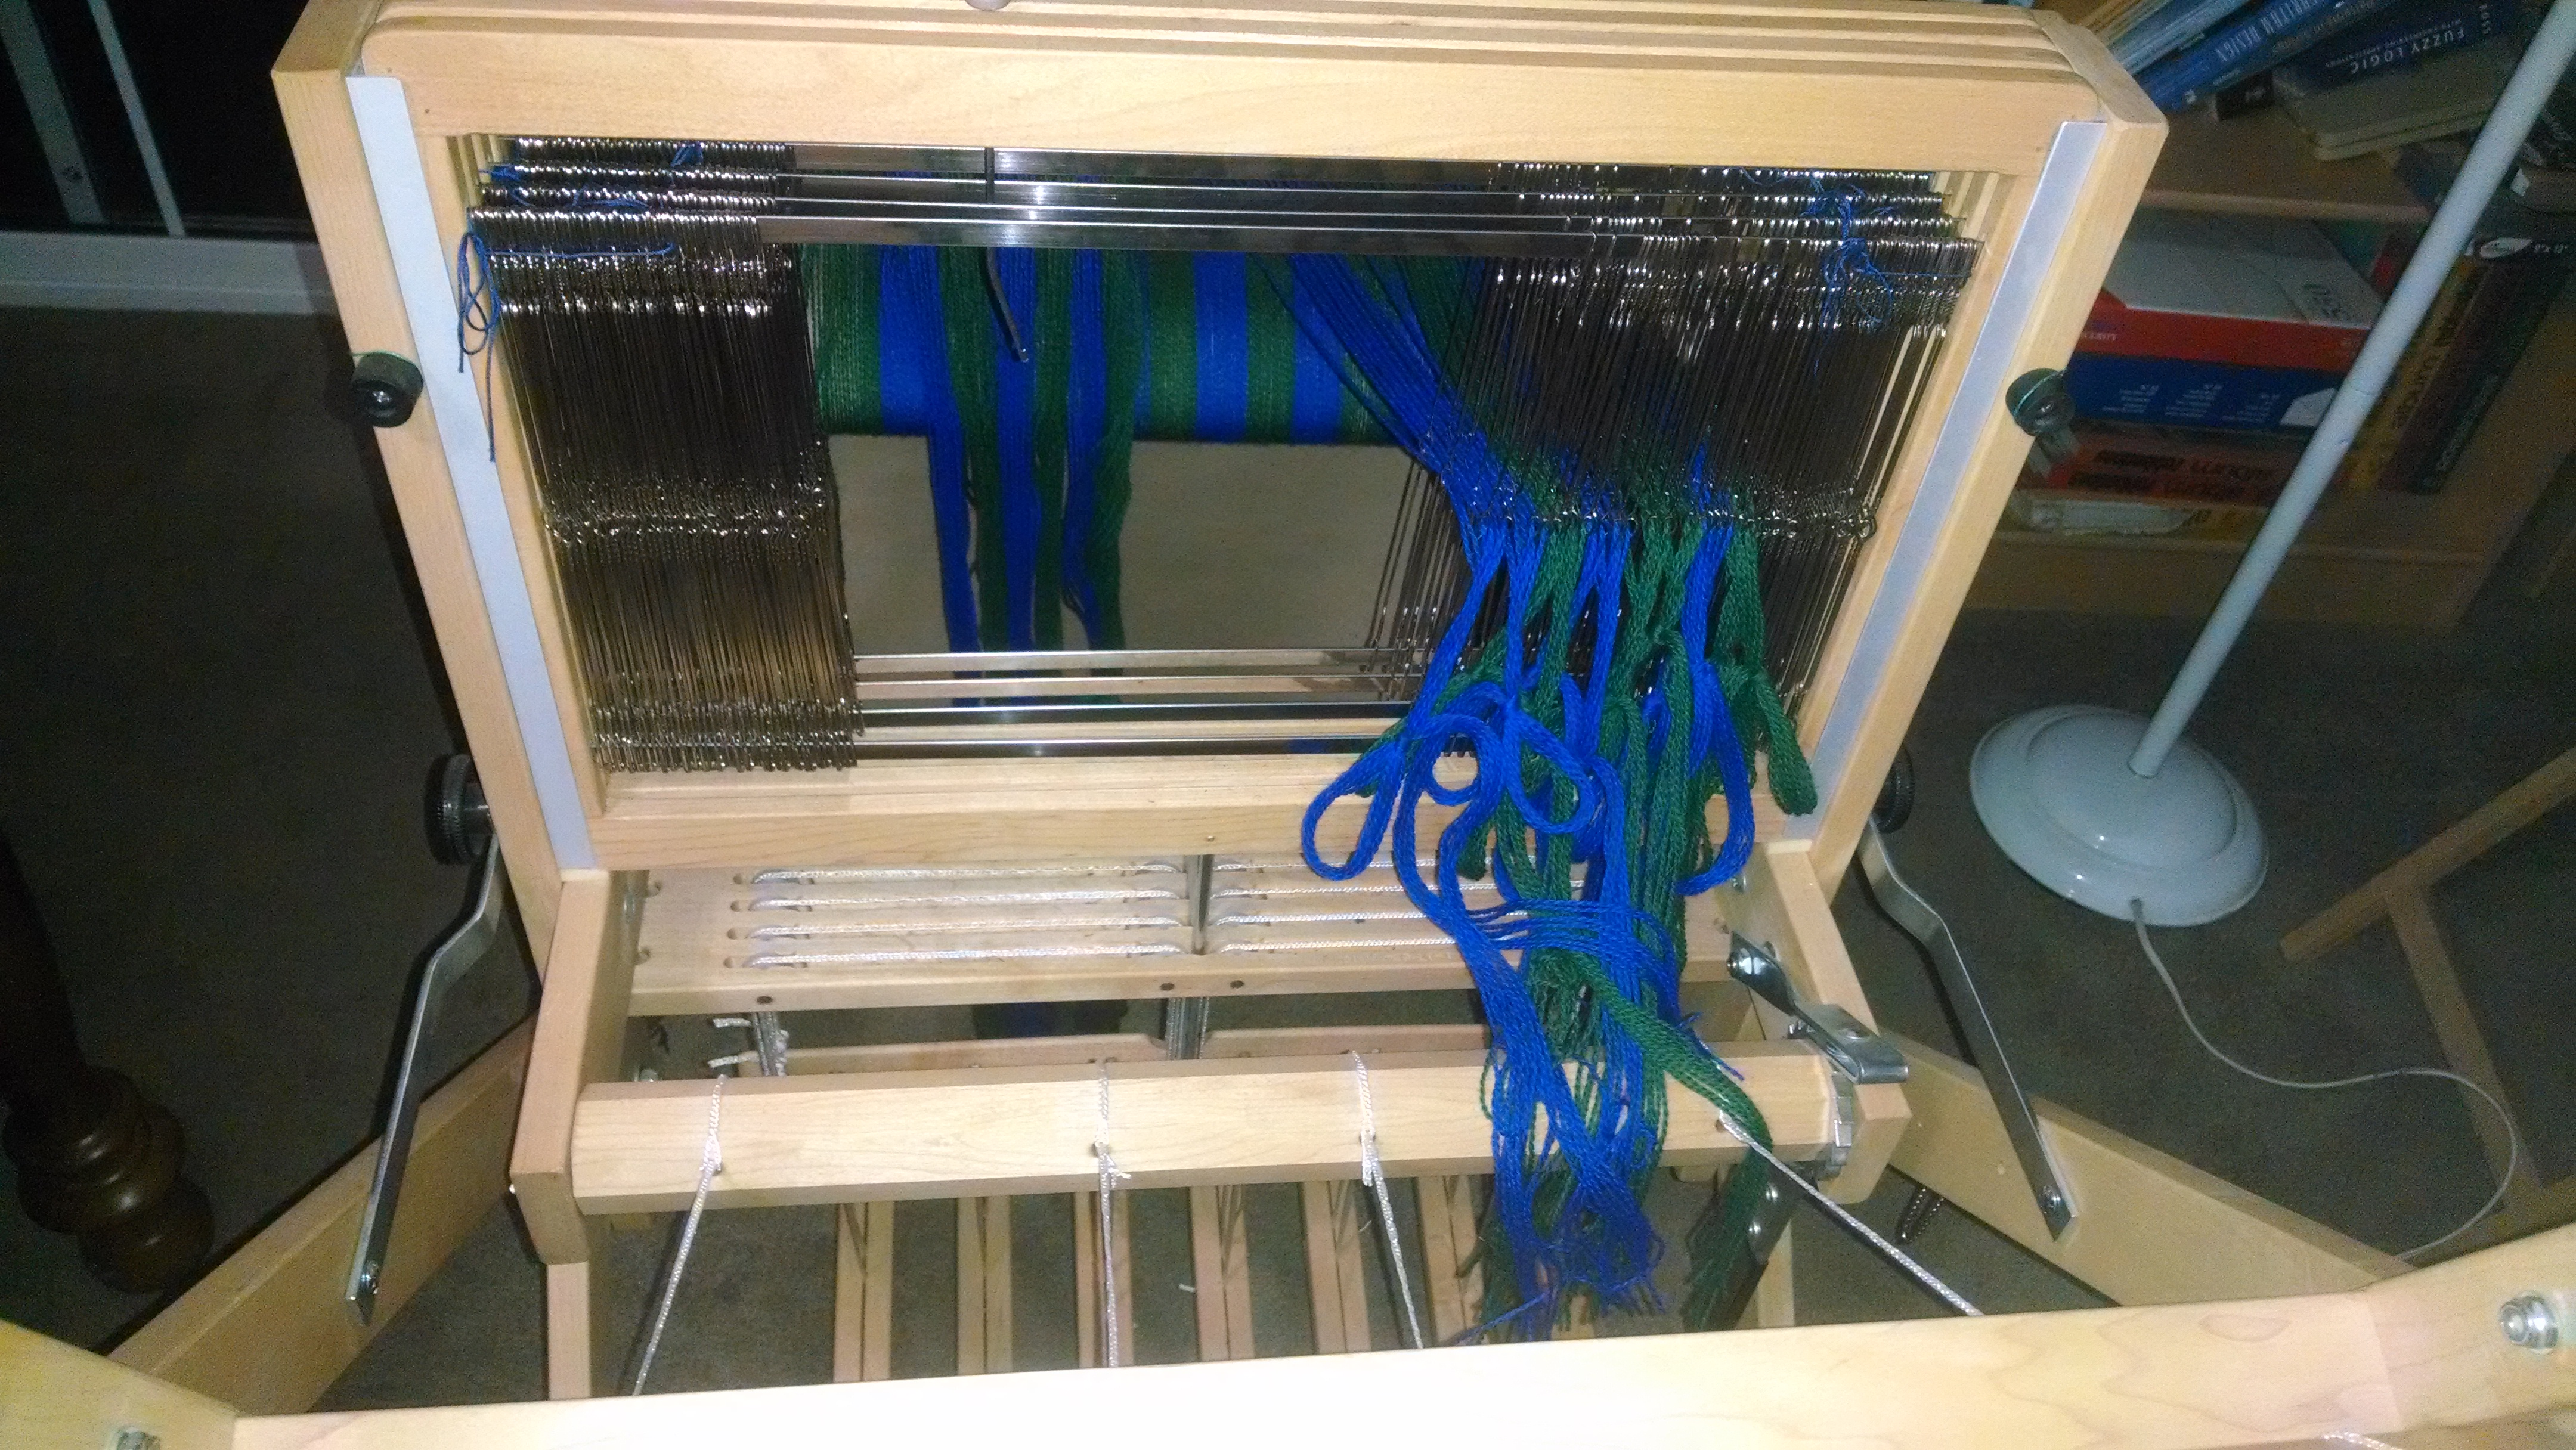
Step 2 was to wind the warp on to the backbeam; to do this I used what some call “Angel Wings”: a pair of dowels which are put through the warp on both sides of the cross, and kept together with hairbands. I use loops of string to hold the dowels in place. This allows me to wind the warp on to the backbeam while maintaining the cross. It usually maintains a nice even tension too, although here the wool was being very sticky and obstreperous.
Threading the heddles in groups of 8
Step 3: threading the heddles. We left the dowel sticks in place and heddles from right to left. The pattern repeats: first 8 heddles 1-2-3-4-1-2-3-4 and then 8 heddles 2-1-4-3-2-1-4-3. Keeping track of count was easy since everything was being done in bundles of 8. The outermost thread on each side was not heddled, and will form the floating selvage.
The reed I have for this loom is 10 ends per inch, so it took me a while to puzzle out how to thread it to get 16 ends to the inch. Finally I decided that solving 8 ends to the half inch (and 5 slots) was easier, and threaded in a 2 – 1 – 2 – 1 – 2 pattern through the slots.
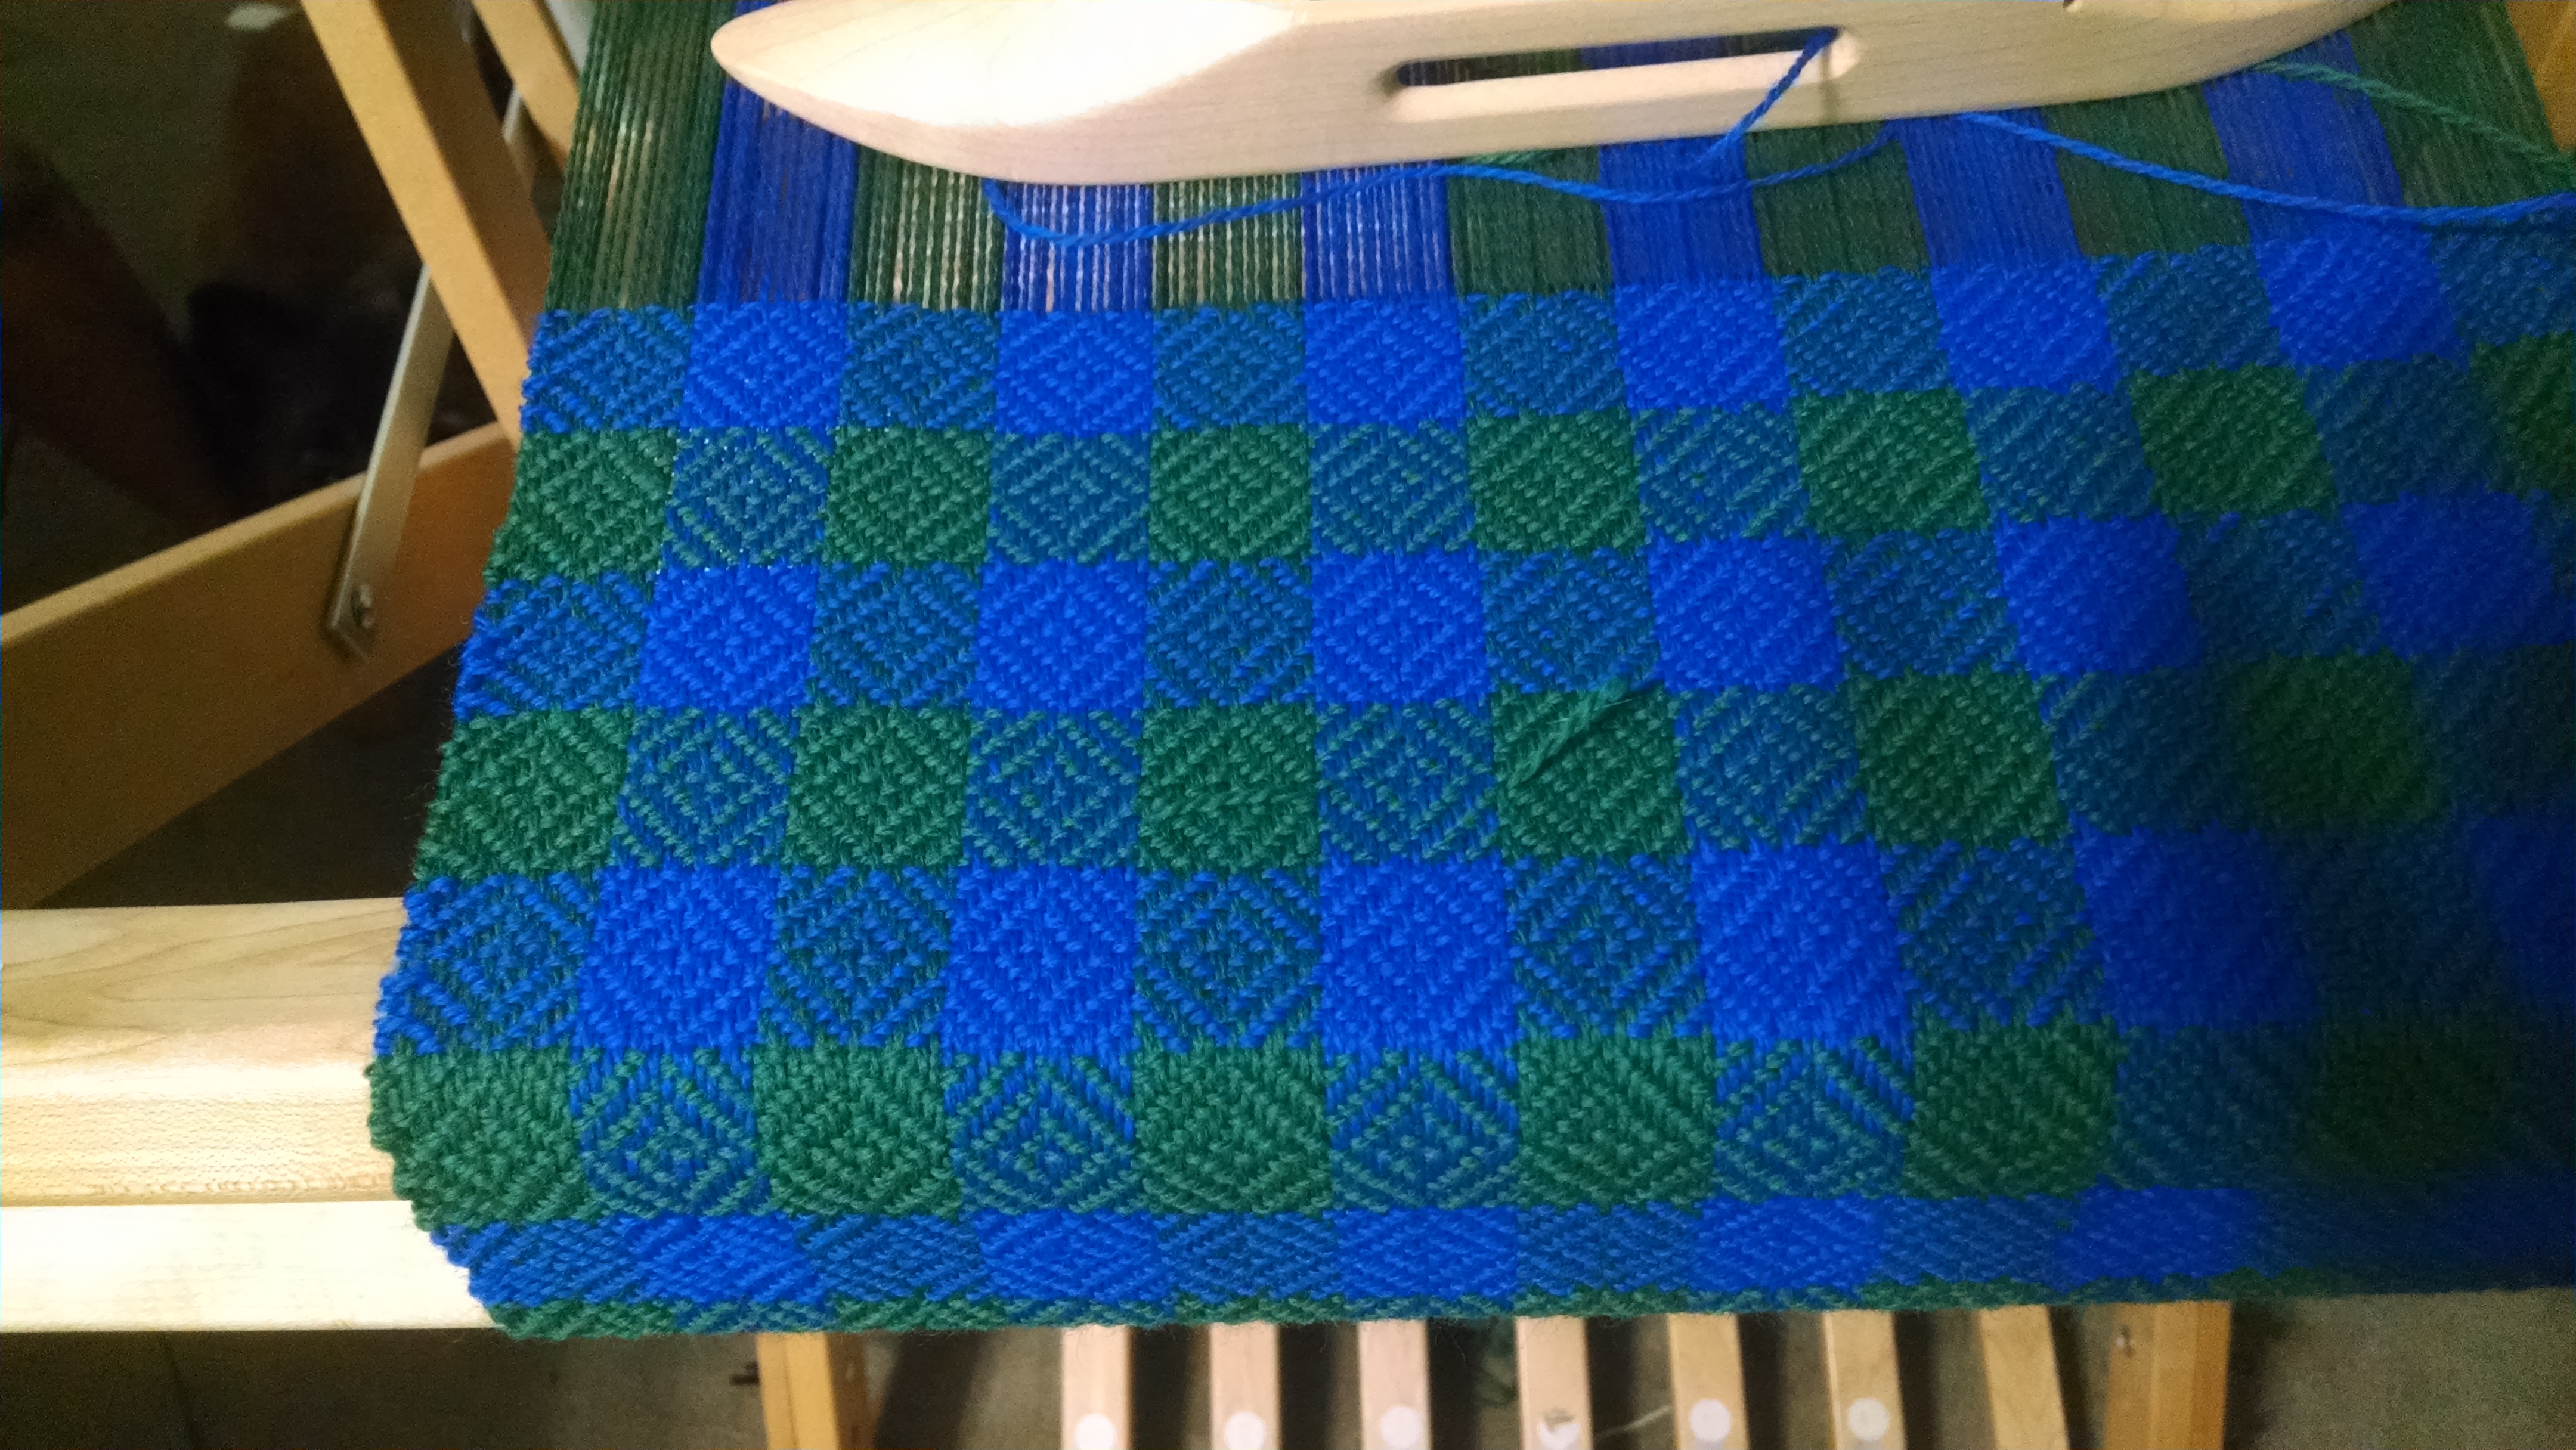
Broken twill, alternating between two shuttles every 16 picks.
Step 4: We weave! Took a bit of monochrome weaving to get the edges right, and I realized that perhaps I could have set the threads closer together on the outside on both sides, but I got it to square up eventually. And that’s when I added the second colour. There are two shuttles loaded with blue and green respectively, and the one not in use is perched on the desk next to me. The shuttle in use treats the thread from the other colour as a second floating selvage, so there’s a little bit of oddness on the right hand side of the fabric.
For now, though, my concern is still on getting the edges even, and trying to keep the squares … we.. square, which means managing the interplay between the tension of the warp threads, and the force with which I beat. (And when a bobbin runs out, as you can see in the green, you just double up for an inch or so and keep going.)
The last picture, btw, was taken with flash so that you can really see the structure. In natural light the patterning – especially in the monochrome areas – is much more subtle.
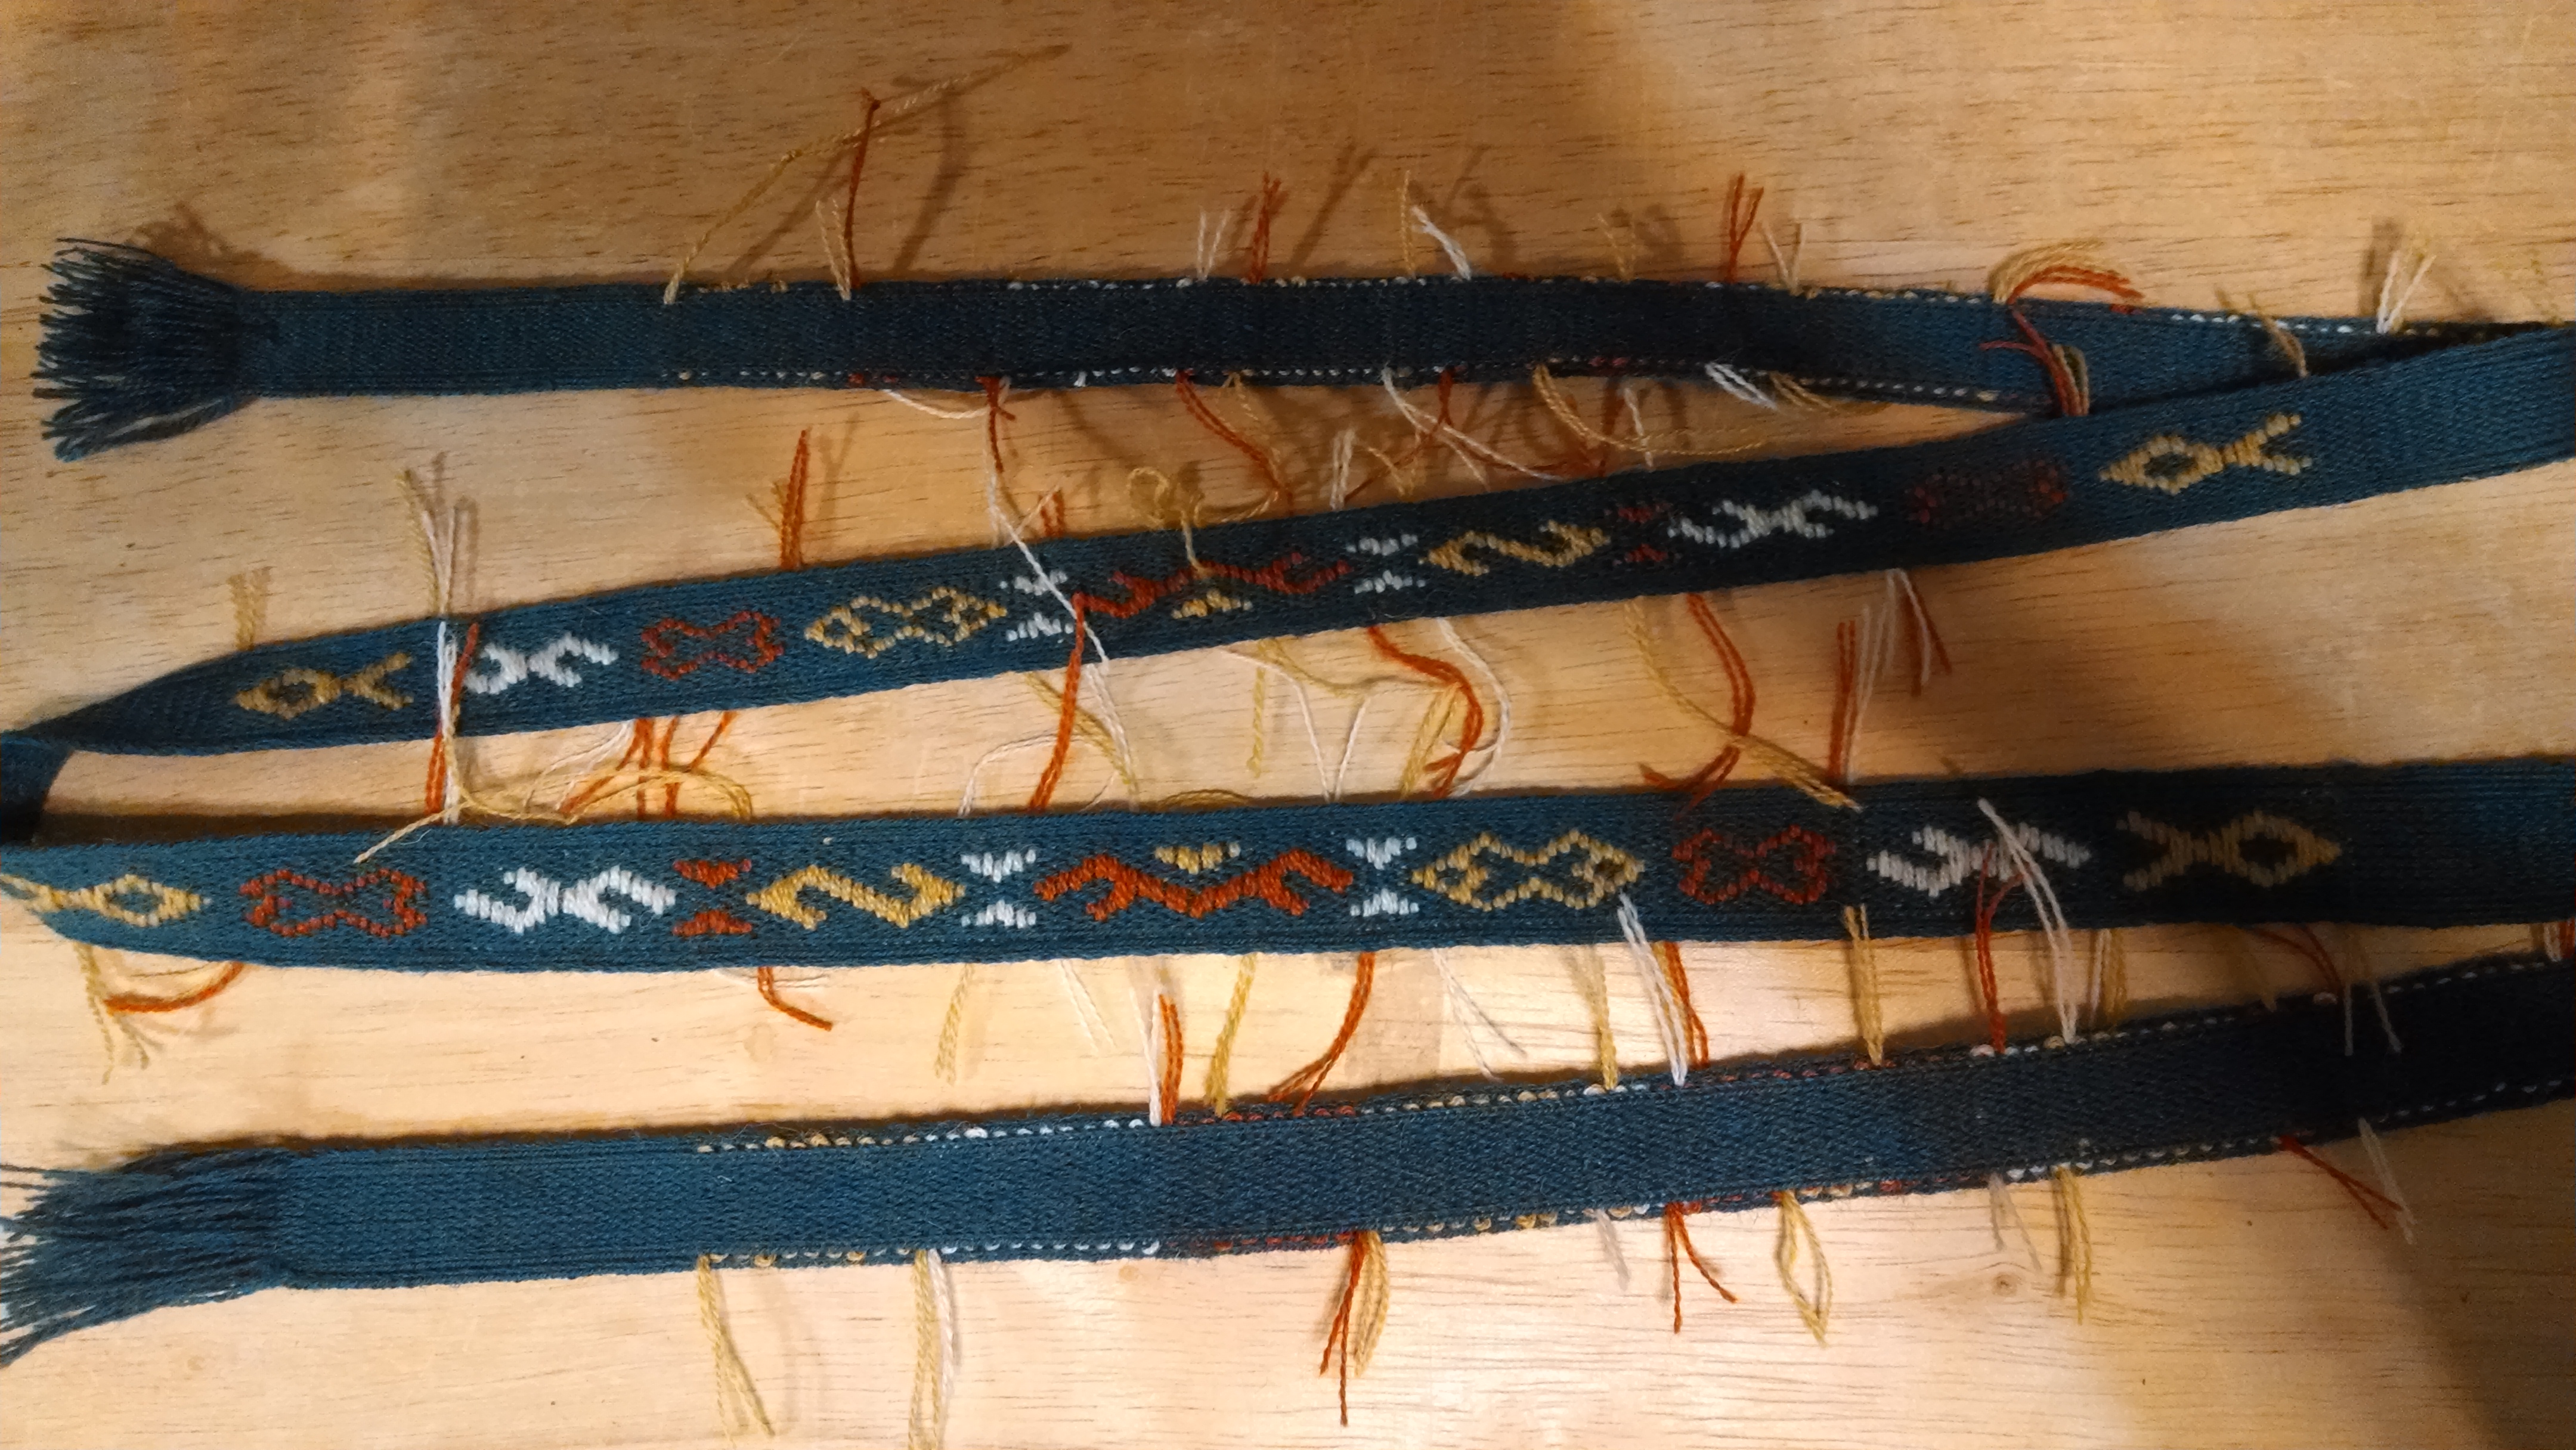
Sunday was the moment the weaving came off the loom. Total woven length is 1.36m. And the wool used in the brocading is the same weight as the wool used in the weaving, except that the brocade uses doubled threads. For the weft I used 60/2 silk, and in a next product I might go thinner still.
As you can see from this first picture, I handled the colour changes by cutting the brocading thread at the end of each colour. Each woolen brocade thread passed through one weft after it’s done brocading; given the stickiness of this wool, that should be more than enough to anchor it in place. In some cases, like the small triangles, you use two colours at the same time; even beating extra hard I struggled to get both brocading wefts to lie in the weft without a smidge of gappage. In a next attempt, I think it might be better for those areas if the brocading weft does not go the width of the band, but instead goes only part way.
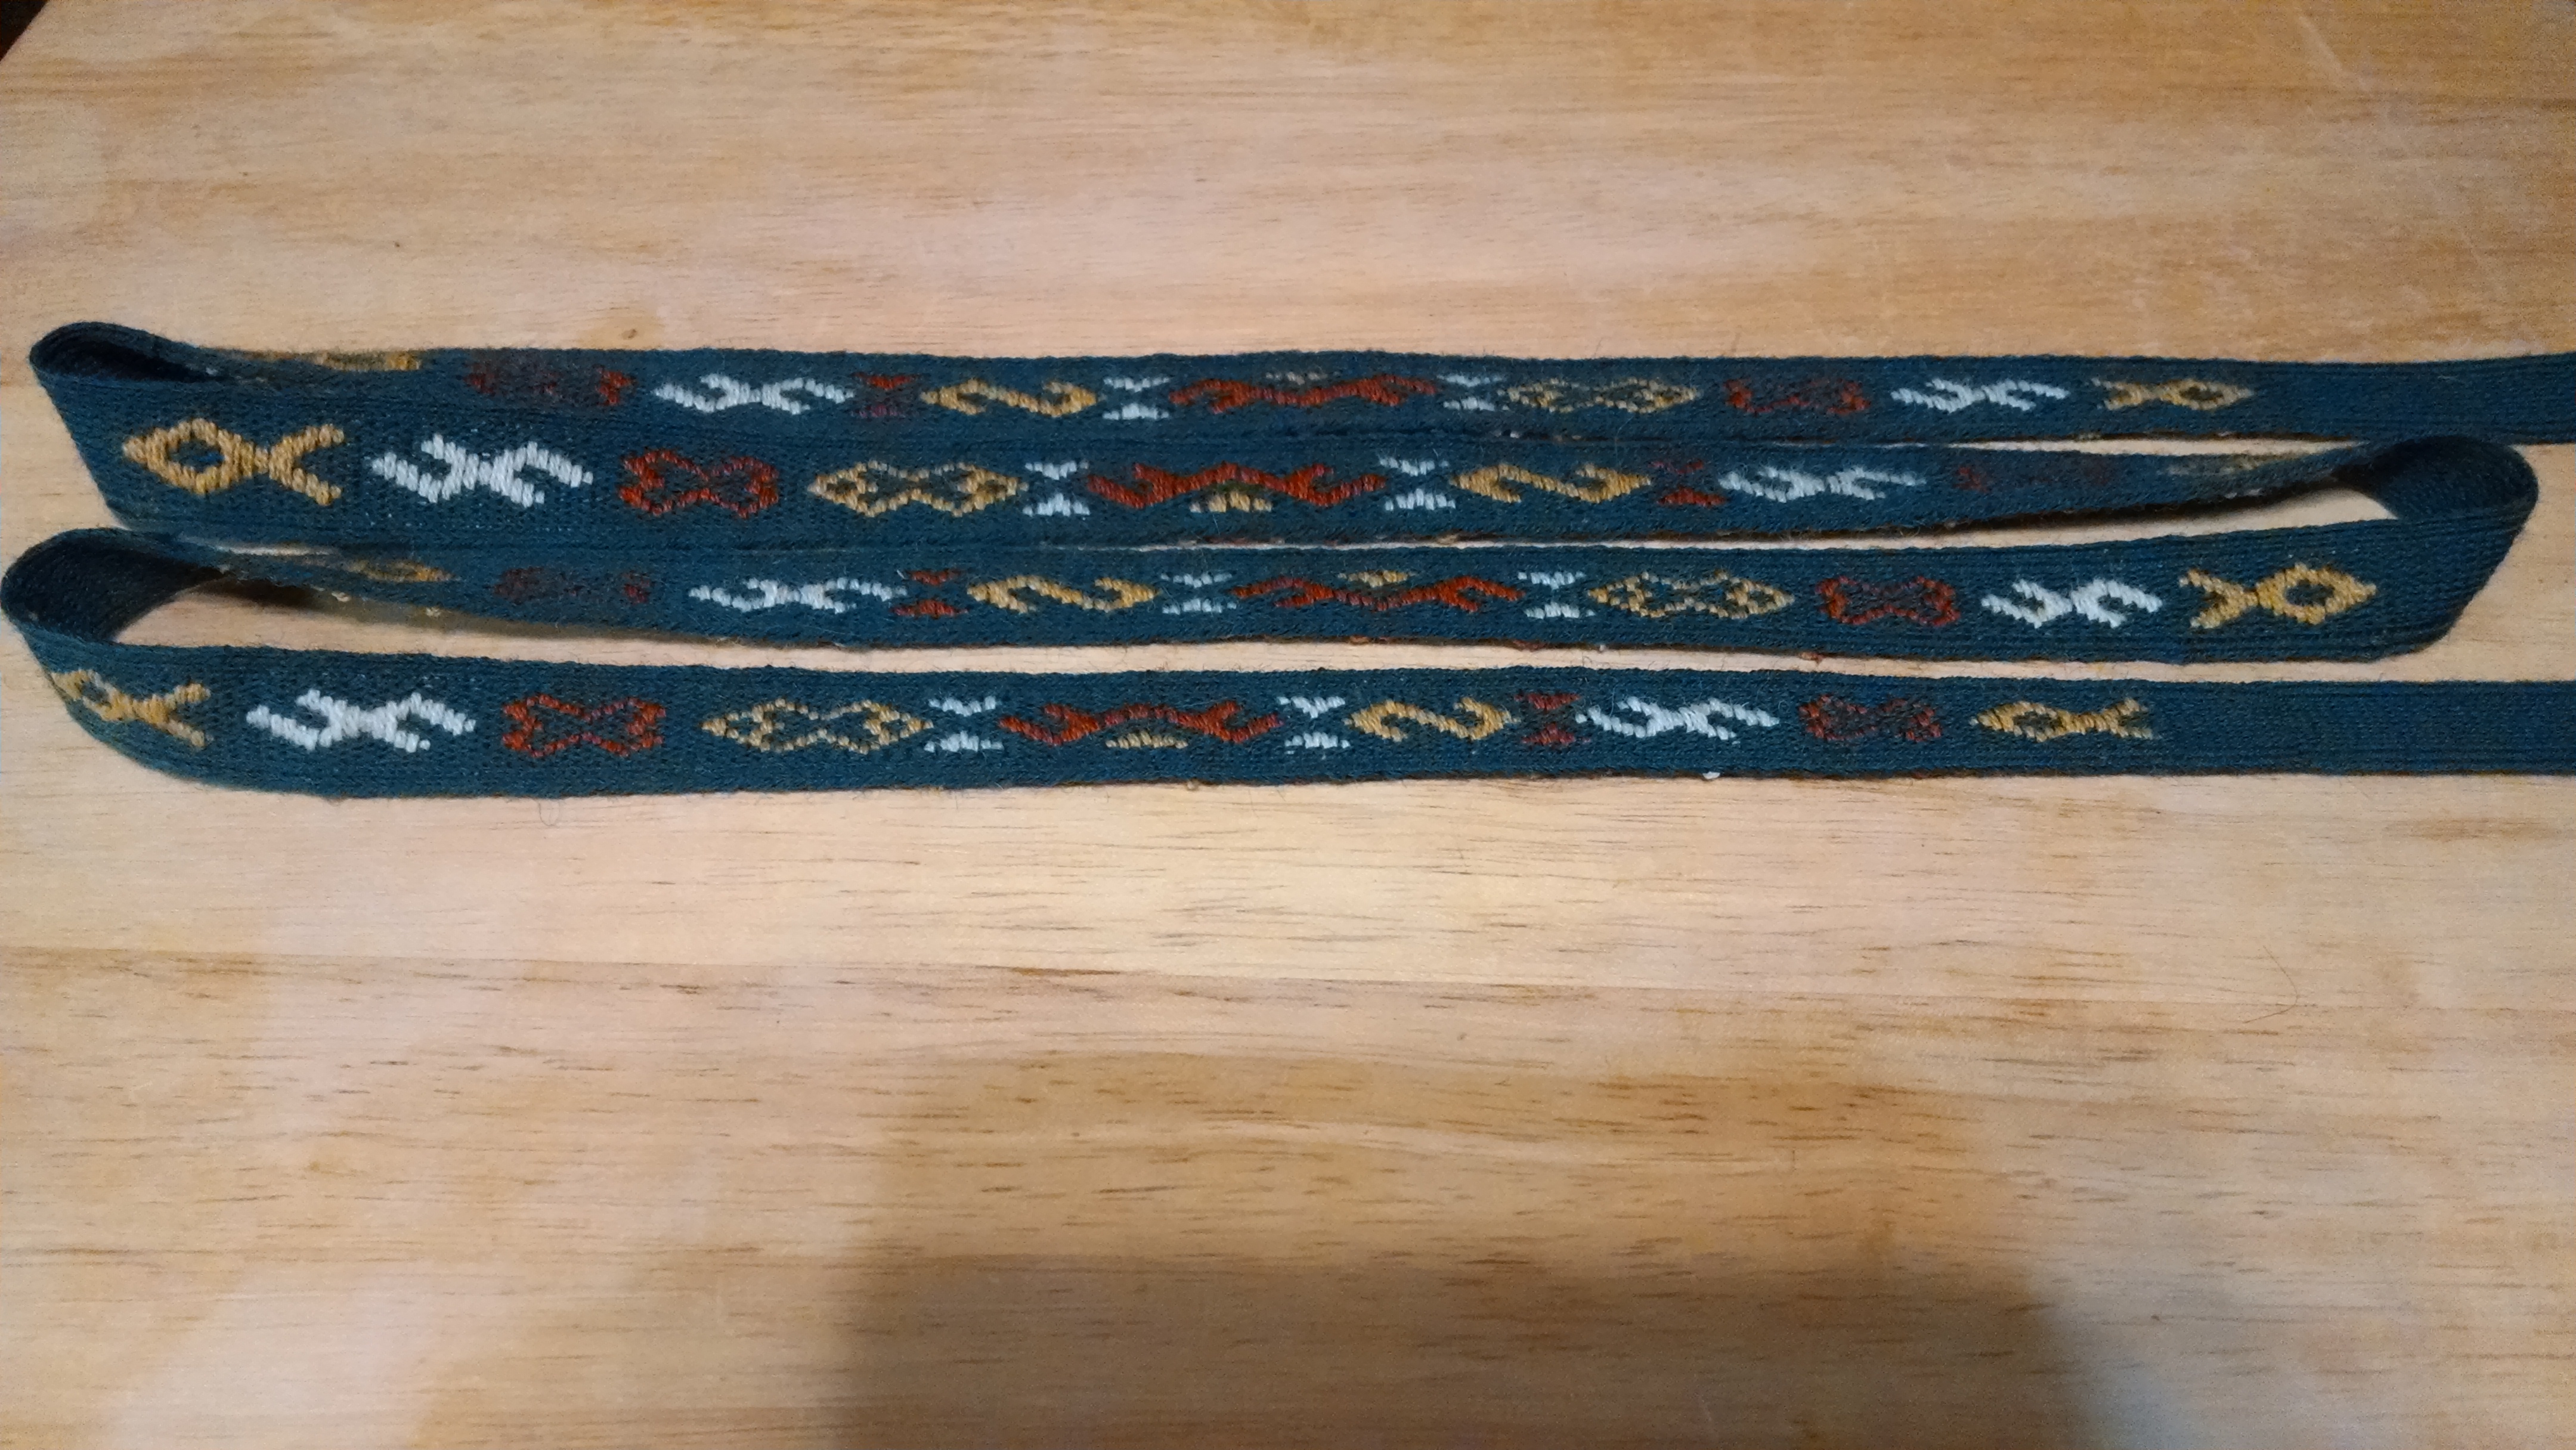
On the other hand, once the band relaxed off the loom, the occasional gaps between successive lines of brocading improved already. Trimming the ends of the brocading threads carefully, you can see that the brocading threads are visible on the back only where it moves from pick to pick; I dropped the brocading threads two cards from the edge (or halfways through the 4 card selvage), so that there wouldn’t be any colourful bumps on the very end.
Next step is to take it to the post office tomorrow and mail it off, and then I want to experiment with some pattern variations.
Progress remains painfully slow, although the netting needles have helped tremendously in picking out the pattern, and I have finally developed a rhythm of sorts.
By evening last night I had finished the first 30 cm, which was one repeat of the patterns in the paper. I’m going to weave about a 3cm break and then repeat the set of patterns. Three repeats should get me pretty close to a meter.
The biggest problem so far is that the wool sticks to itself, and so I am having to reverse direction sooner than I am used to, just to keep the wool from felting.
Well, that and occasionally a card sneaks in a quarter turn, and it takes me a while to notice and fix it.
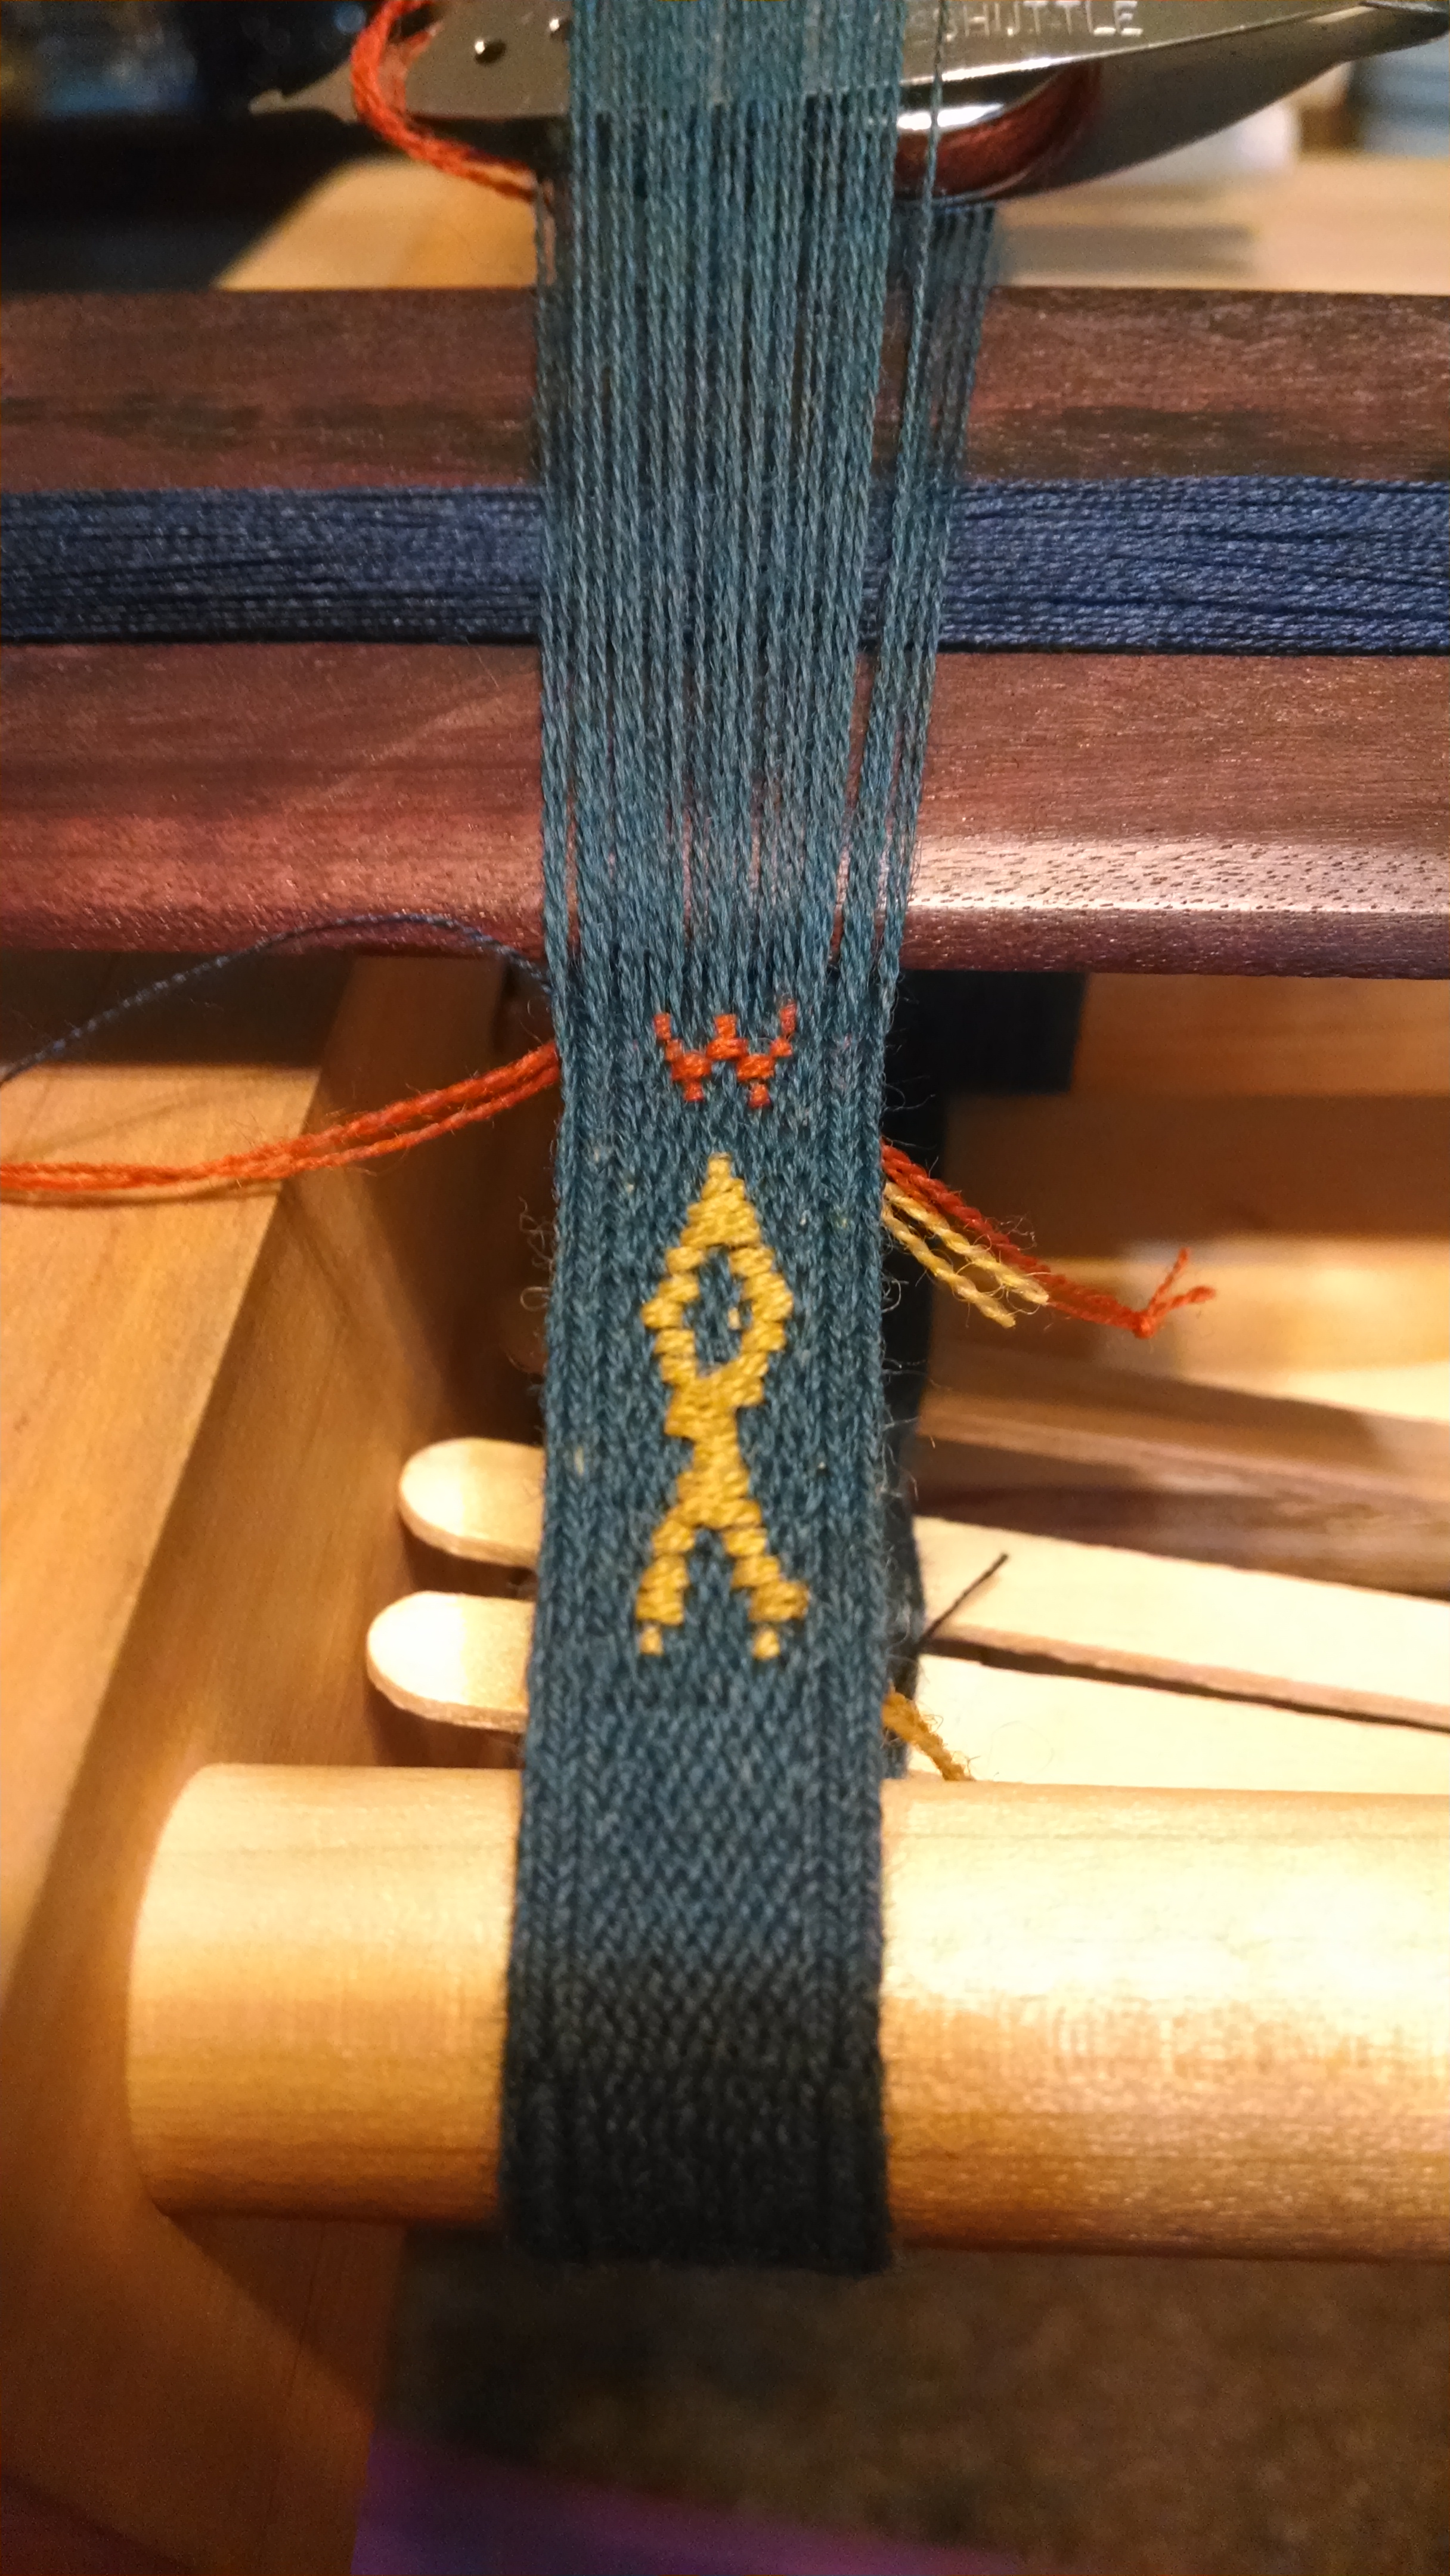
So once the skeins of wool were wound up into balls it was time to warp the loom. The trim that I am trying to reproduce was 1.2 cm wide, on 17 cards that were each threaded with 2 threads. It looked like there was selvage in the picture, so I added 4 cards of selvage, and alternated the threading of the selvage cards, as well as the pattern cards. By alternating the threading direction (or rather, warping and then flipping every other card) the ribbon should naturally lie flat.
When you zoom in on the picture you can see the interesting weaving structure created by the missed hole threading in the pattern tablets. The weft is a navy 60/2 silk and just about invisible on the edges, and the brocading threads are doubled threads of the 20/2 wool, dropped down below two cards from the edge so that you don’t see them at the edge. Right now the ends are also visible; those will be trimmed flush with the band when it comes off the loom.
What I find particularly interesting is the effect of the weaving structure on the diagonal edges of the brocading; for instance in the cross over X part of the yellow fish it looks like two rows have the same end point, but they don’t. I think this effect is due to the fact that the threads in each card are basically floating two above and two below, which affects the appearance.
What I find more frustrating is that the emergency brocading shuttle I’m using – a tatting shuttle whose bobbins can be traded out – is not really long enough and difficult to manipulate with the left hand, making every second row trickier. This is exacerbated by the pattern cards’ desire to shift …
Unless I find a way to speed up, this is going to be one of those projects where the pace is measured in cm per hour. So far, roughly 2 cm per hour.
A bartering agreement has been made, and I will be trying to recreate the tabletwoven band that sits between the brooches but above the pleated fabric of the actual smokkr, as described in the paper The aprondress from Køstrup (grave ACQ).
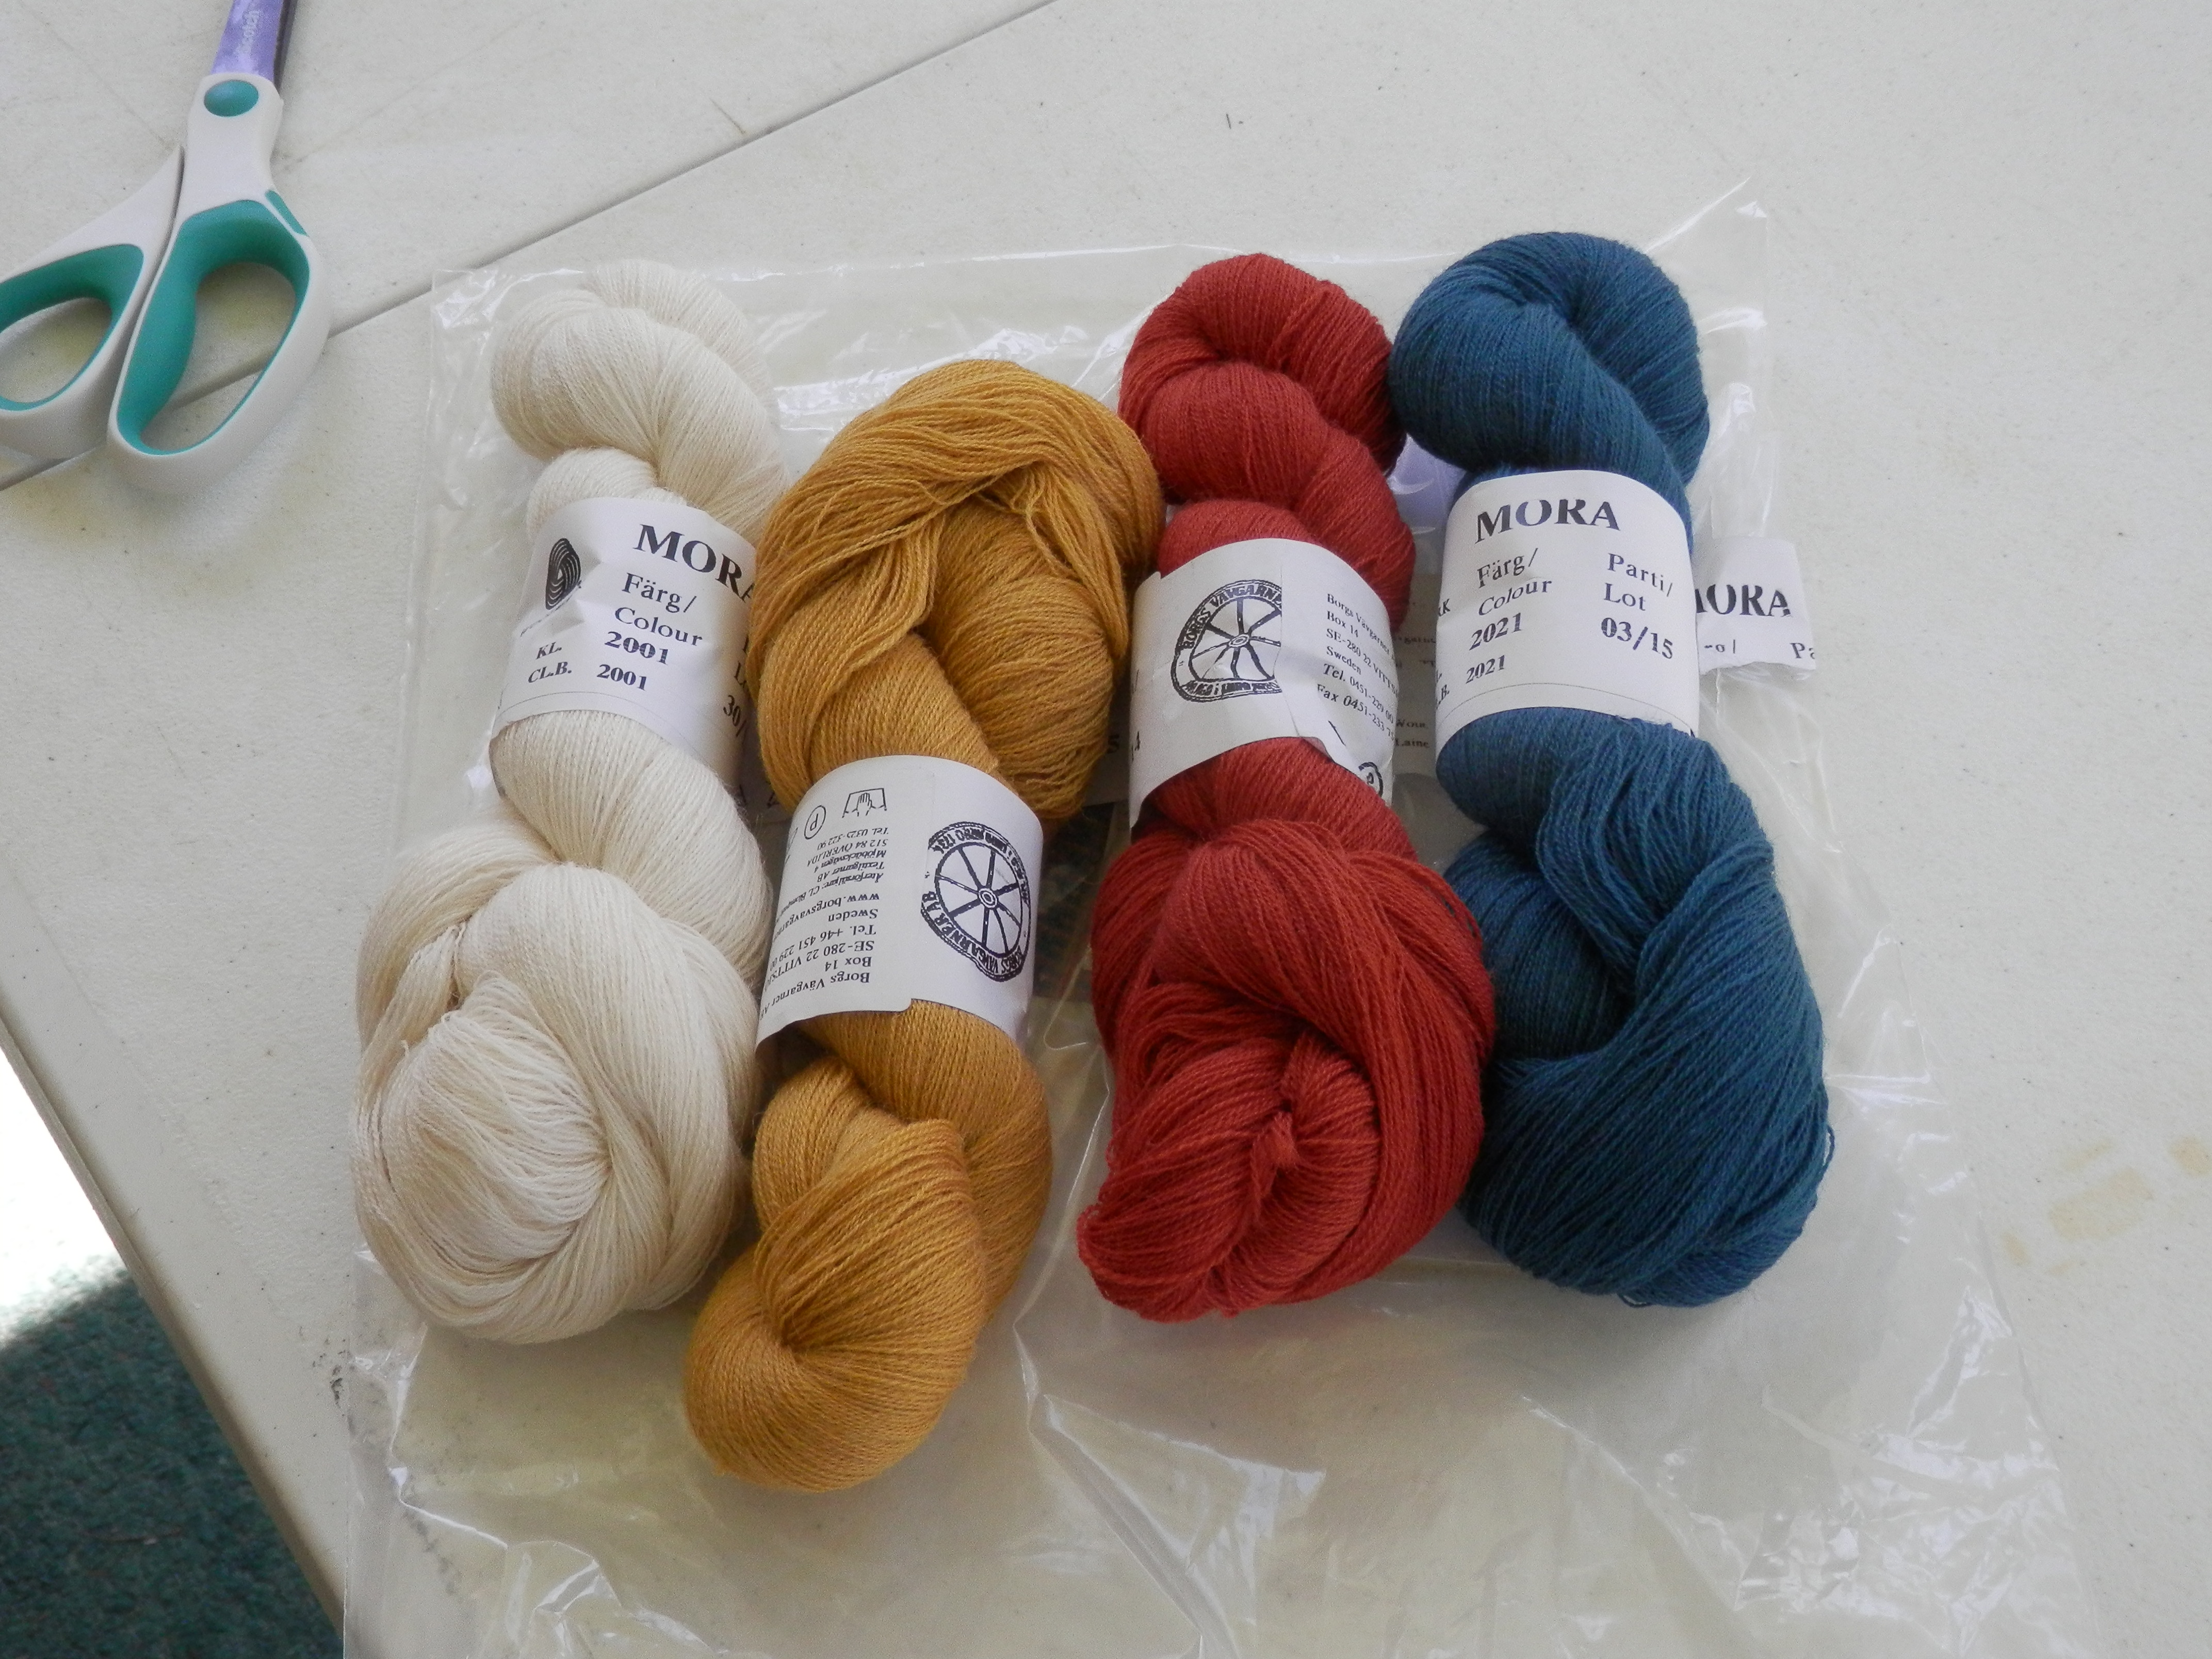
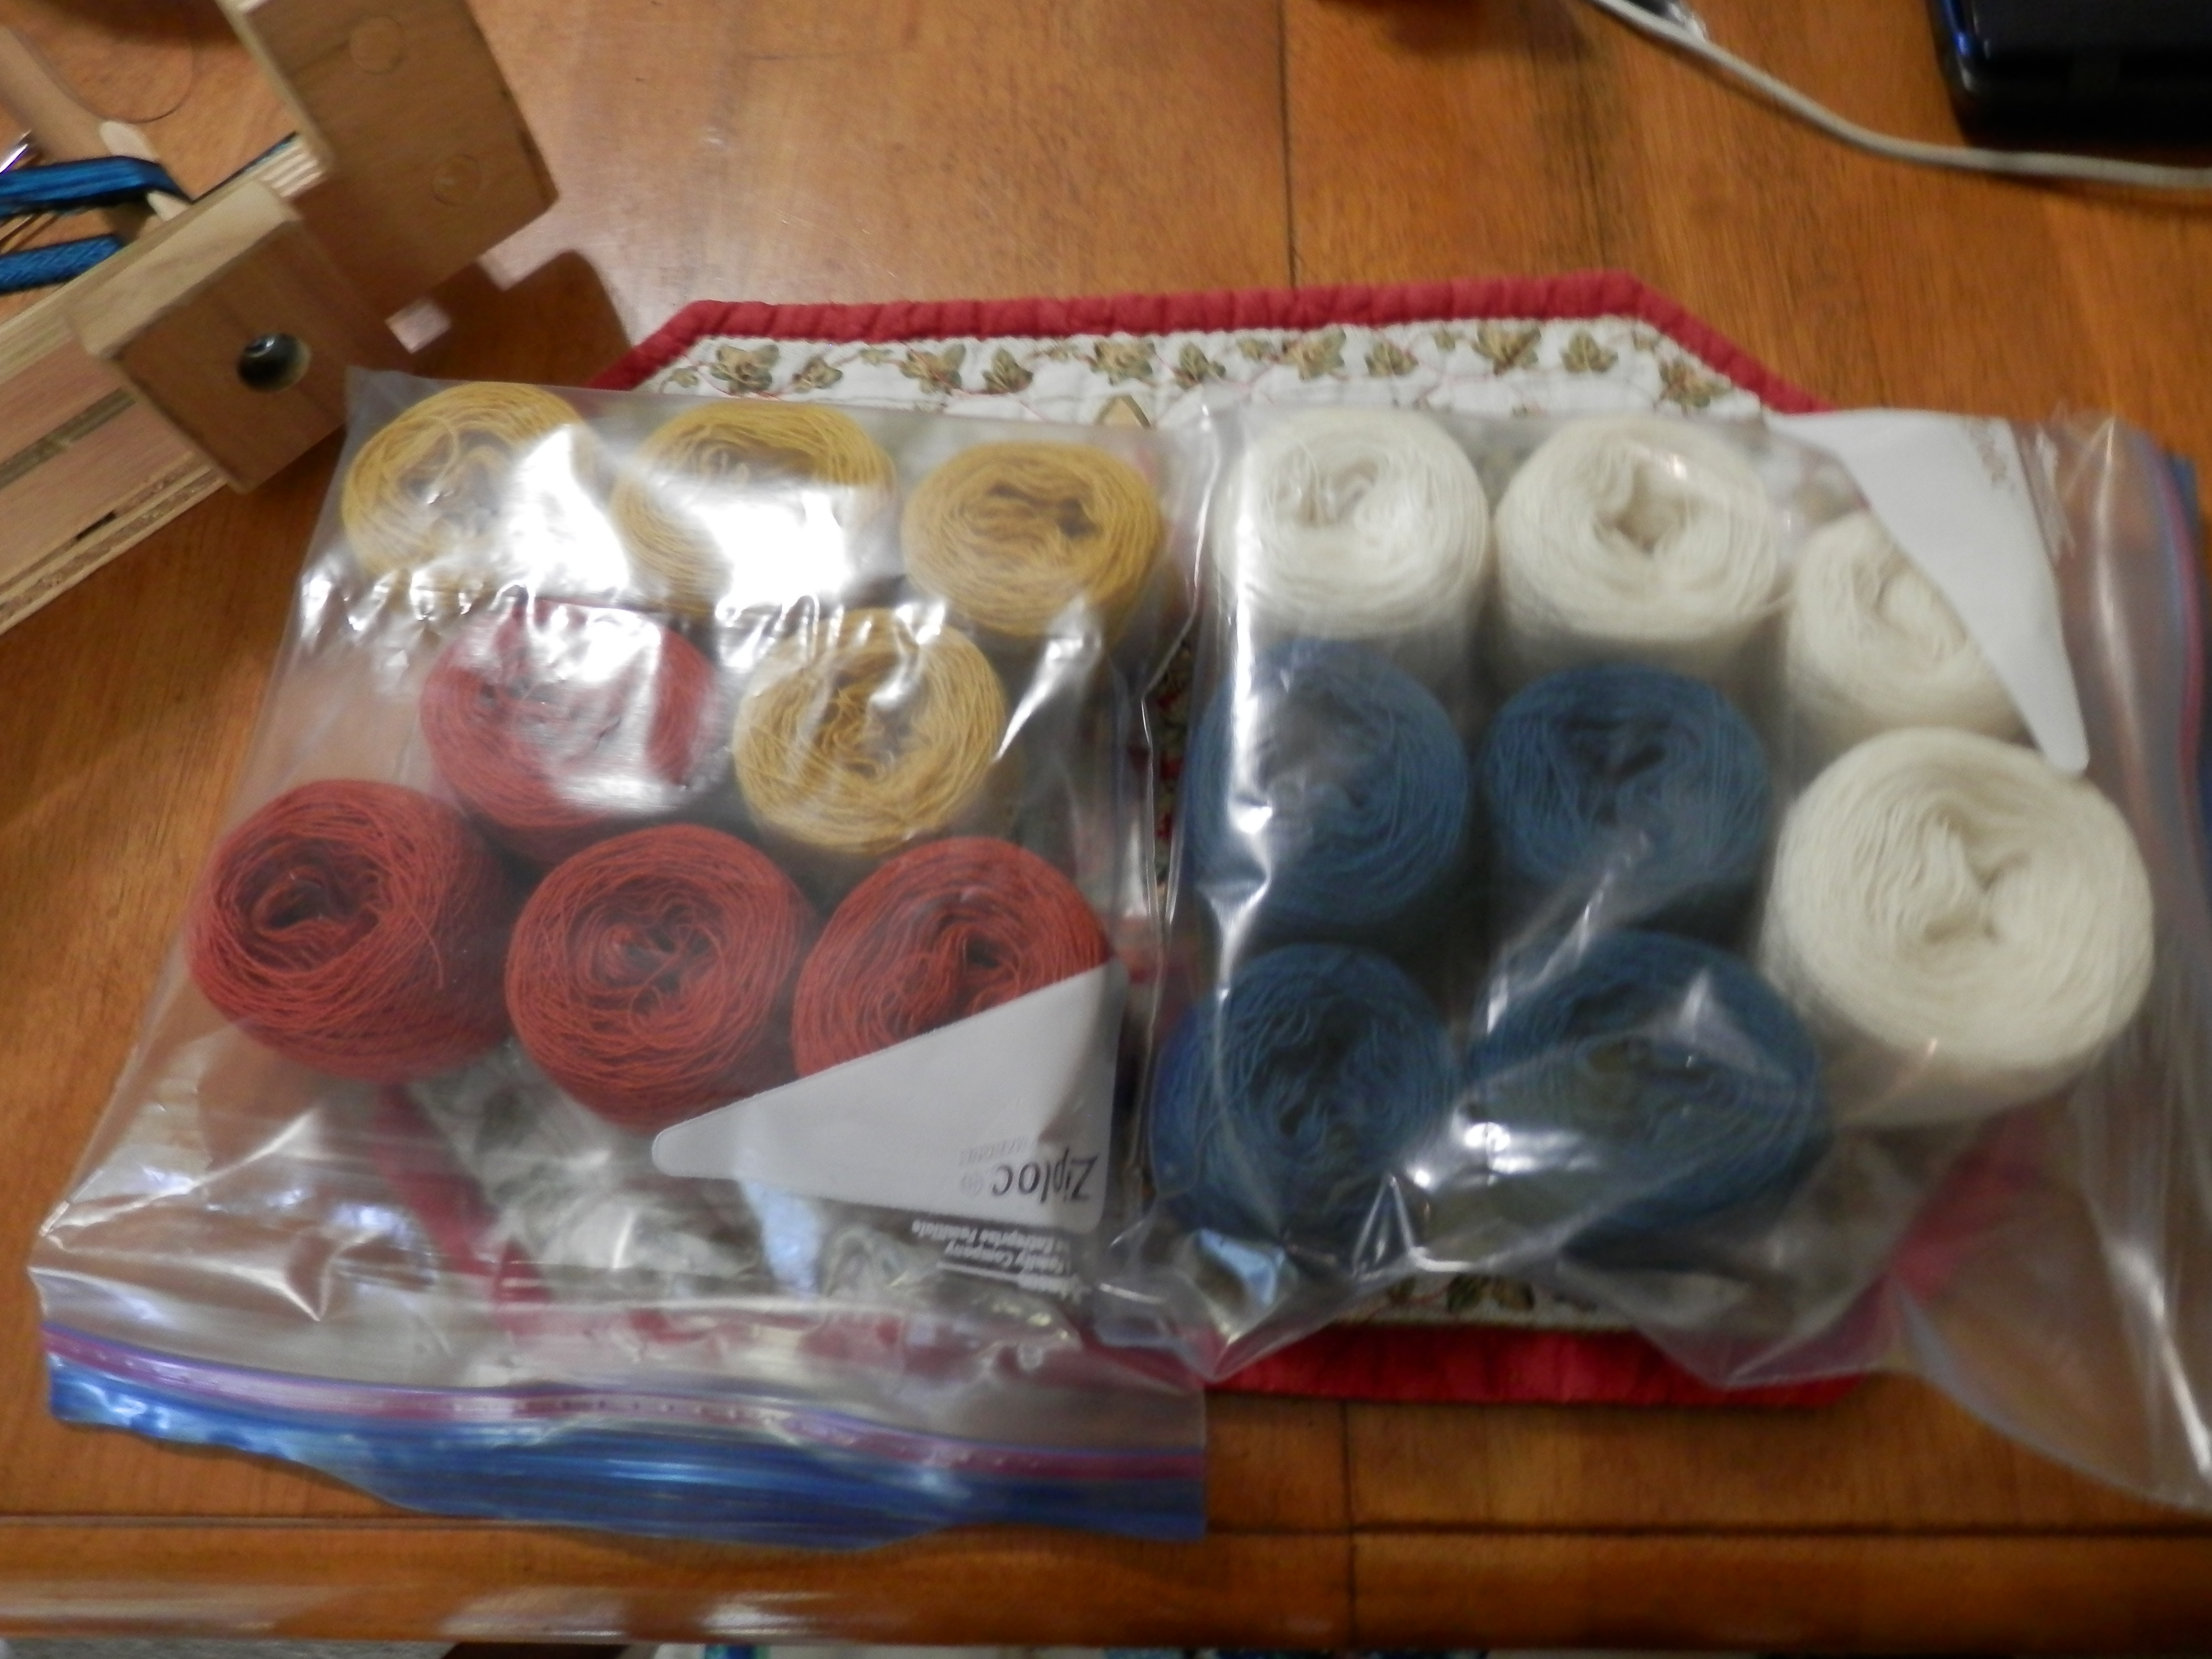
Step one was acquisition of the wool; I will be going with commercially dyed wool since this needs to be done by late May (which is sooner than it sounds). I bought 20/2 Mora wool in four colours: blue for the background and then white, yellow, and red for the brocading. As you can see from the pictures below, I may have a slight surfeit of the brocading wool. Luckily wool can be used for more than one project at a time, no?
This is how the wool arrives from the vendor; in skeins that need to be wound off into balls to be useful for warping.
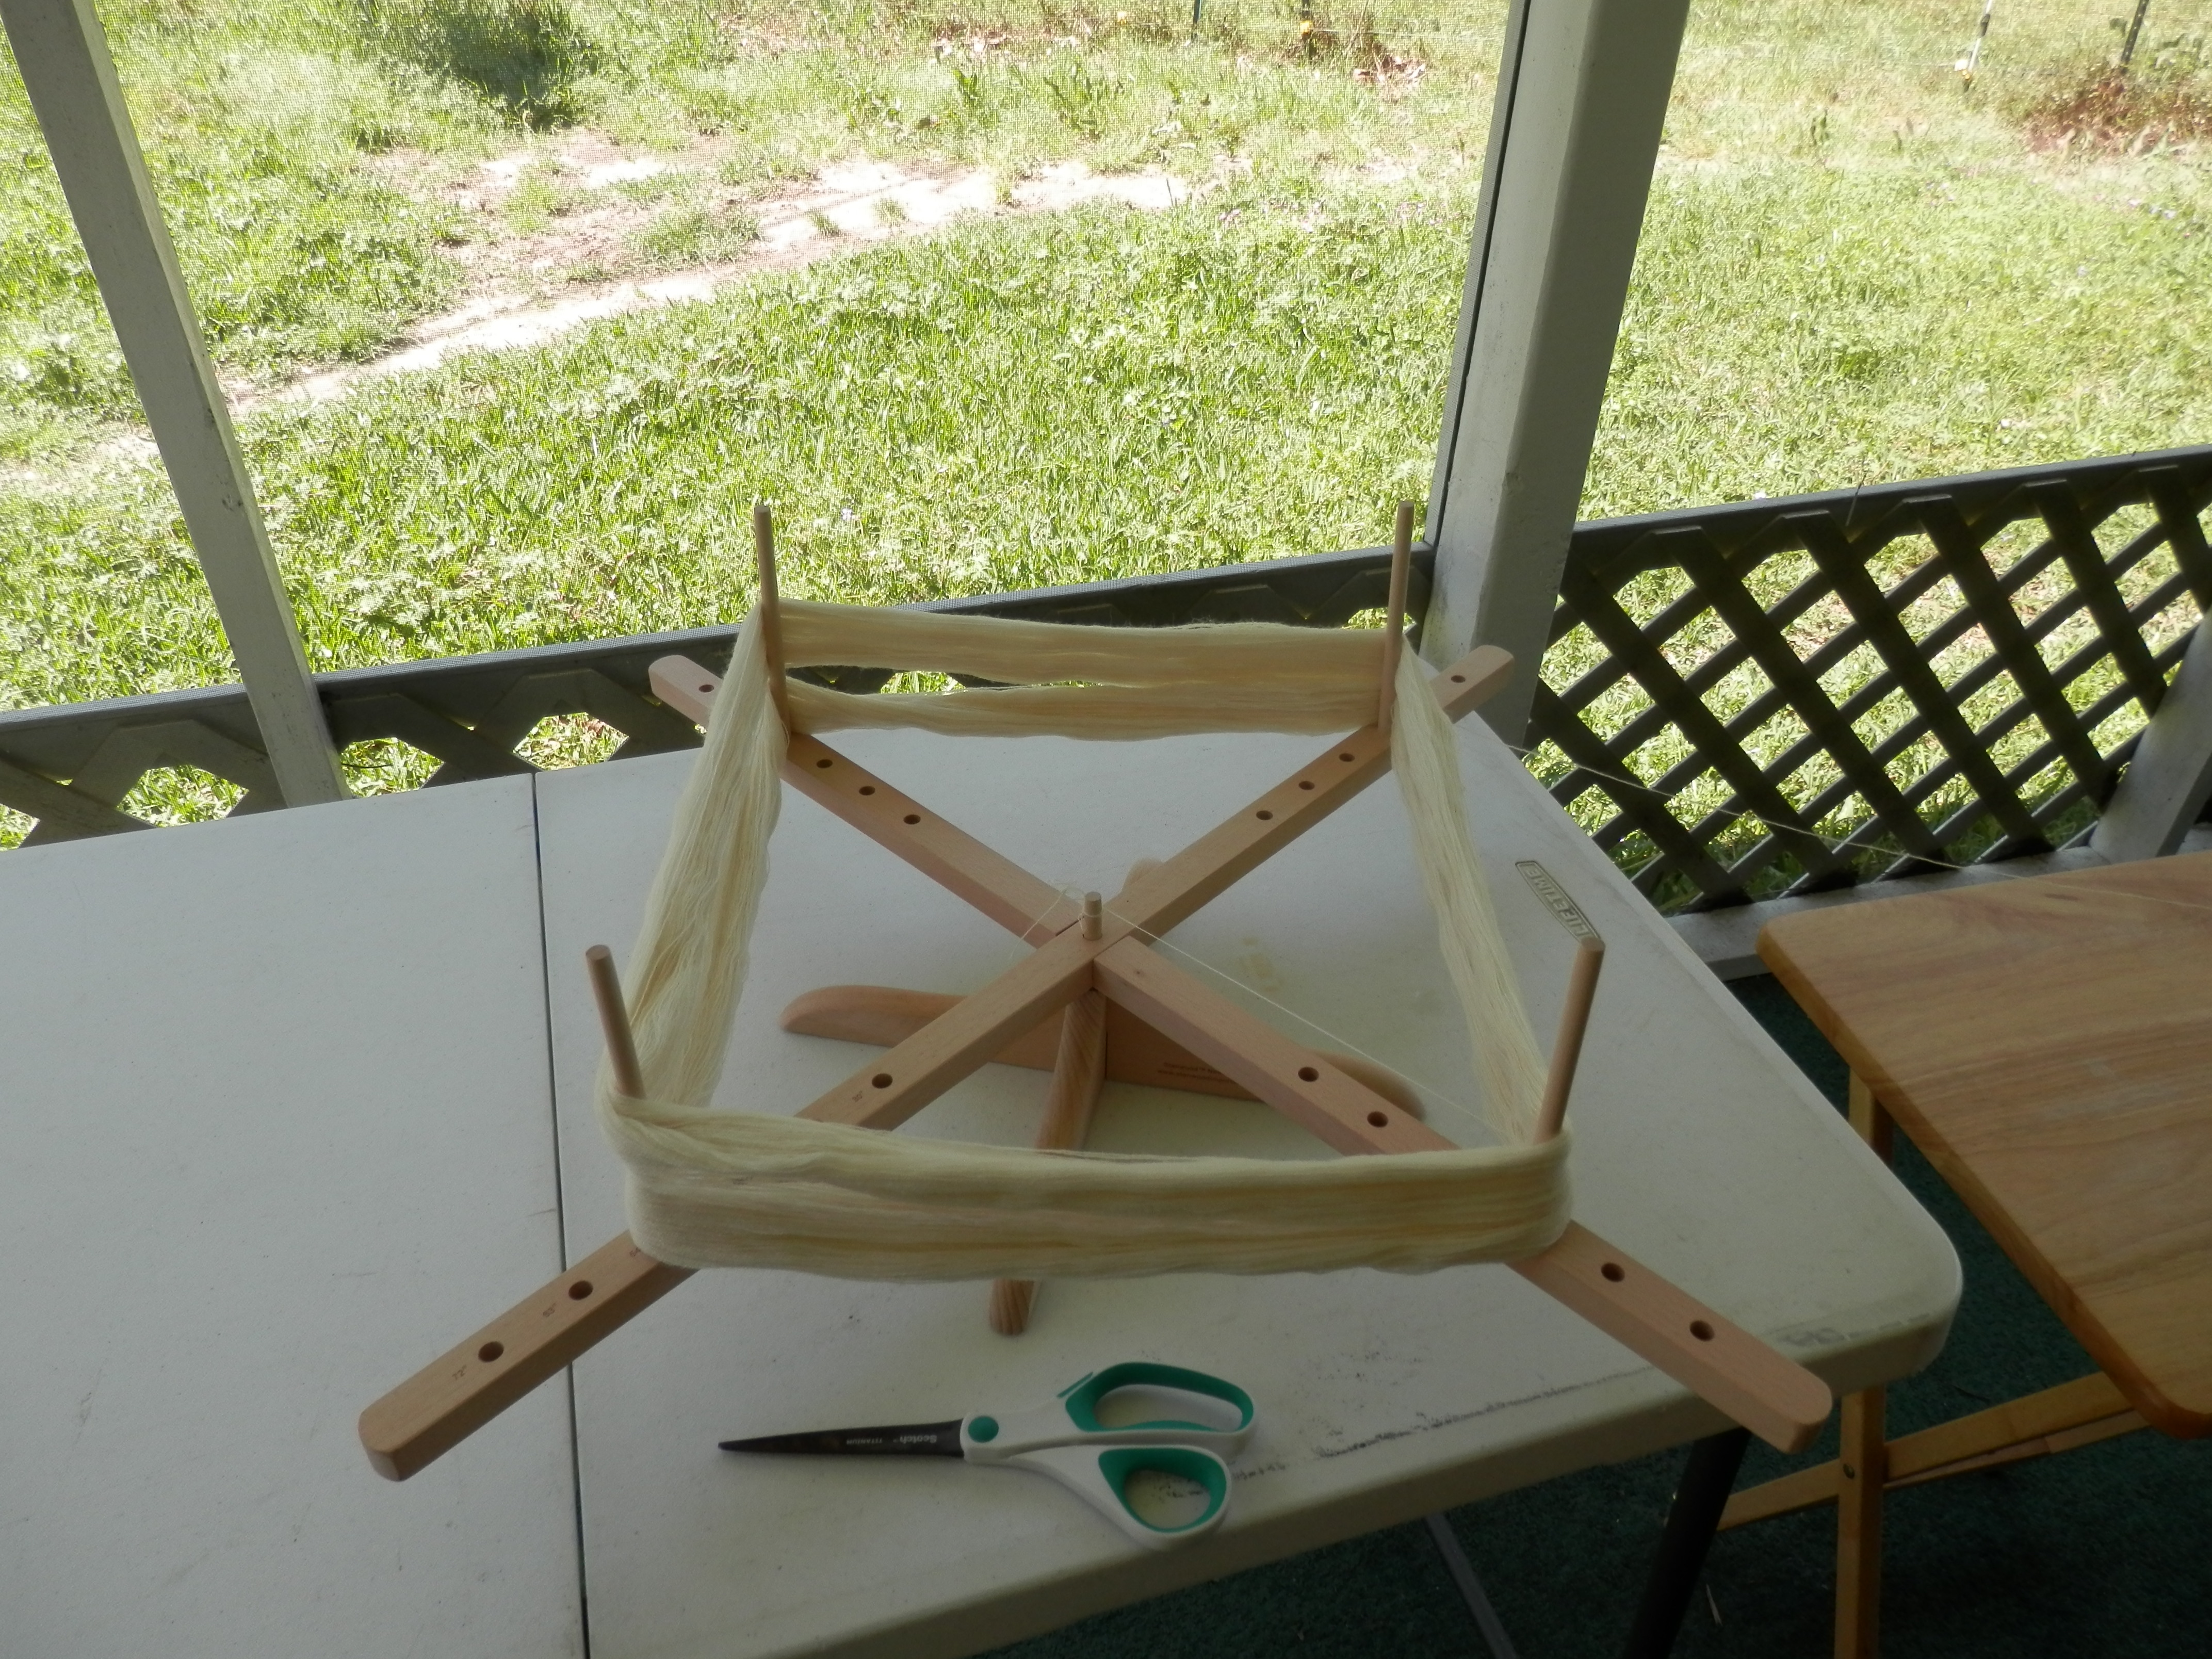
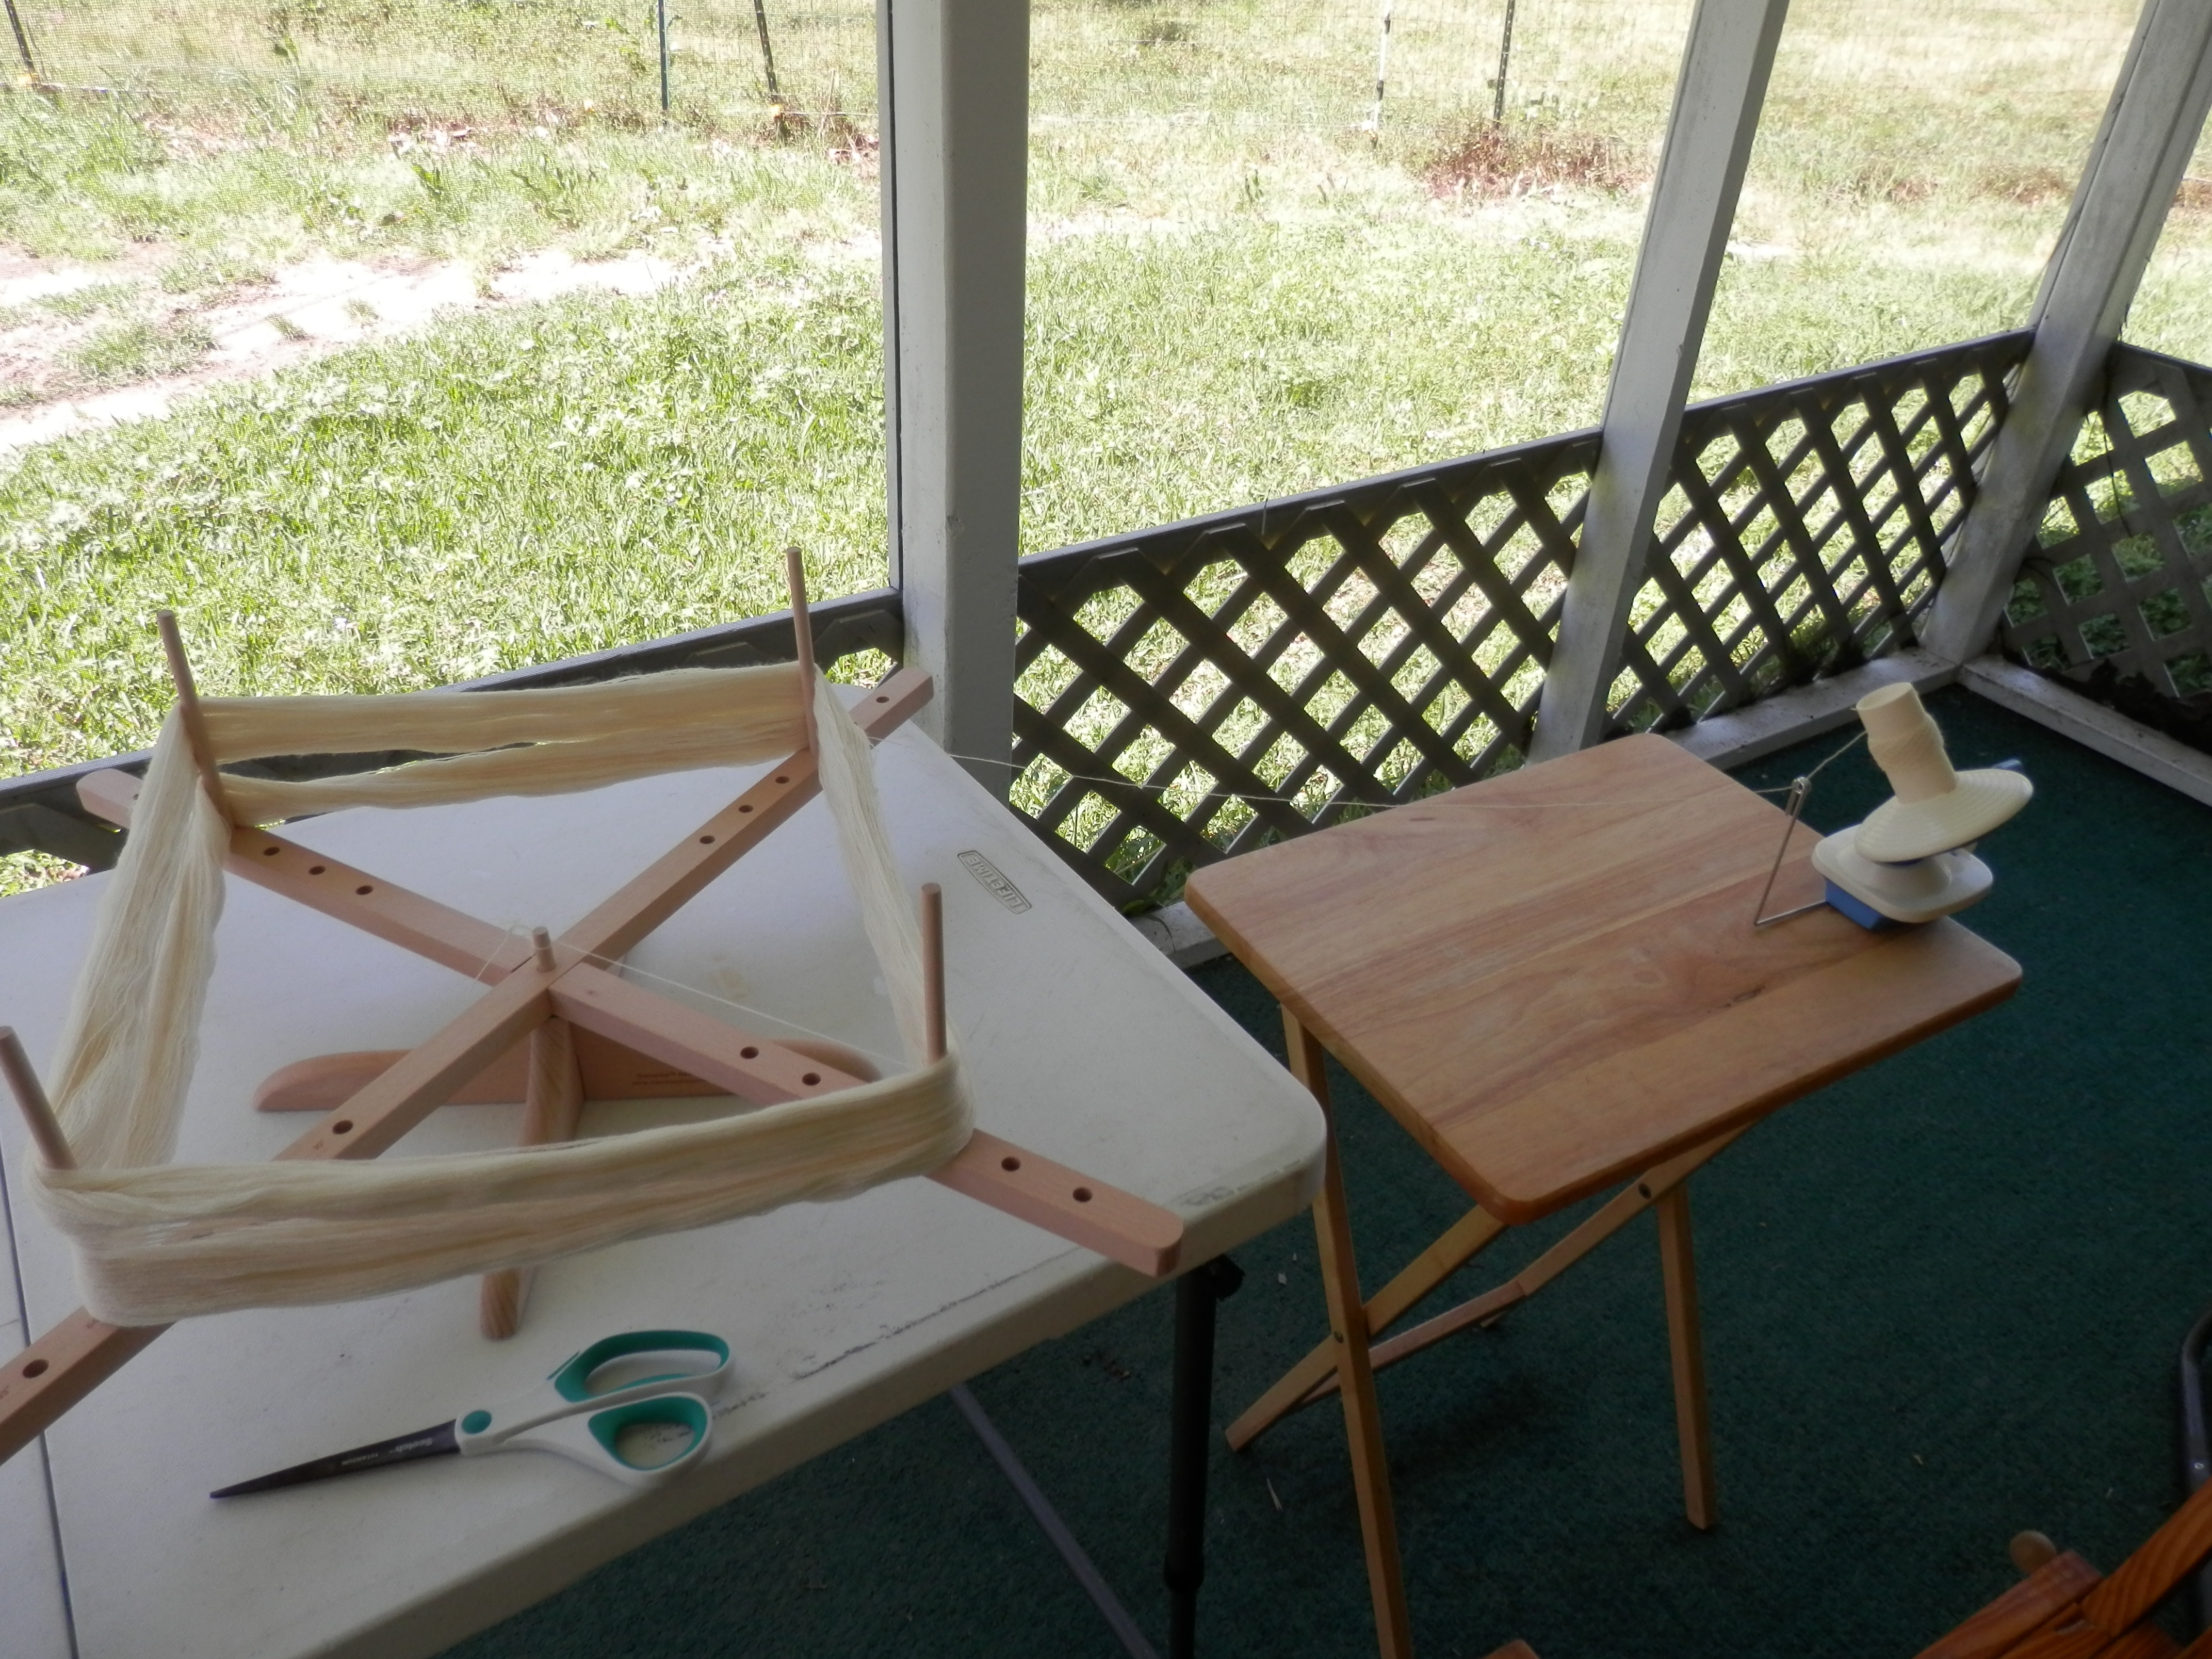
Step two was turning the acquired skeins of yarn into something I could warp. Swift and ball winder to the rescue. Note that the swift is constructed similarly to an old Viking horizontal swift, and is made entirely of wood, with the exception of the metal washer I added to facilitate the turning of the arms. The ball winder, in contrast, is thoroughly modern but faster than a nostepinne. And while it’s sunny, it’s not that warm outside.
The skein is mounted on a horizontal swift and then the end is found. After untying the skein, the end is fed into a ball winder and the turning begins. Each skein was wound into four very roughly equal balls of wool; sizes were eyeballed.
The advantage of having four balls is that I can quickwarp, when I get t that stage.
Several hours later, all four skeins have been turned into center-pull balls of wool, ready for the next stage.