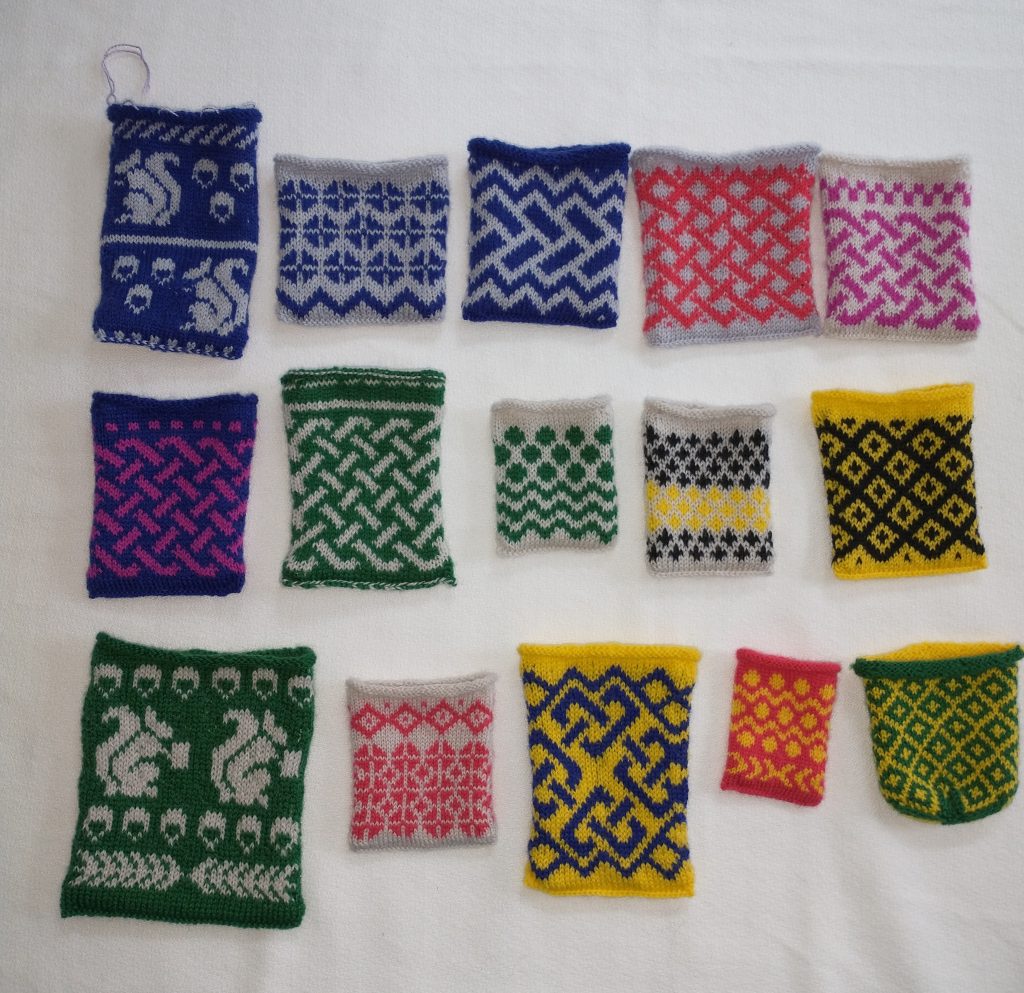
So I had promised to enter something for kingdom A&S, and I had some pouches knitted. And then I knitted some more.
So … fifteen point five pouches will be there this weekend. 20 pages of documentation, most of which is how to instructions.
Ramblings of a Mississippi Weaver
So I had promised to enter something for kingdom A&S, and I had some pouches knitted. And then I knitted some more.
So … fifteen point five pouches will be there this weekend. 20 pages of documentation, most of which is how to instructions.
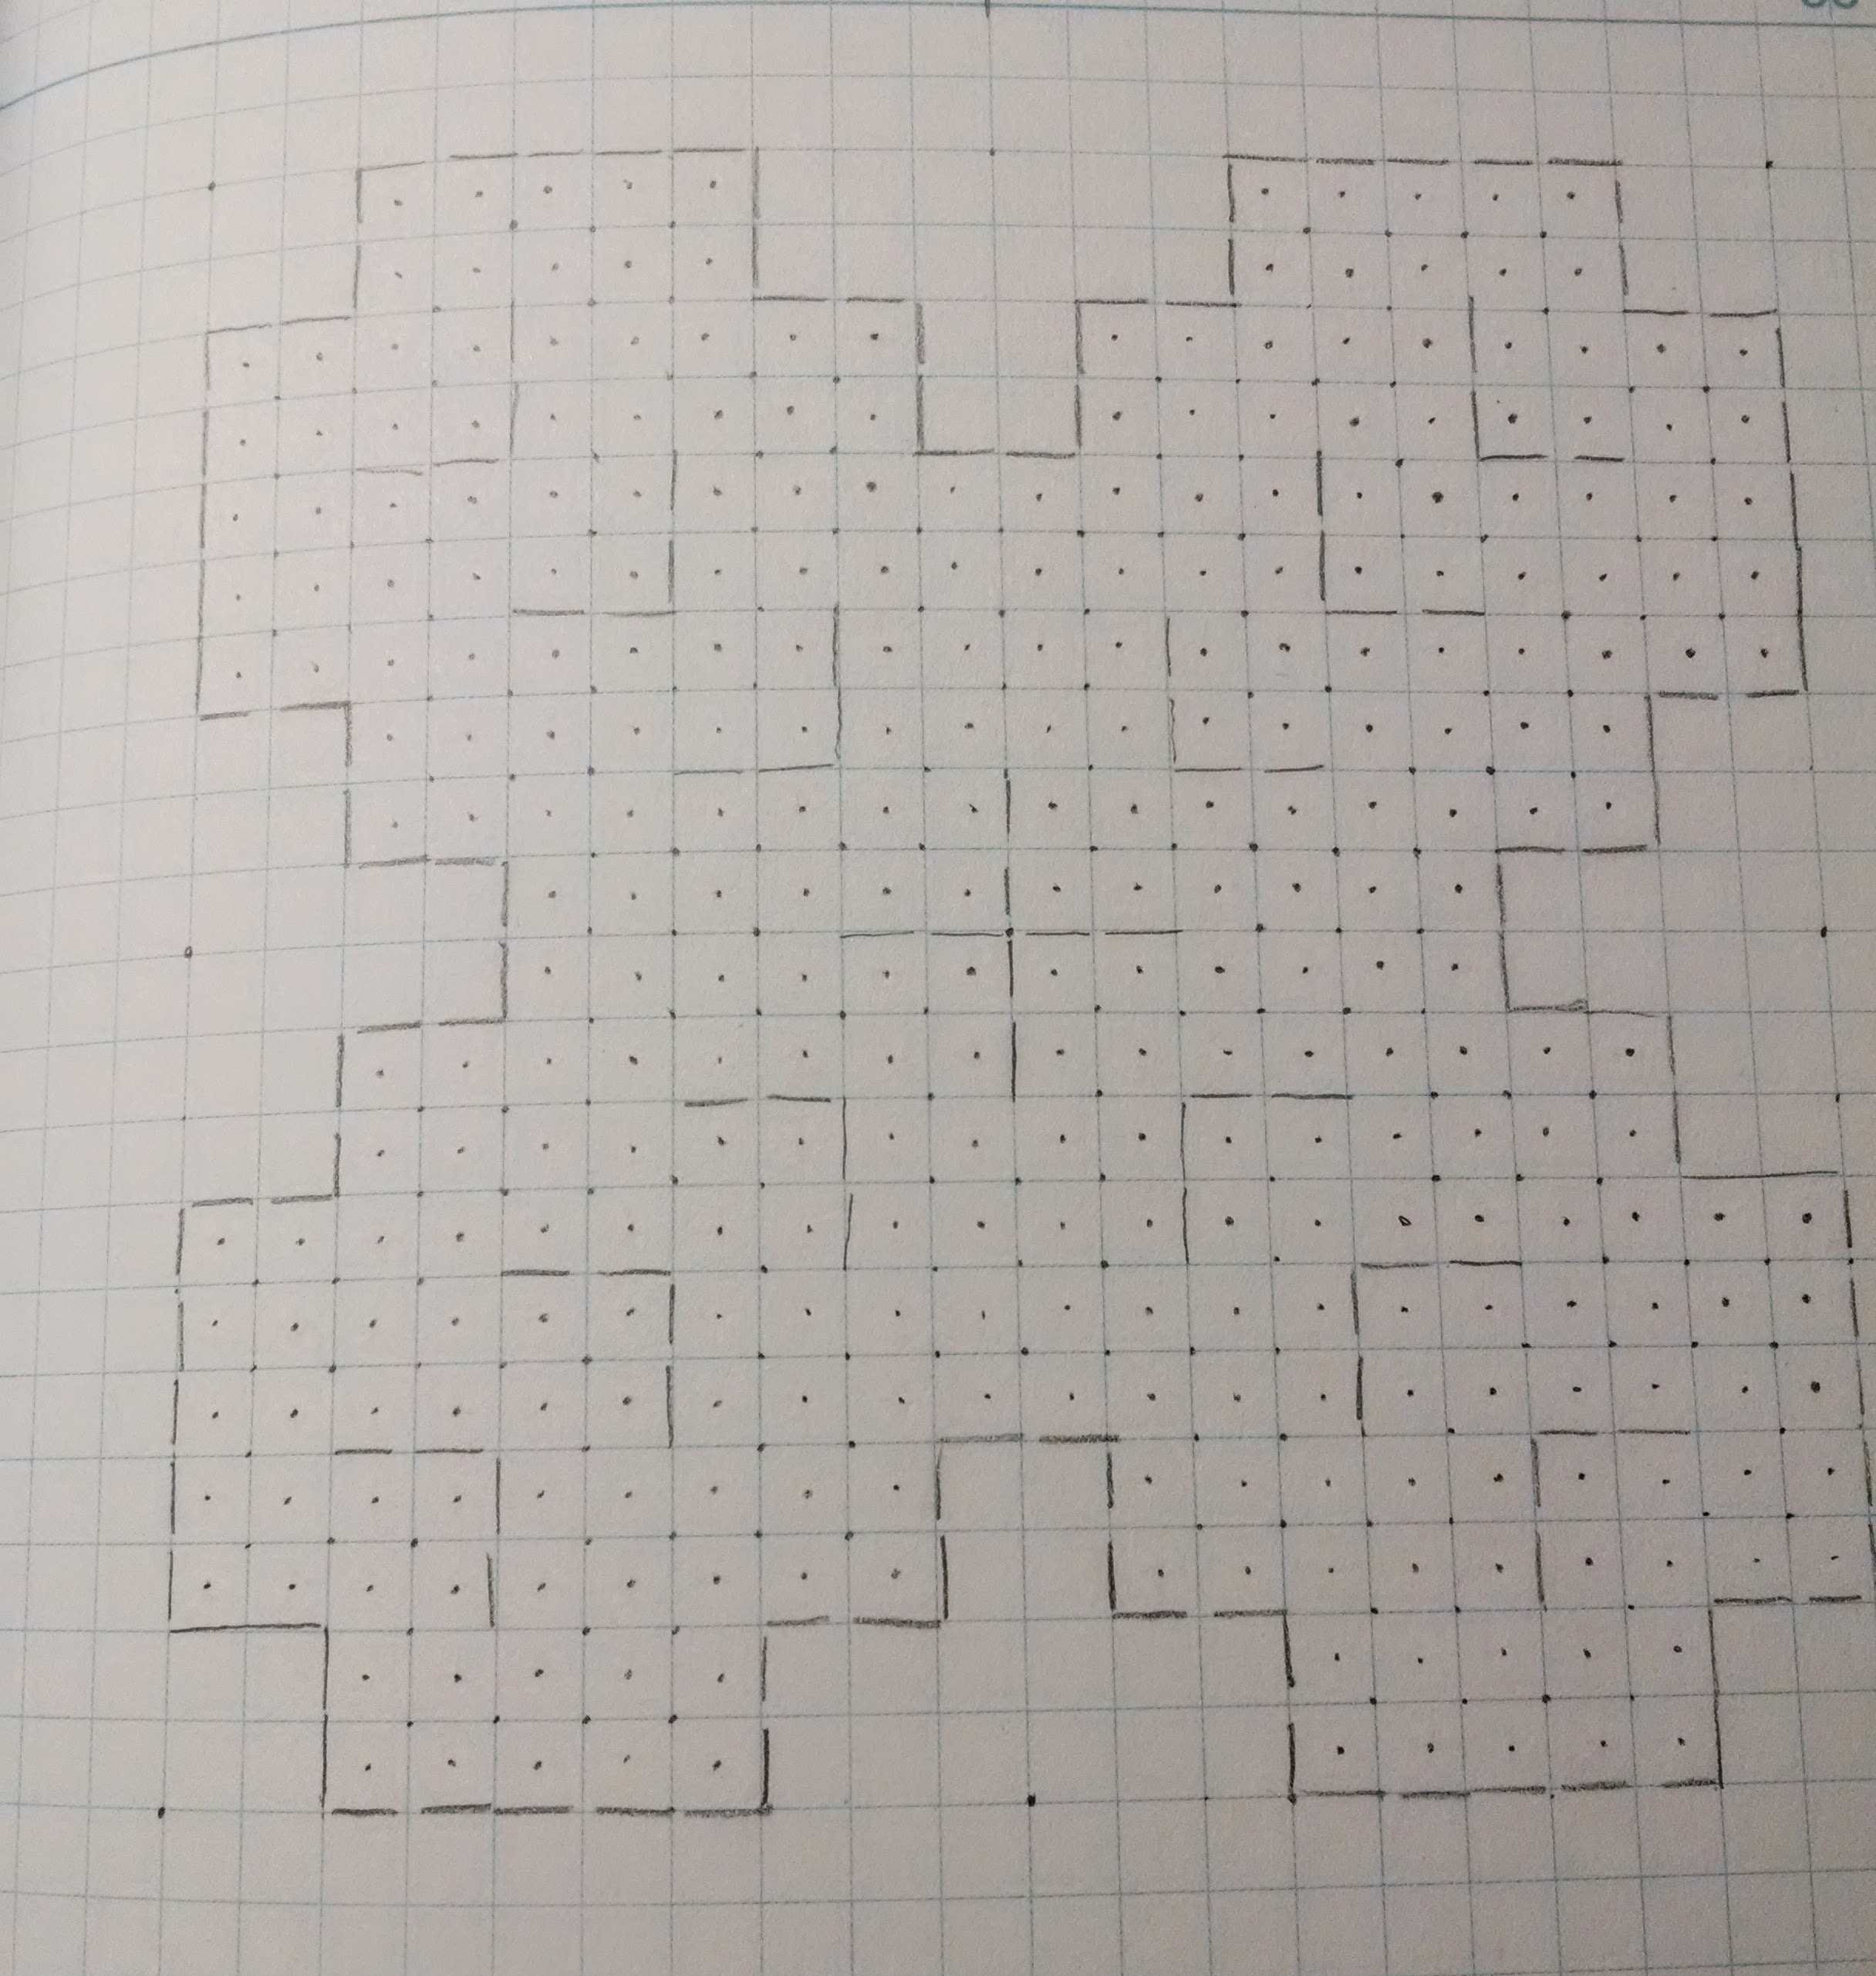
In Zen and the Art of Celtic Knots I talk about a fairly foolproof technique for making square Celtic knots. I’m still working on the journal I started before that post.
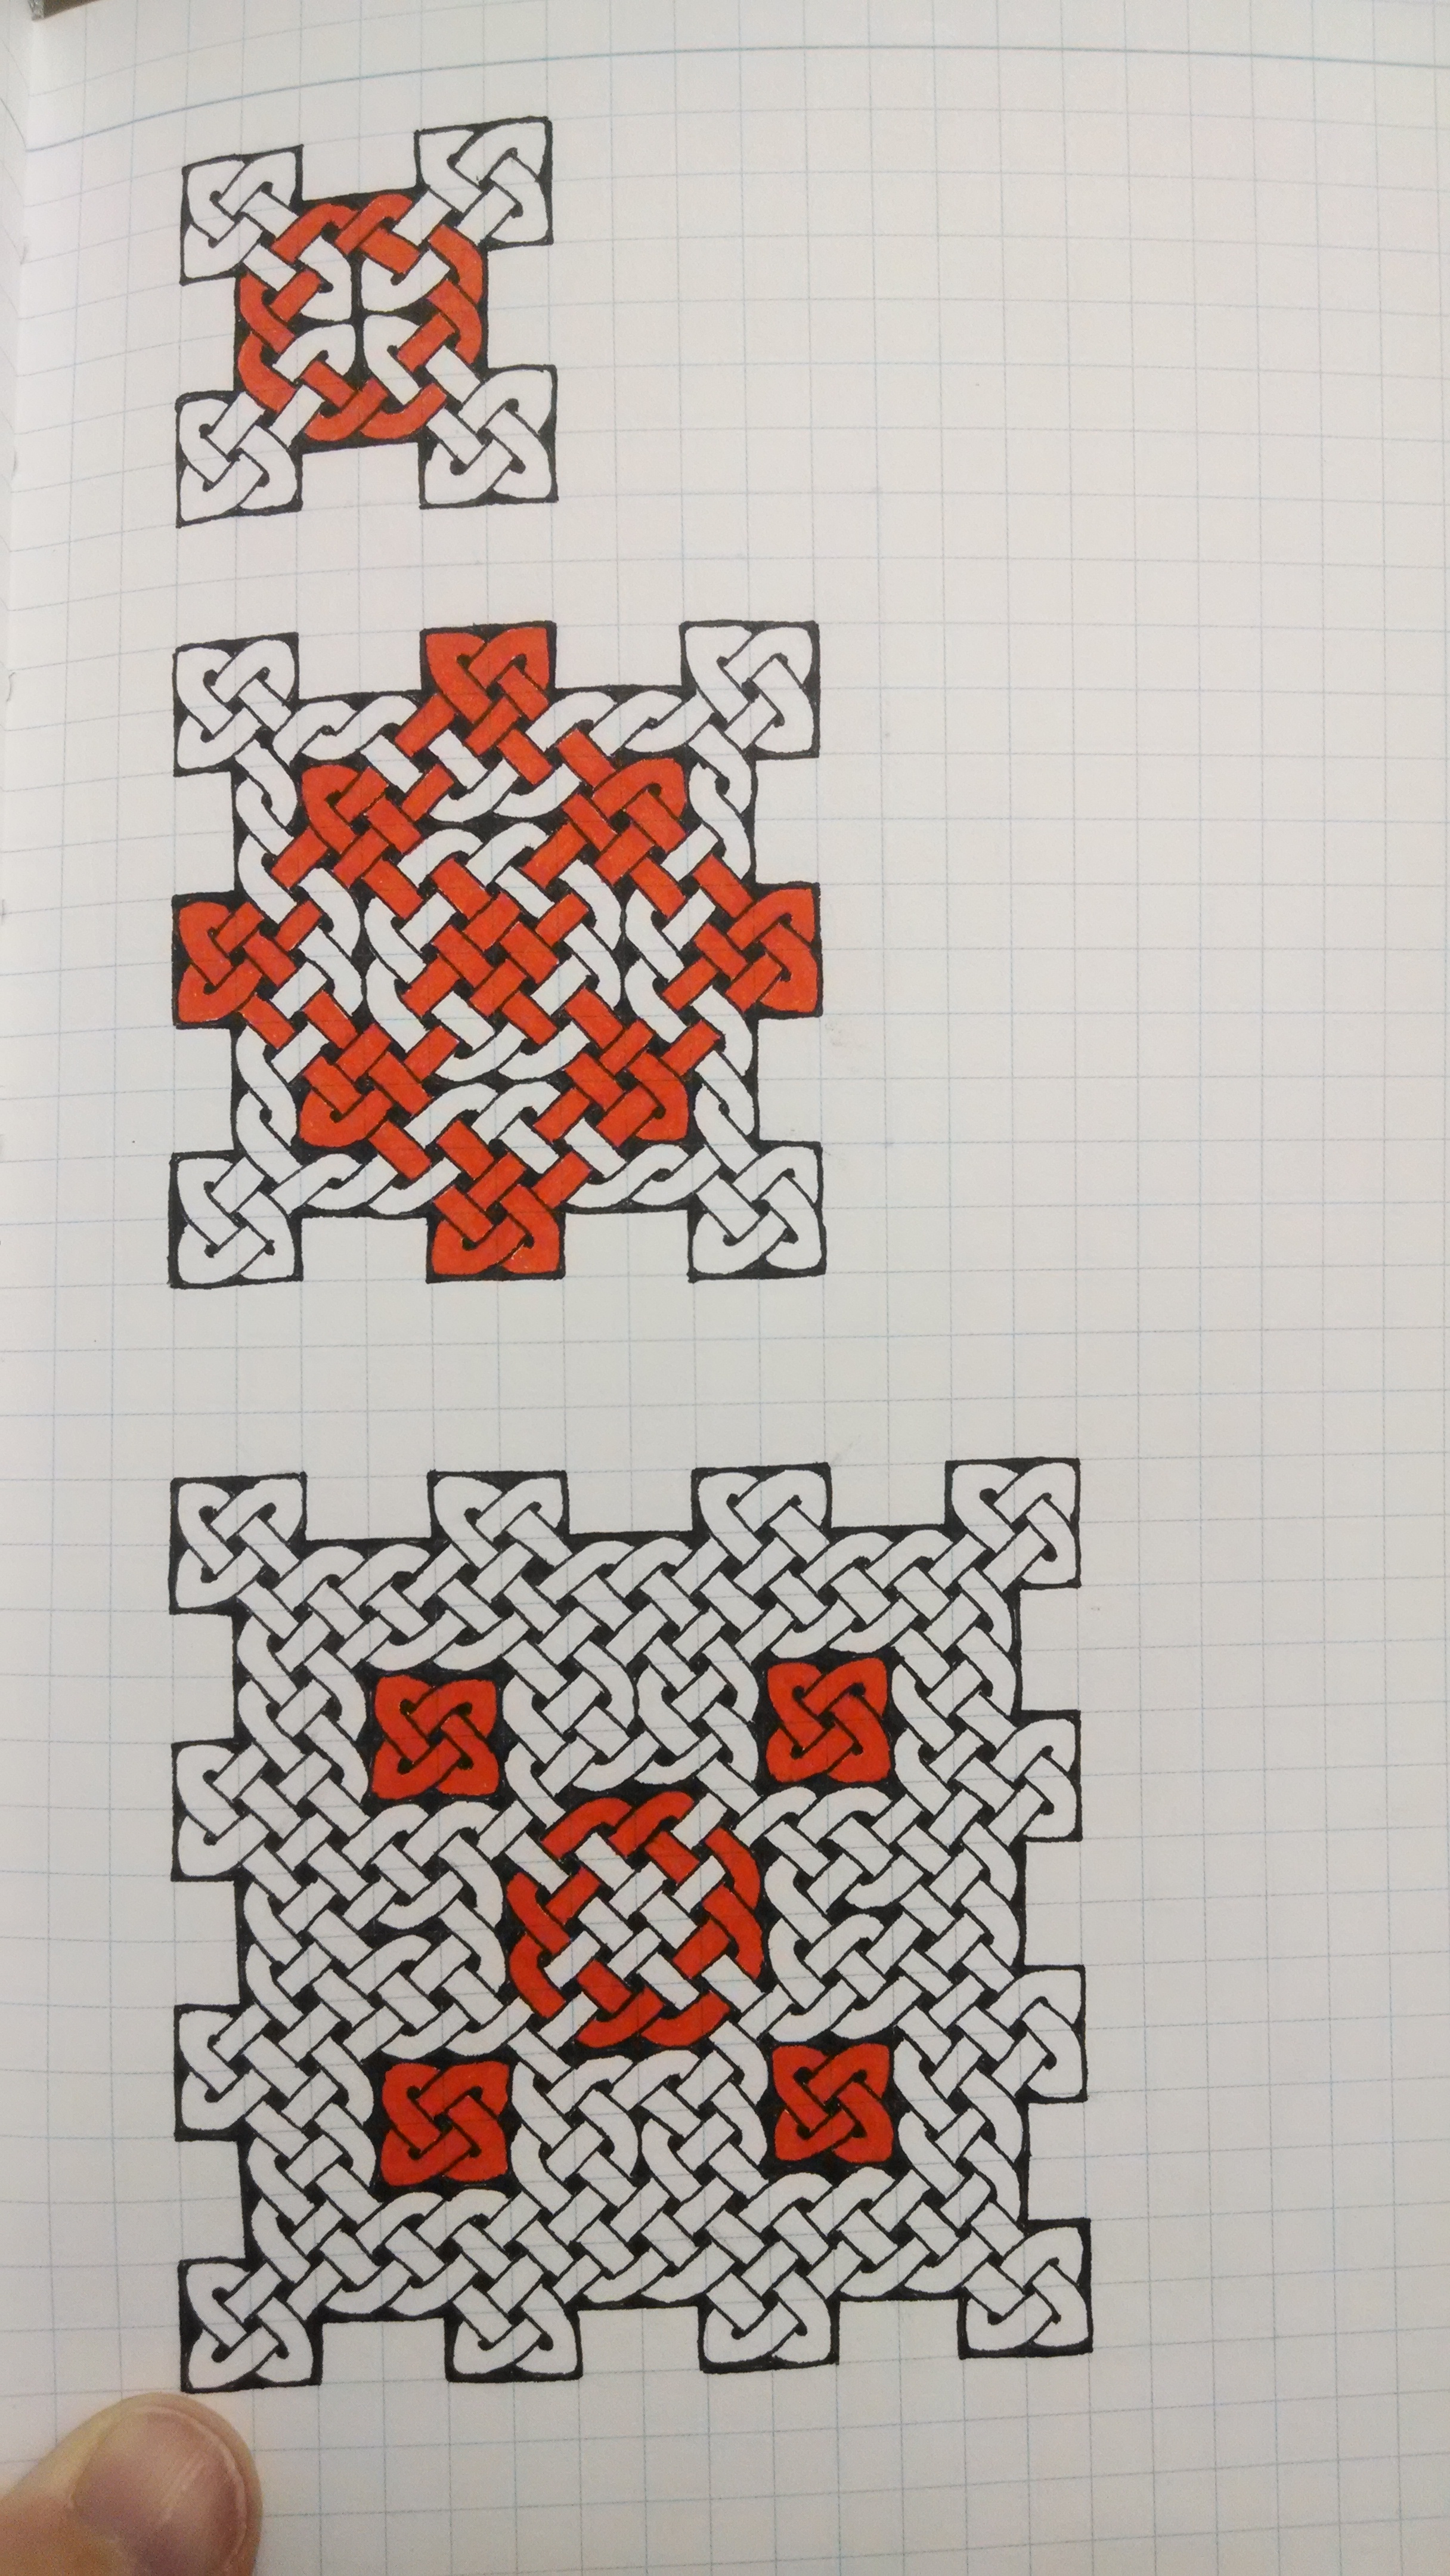
The first thing I did was start adding a little colour, just to highlight ribbons. Now in the Book of Kells and the Lindisfarne Gospels the ribbons can change colour in midstream, but here I was experimenting with the effect of highlighting one ribbon.
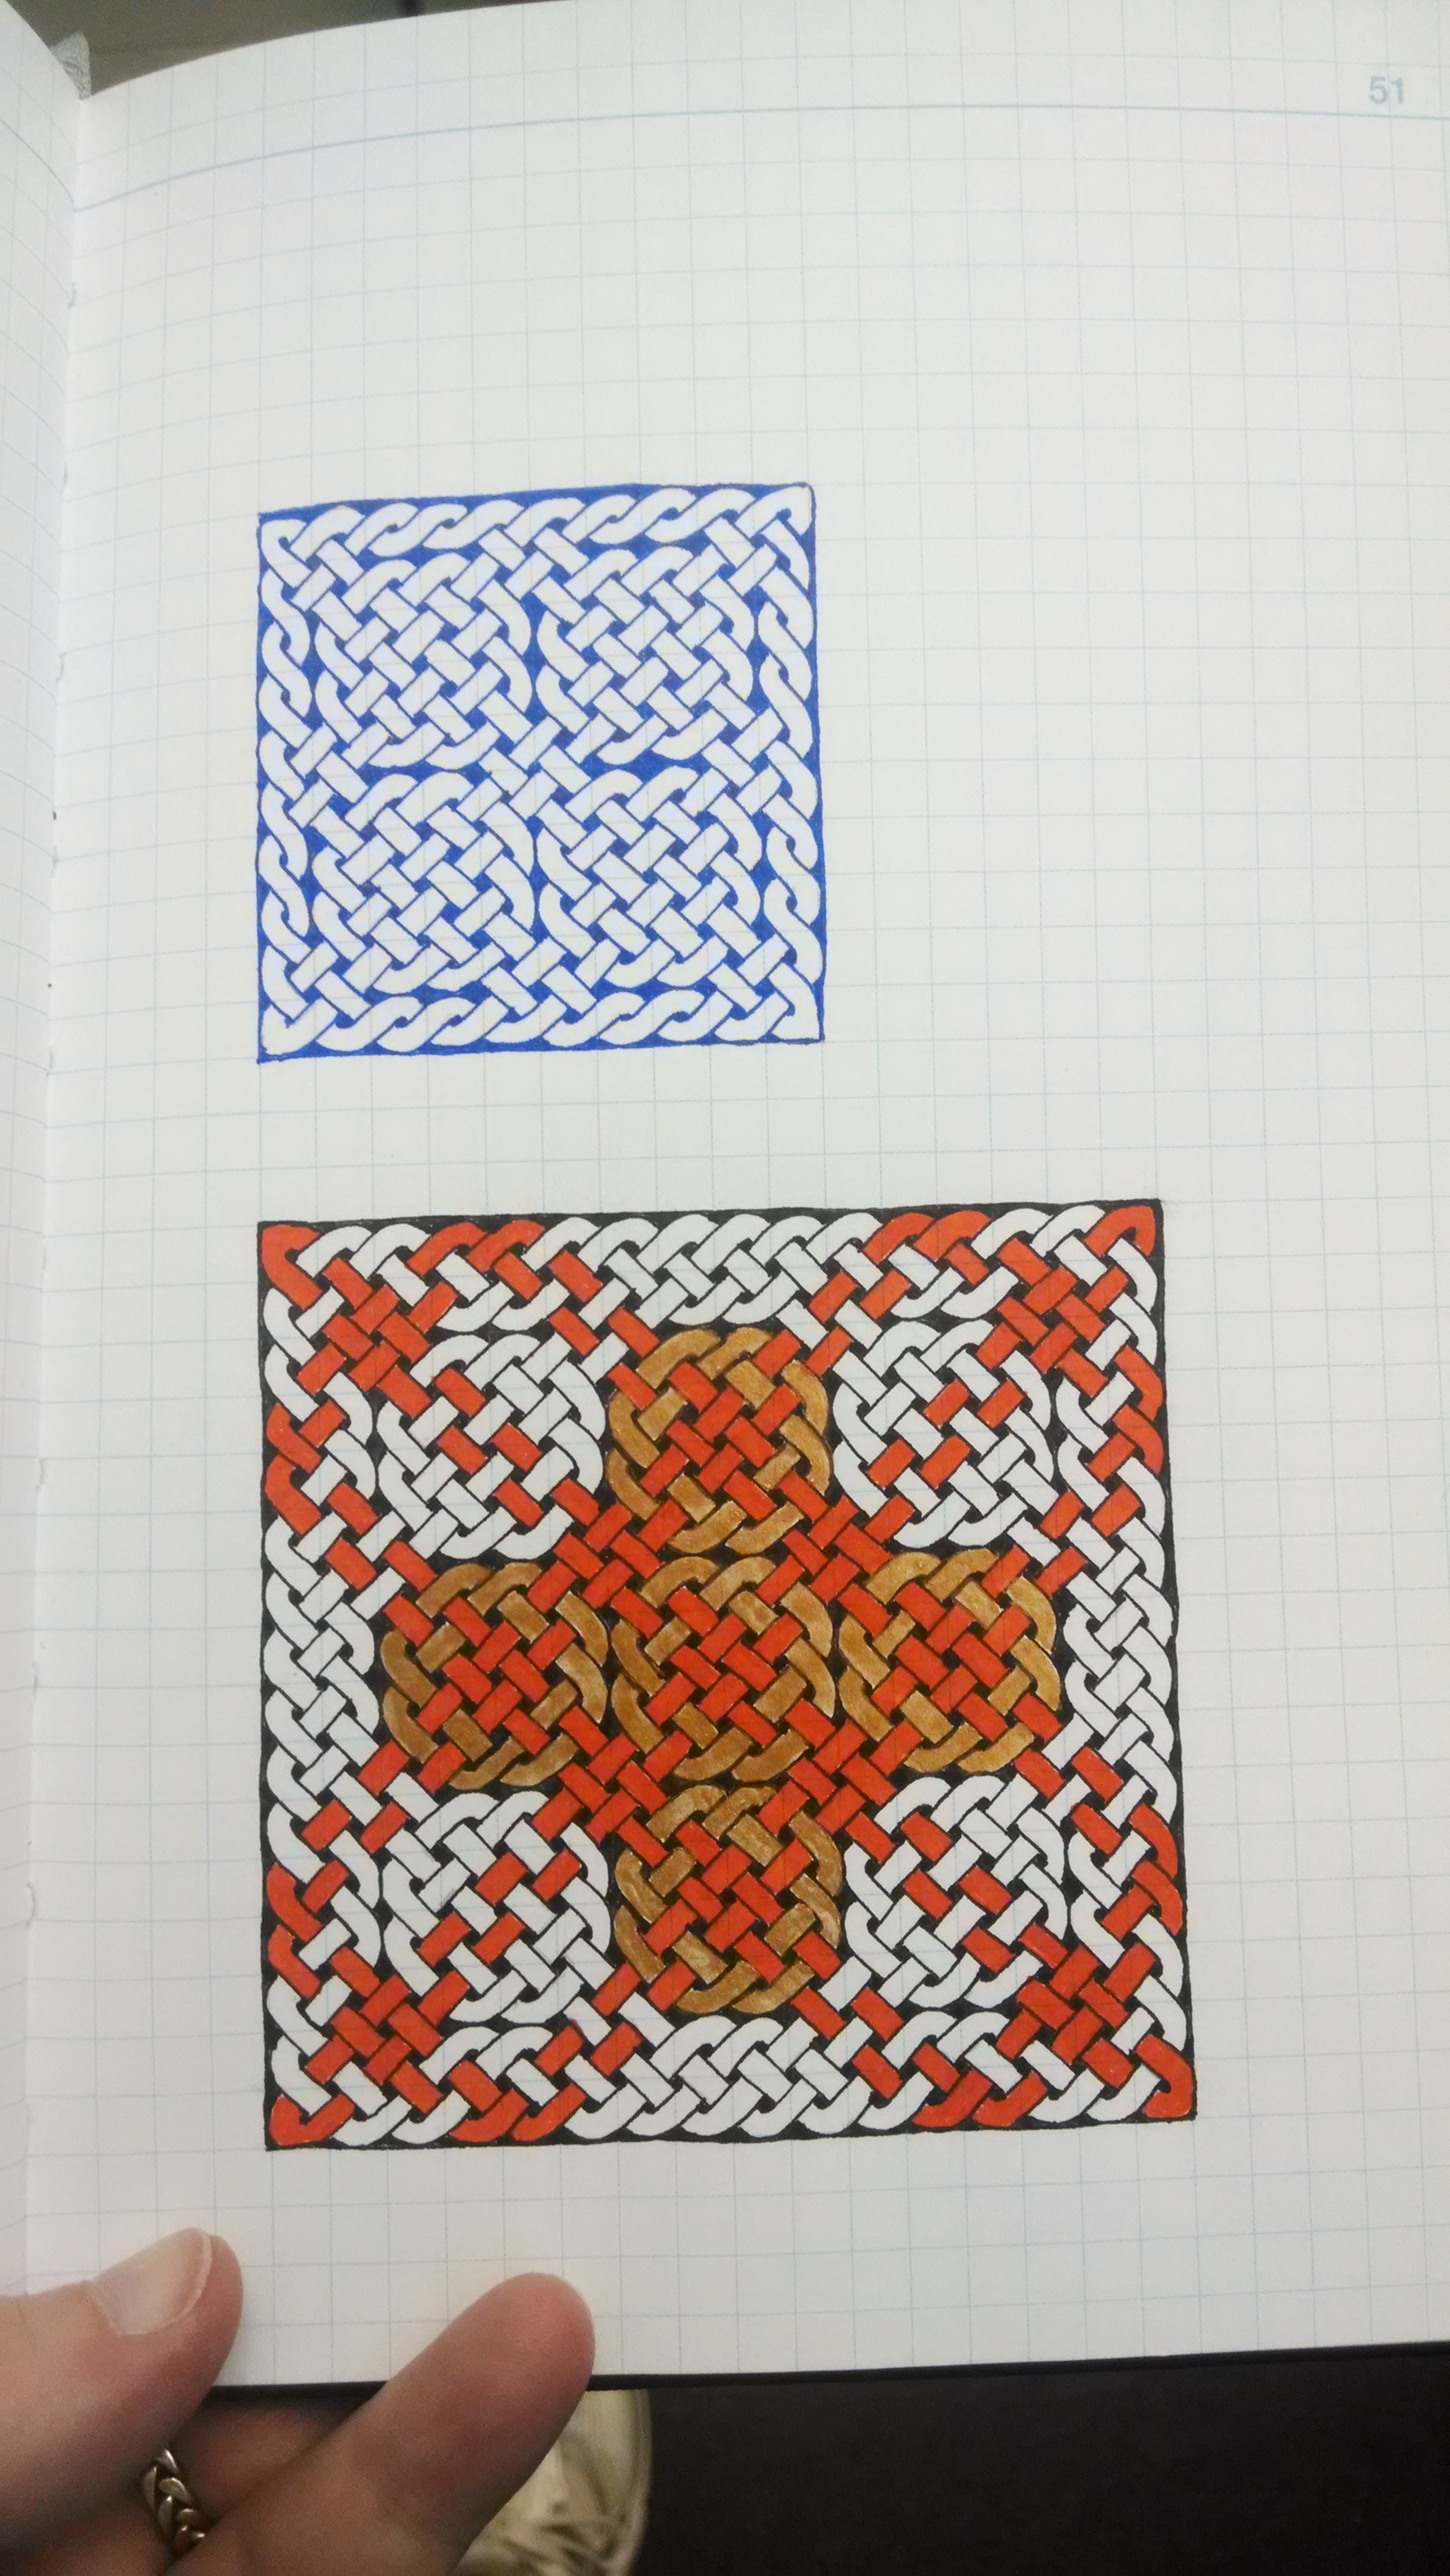
Then I started adding a second colour, to see how things popped. And the gold is much shinier, of course, in real life. I noticed, too, in the blue knotwork that the inner squares became subtly visible. Sort of a shadow play. So of course I had to go a little bigger and experiment more.

Here the blue and the black knots both have the same basic structure, but the black knot is drawn on a bigger field making the cross quite definitely more subtle.

The last successful experiment were these interlocking boxes, especially the one in the center where the colours emphasize the various ribbons intertwining.
I’ve found that it’s easy at this point to make Celtic knots that cover a large area, but it is more challenging to arrange the outside and inside walls so that the large knot becomes, as it were, a tangle of smaller knots that combine to make a whole. And I am working on developing that ability because after that, I can turn the knots into brickstitch patterns.
P.S. This post inspired by Esperanza de Navarra’s 10 day challenge.
I spent a lot of time drawing Celtic Knots this summer, in a little journal. It helped me meditate, as it were. And it’s been a while. But the journal was here, lunch time was here, and my embroidery was a 10 minute drive away.
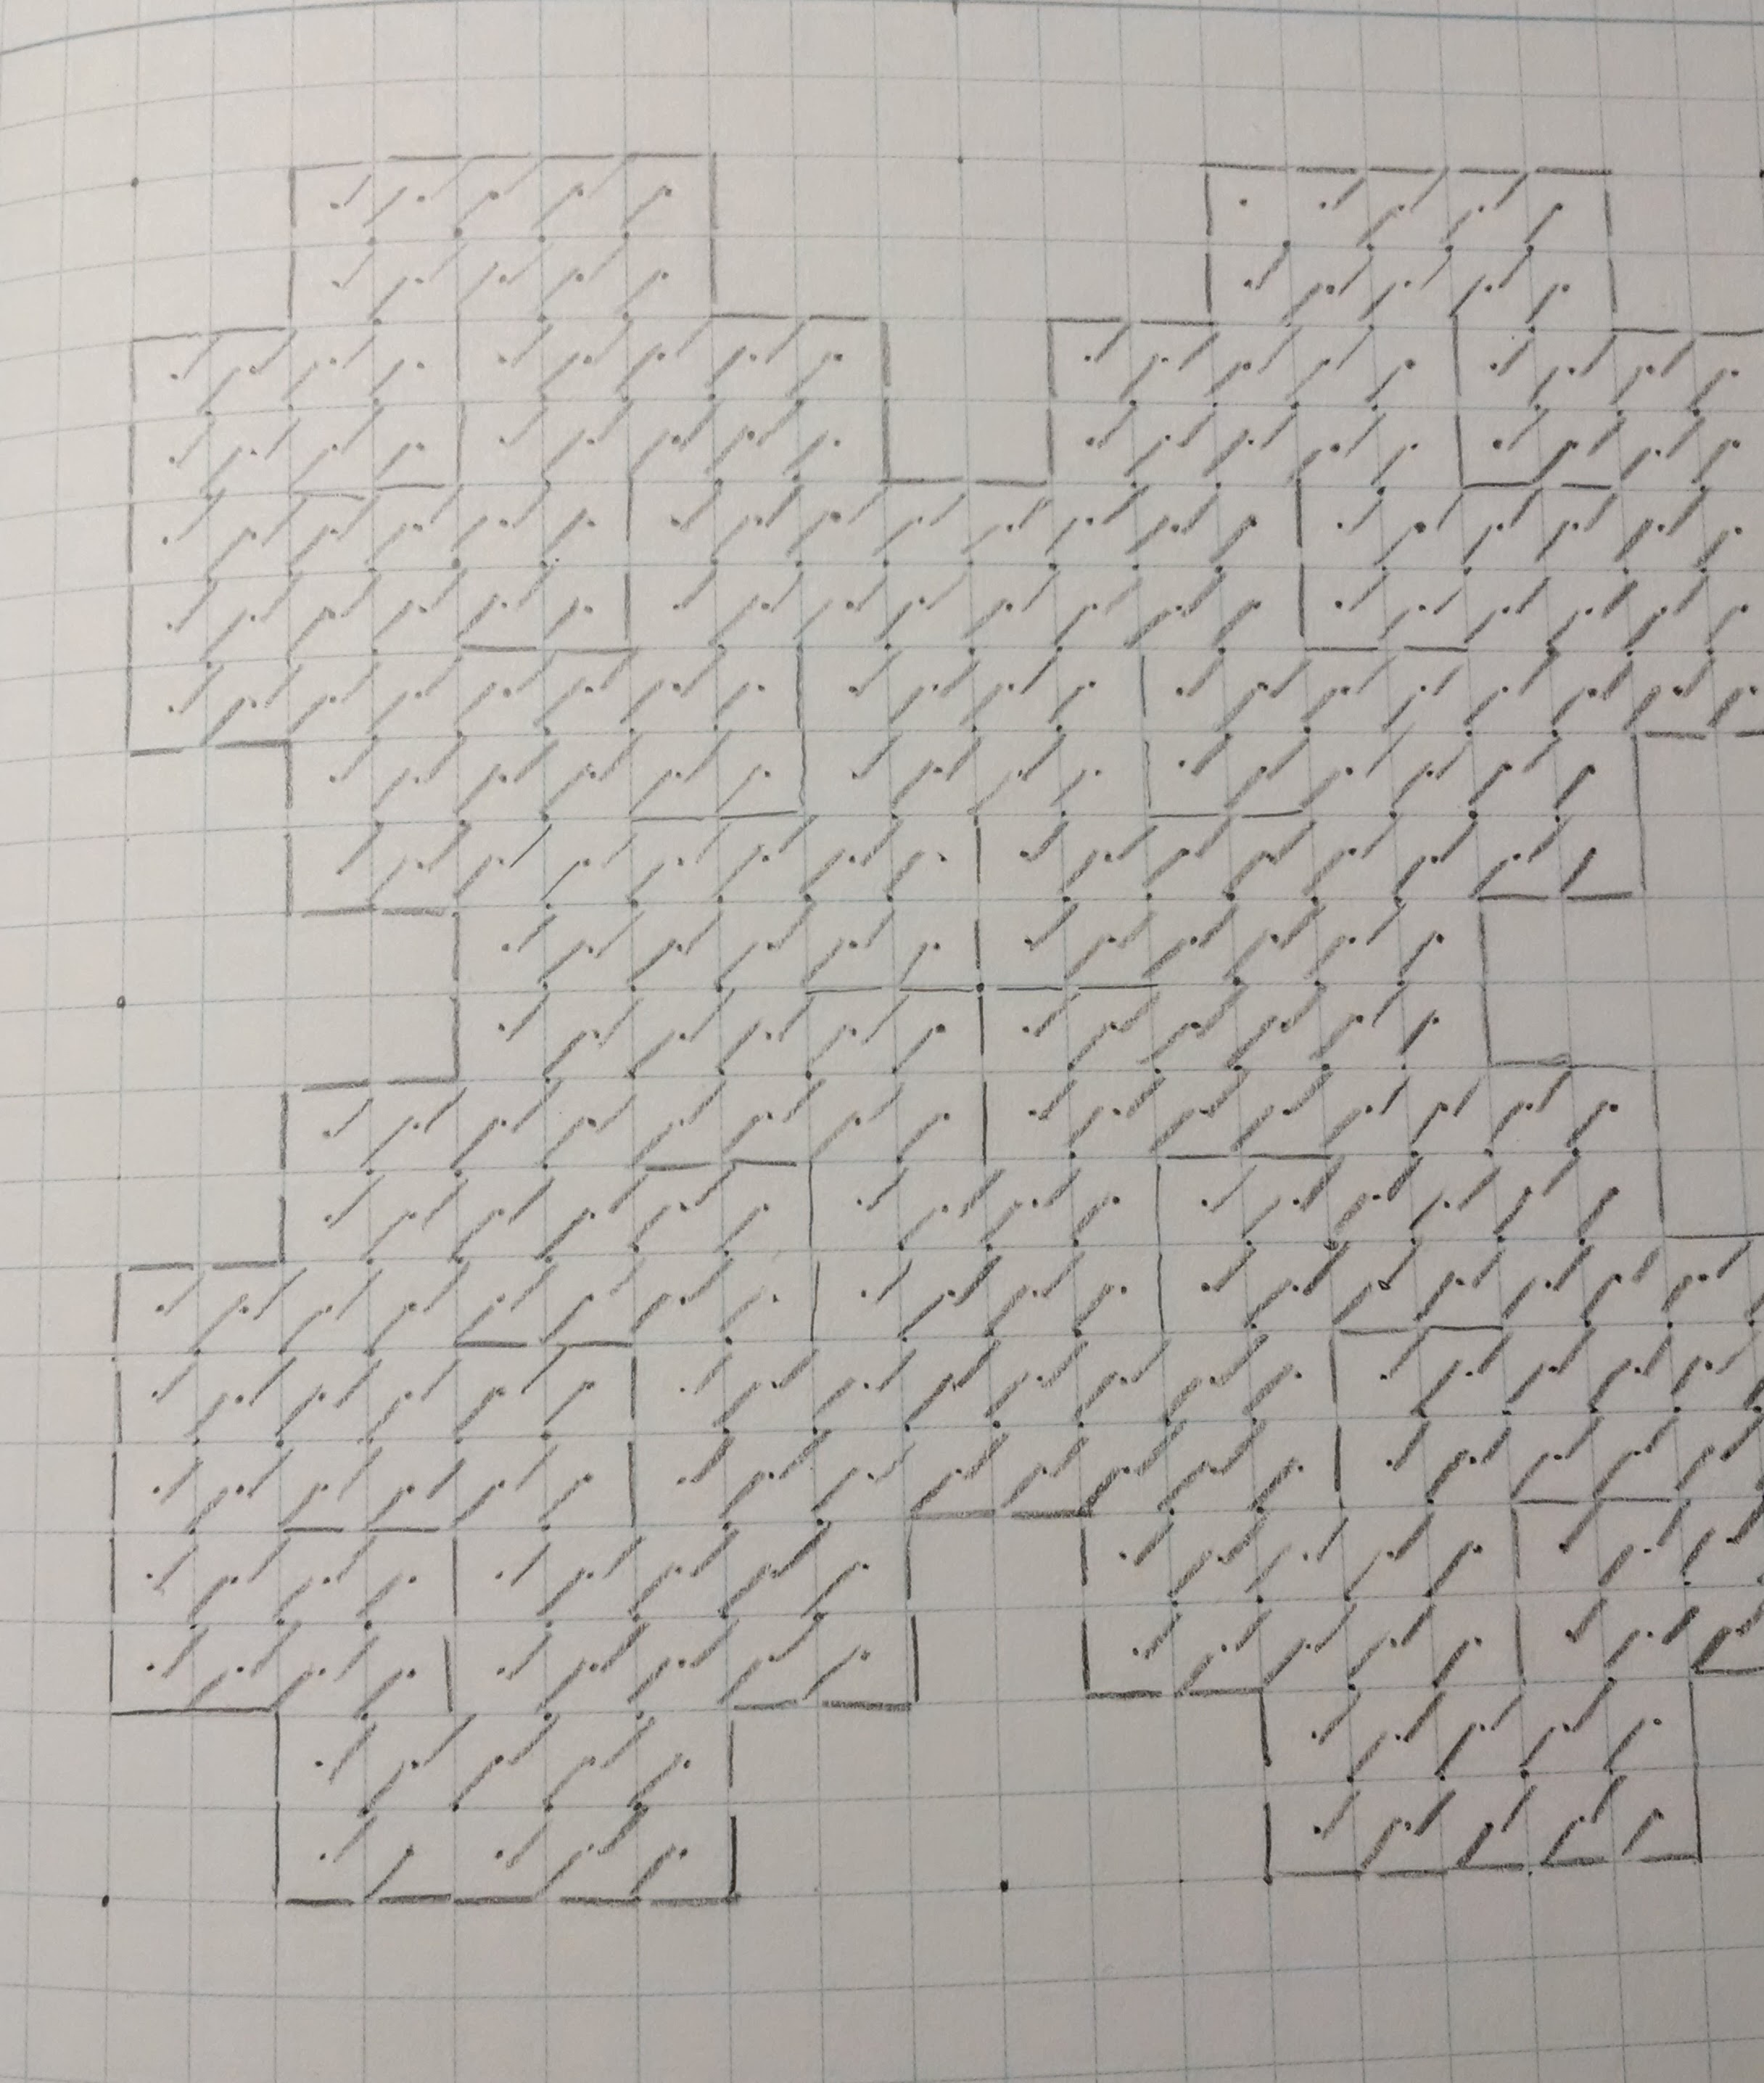
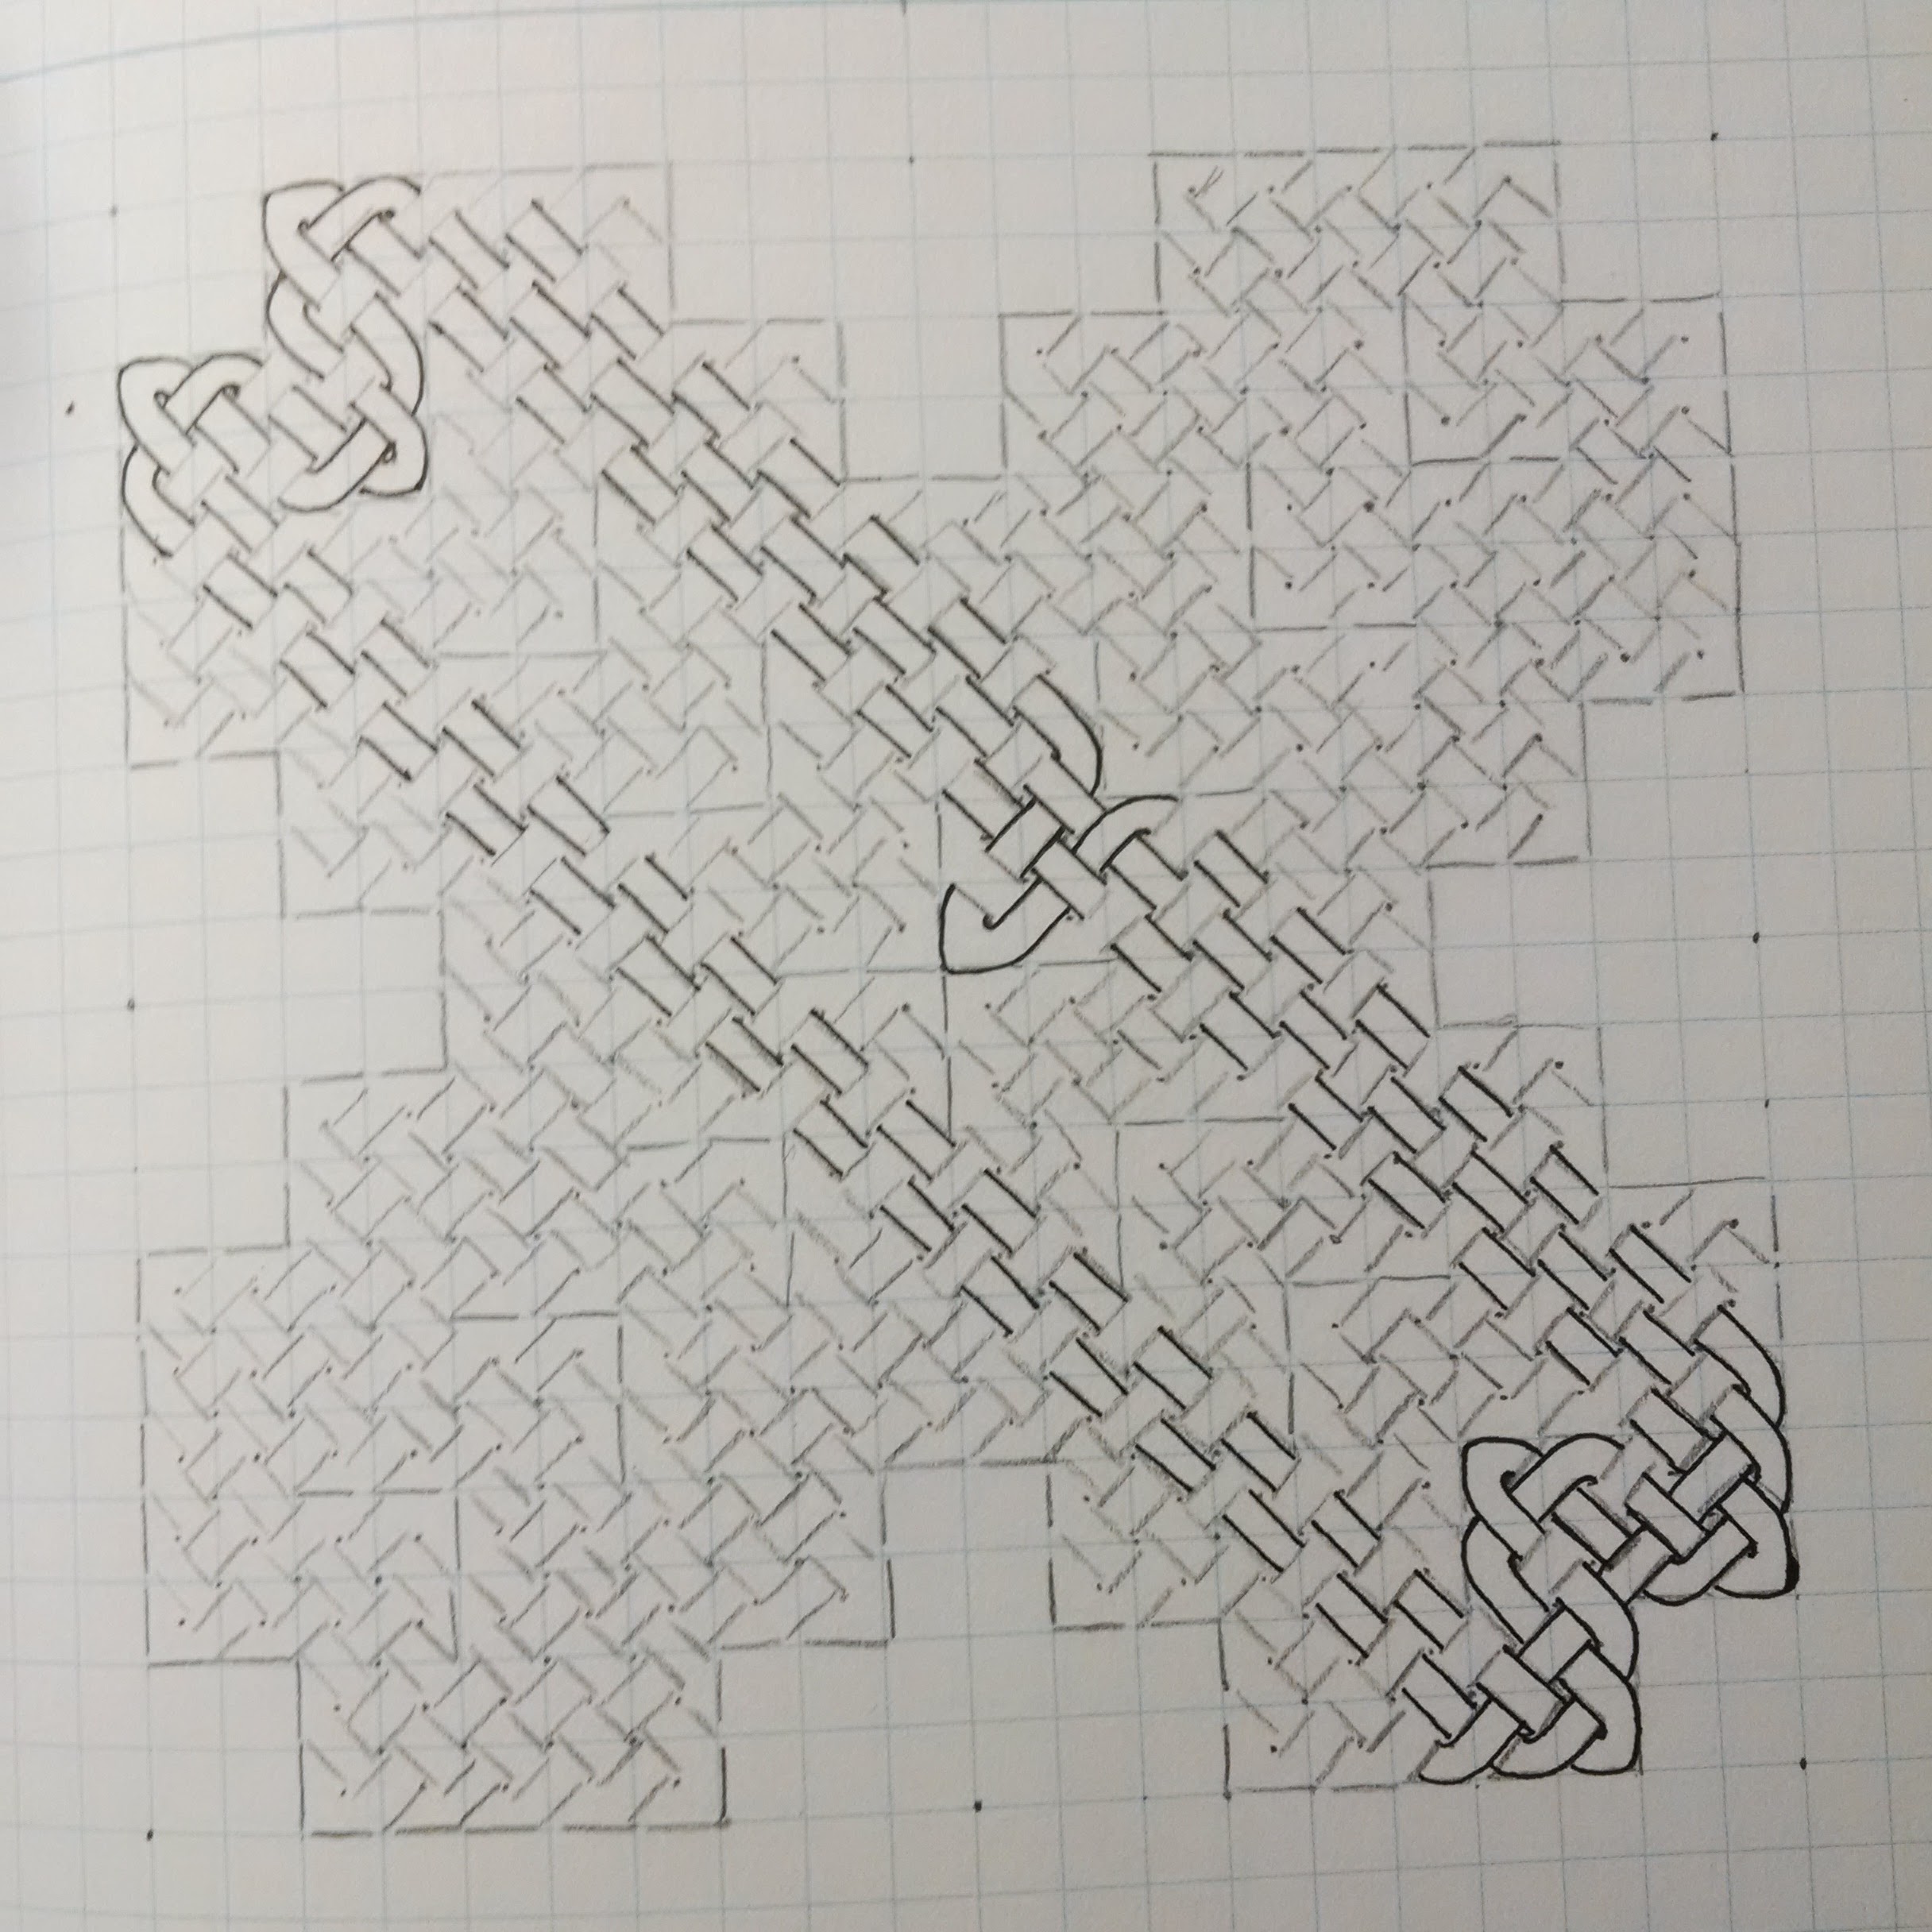
I have been reading about Fresnel lenses, and wondered what would happen if I started similar structures in a knot. This first knot is still fairly straightforward, and I already have several ideas on how I can expand/improve it for the next version. So let’s look at the in-progress pictures where I’m using the method described in the Celtic Knots Class Handout.