These are notes for a project currently on my 4 harness loom. The wool I’m using is 8/2 Jaggerspun wool, from the Maine line, in royal blue and dark green. I wanted to make fabric that was stripey and that displayed the broken twill diamonds encountered in Viking weaving. The final fabric will be used to make a bag with Hedeby handles, as described in https://nattmal.wordpress.com/2015/05/14/haithabu-bag/. Unlike her bag, however, I will be using a tabletwoven rather than a leather strap.
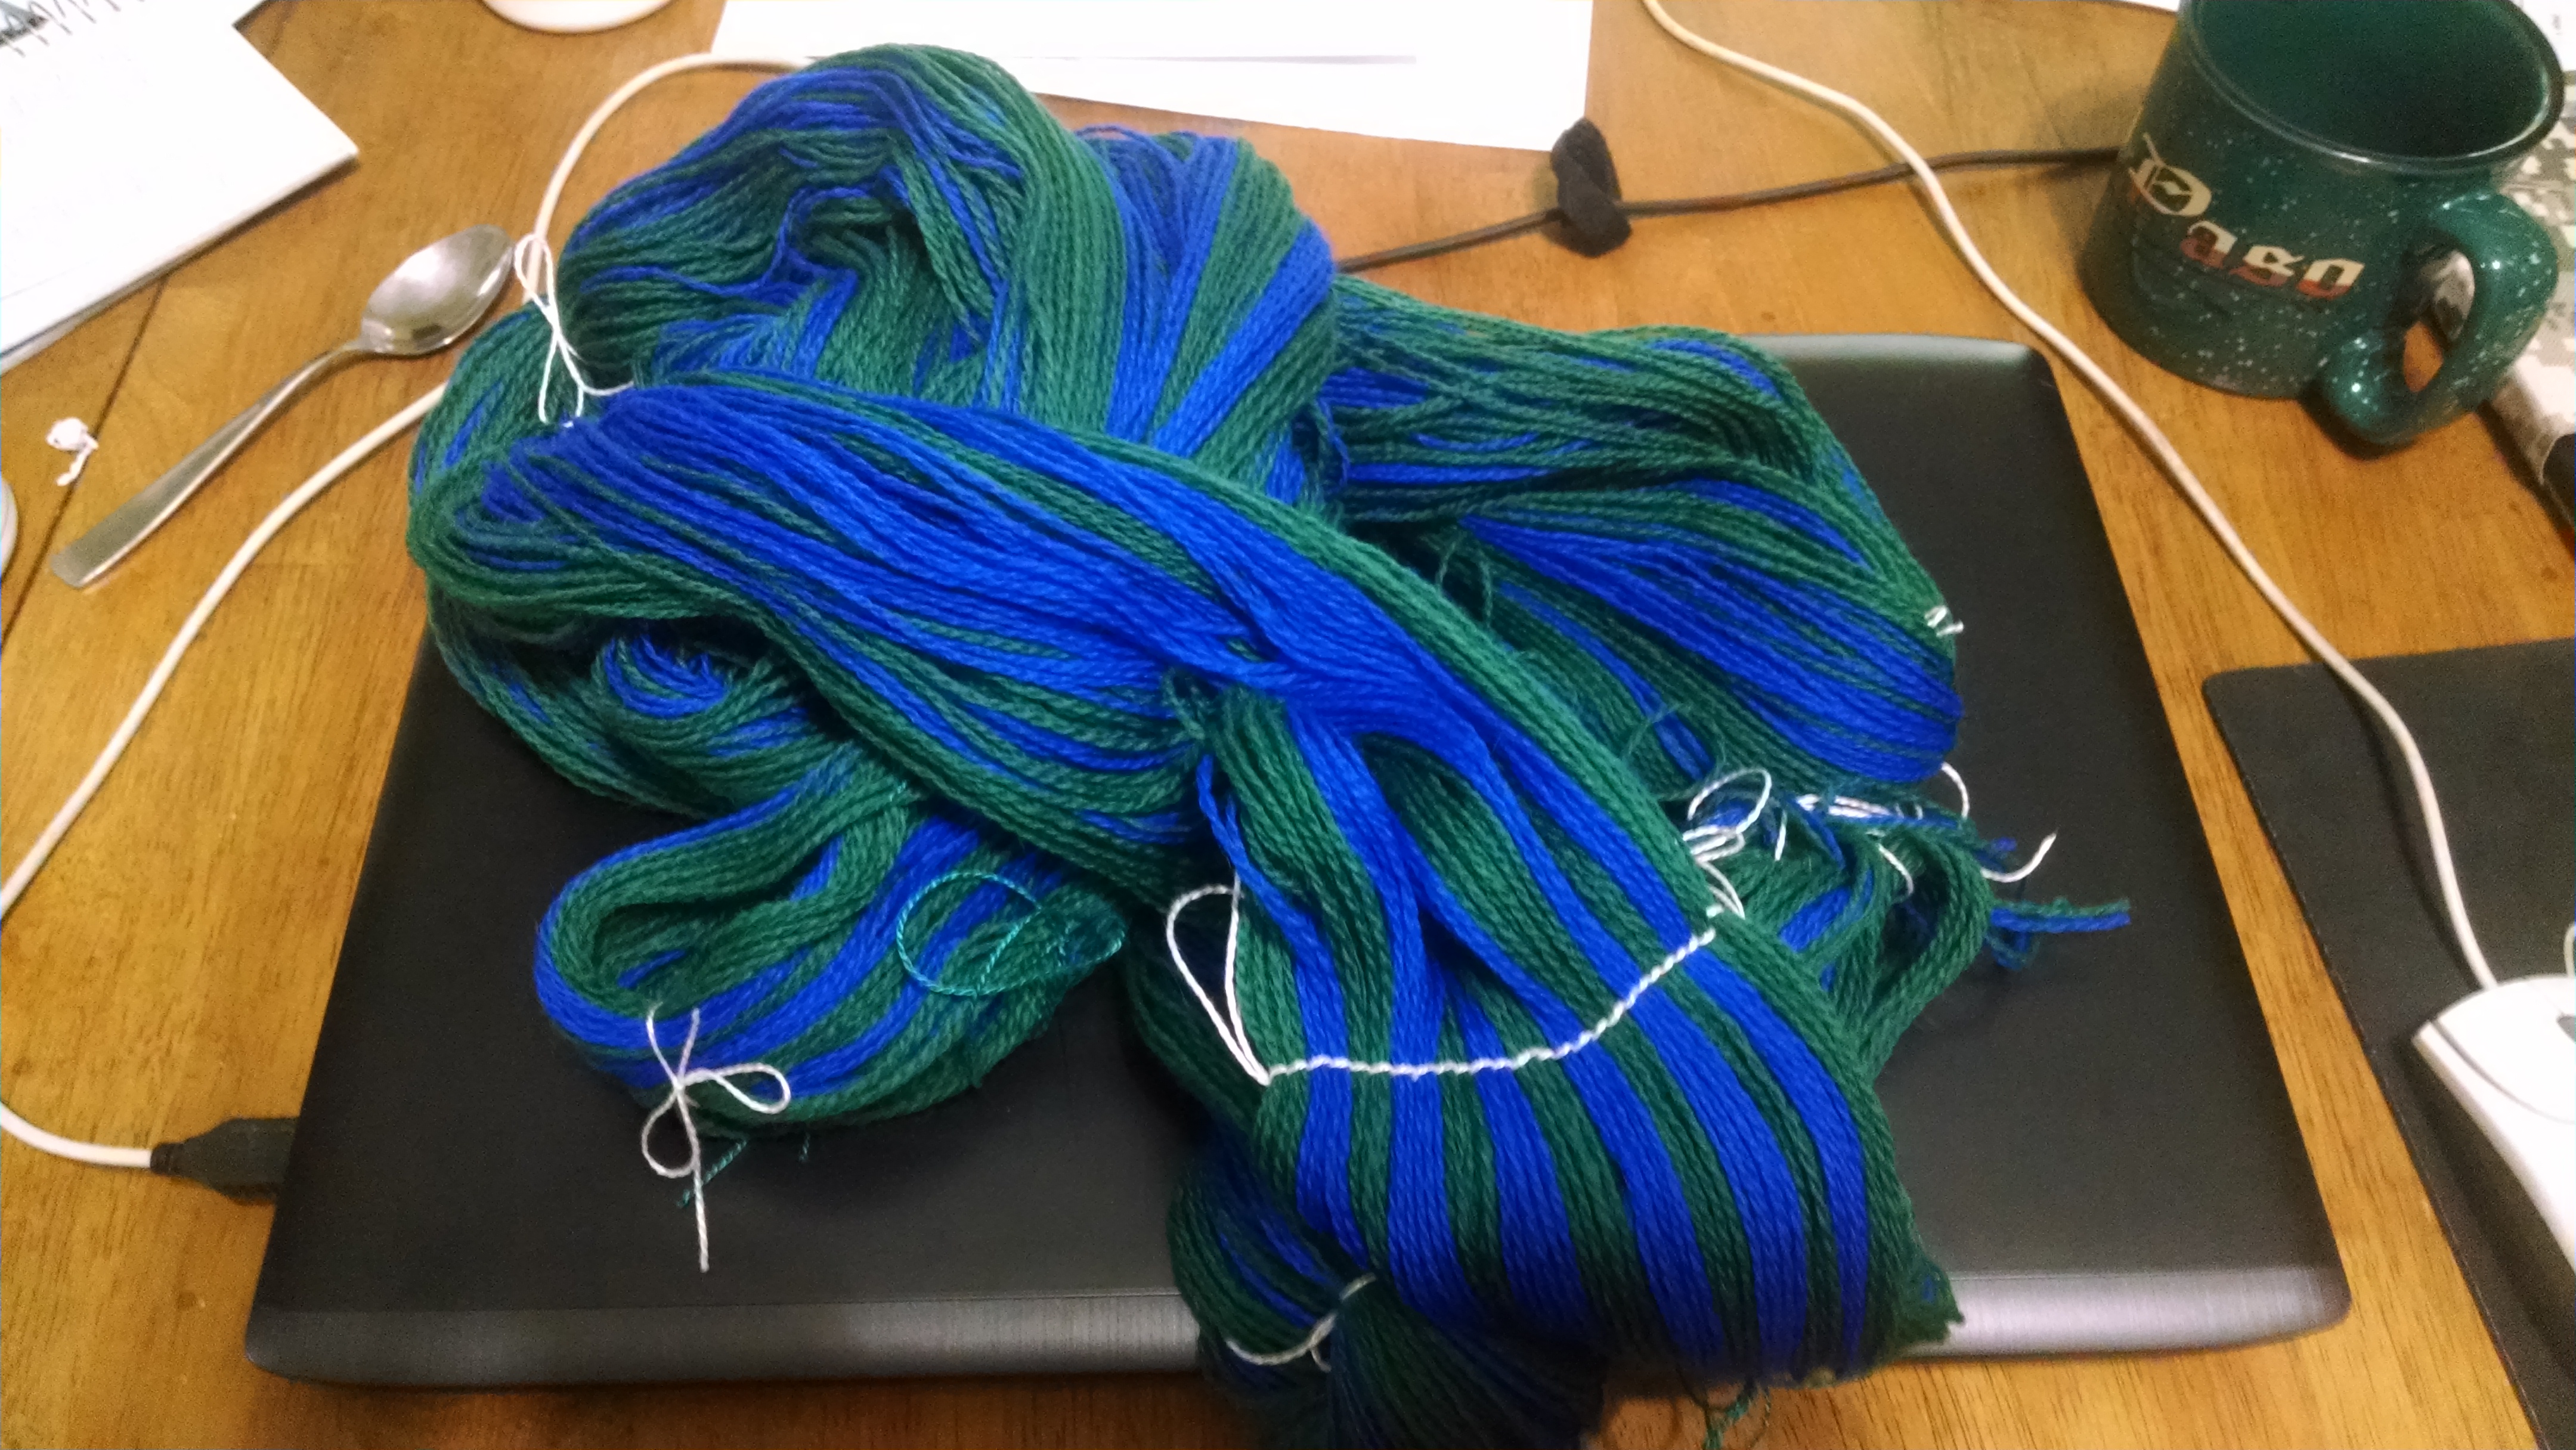
Step 1 was to measure out the warp. As a computer programmer, binary in all its glories is very attractive, so I decided the diamonds would be 16 threads wide, and 16 picks high. Sizes can vary of course. So I measured out 13 strips of 16 ends each, on the horizontal warping mill; to make counting easier, the white thread groups the warp in bundles of 8 threads each. This allows me to easily stretch the threads across the width of the backbeam using the raddle. Since the epi for this wool is listed as 15-18 for twill, I decided to start with 16 epi, so the diamonds should be about an inch square.
Step 2 was to wind the warp on to the backbeam; to do this I used what some call “Angel Wings”: a pair of dowels which are put through the warp on both sides of the cross, and kept together with hairbands. I use loops of string to hold the dowels in place. This allows me to wind the warp on to the backbeam while maintaining the cross. It usually maintains a nice even tension too, although here the wool was being very sticky and obstreperous.
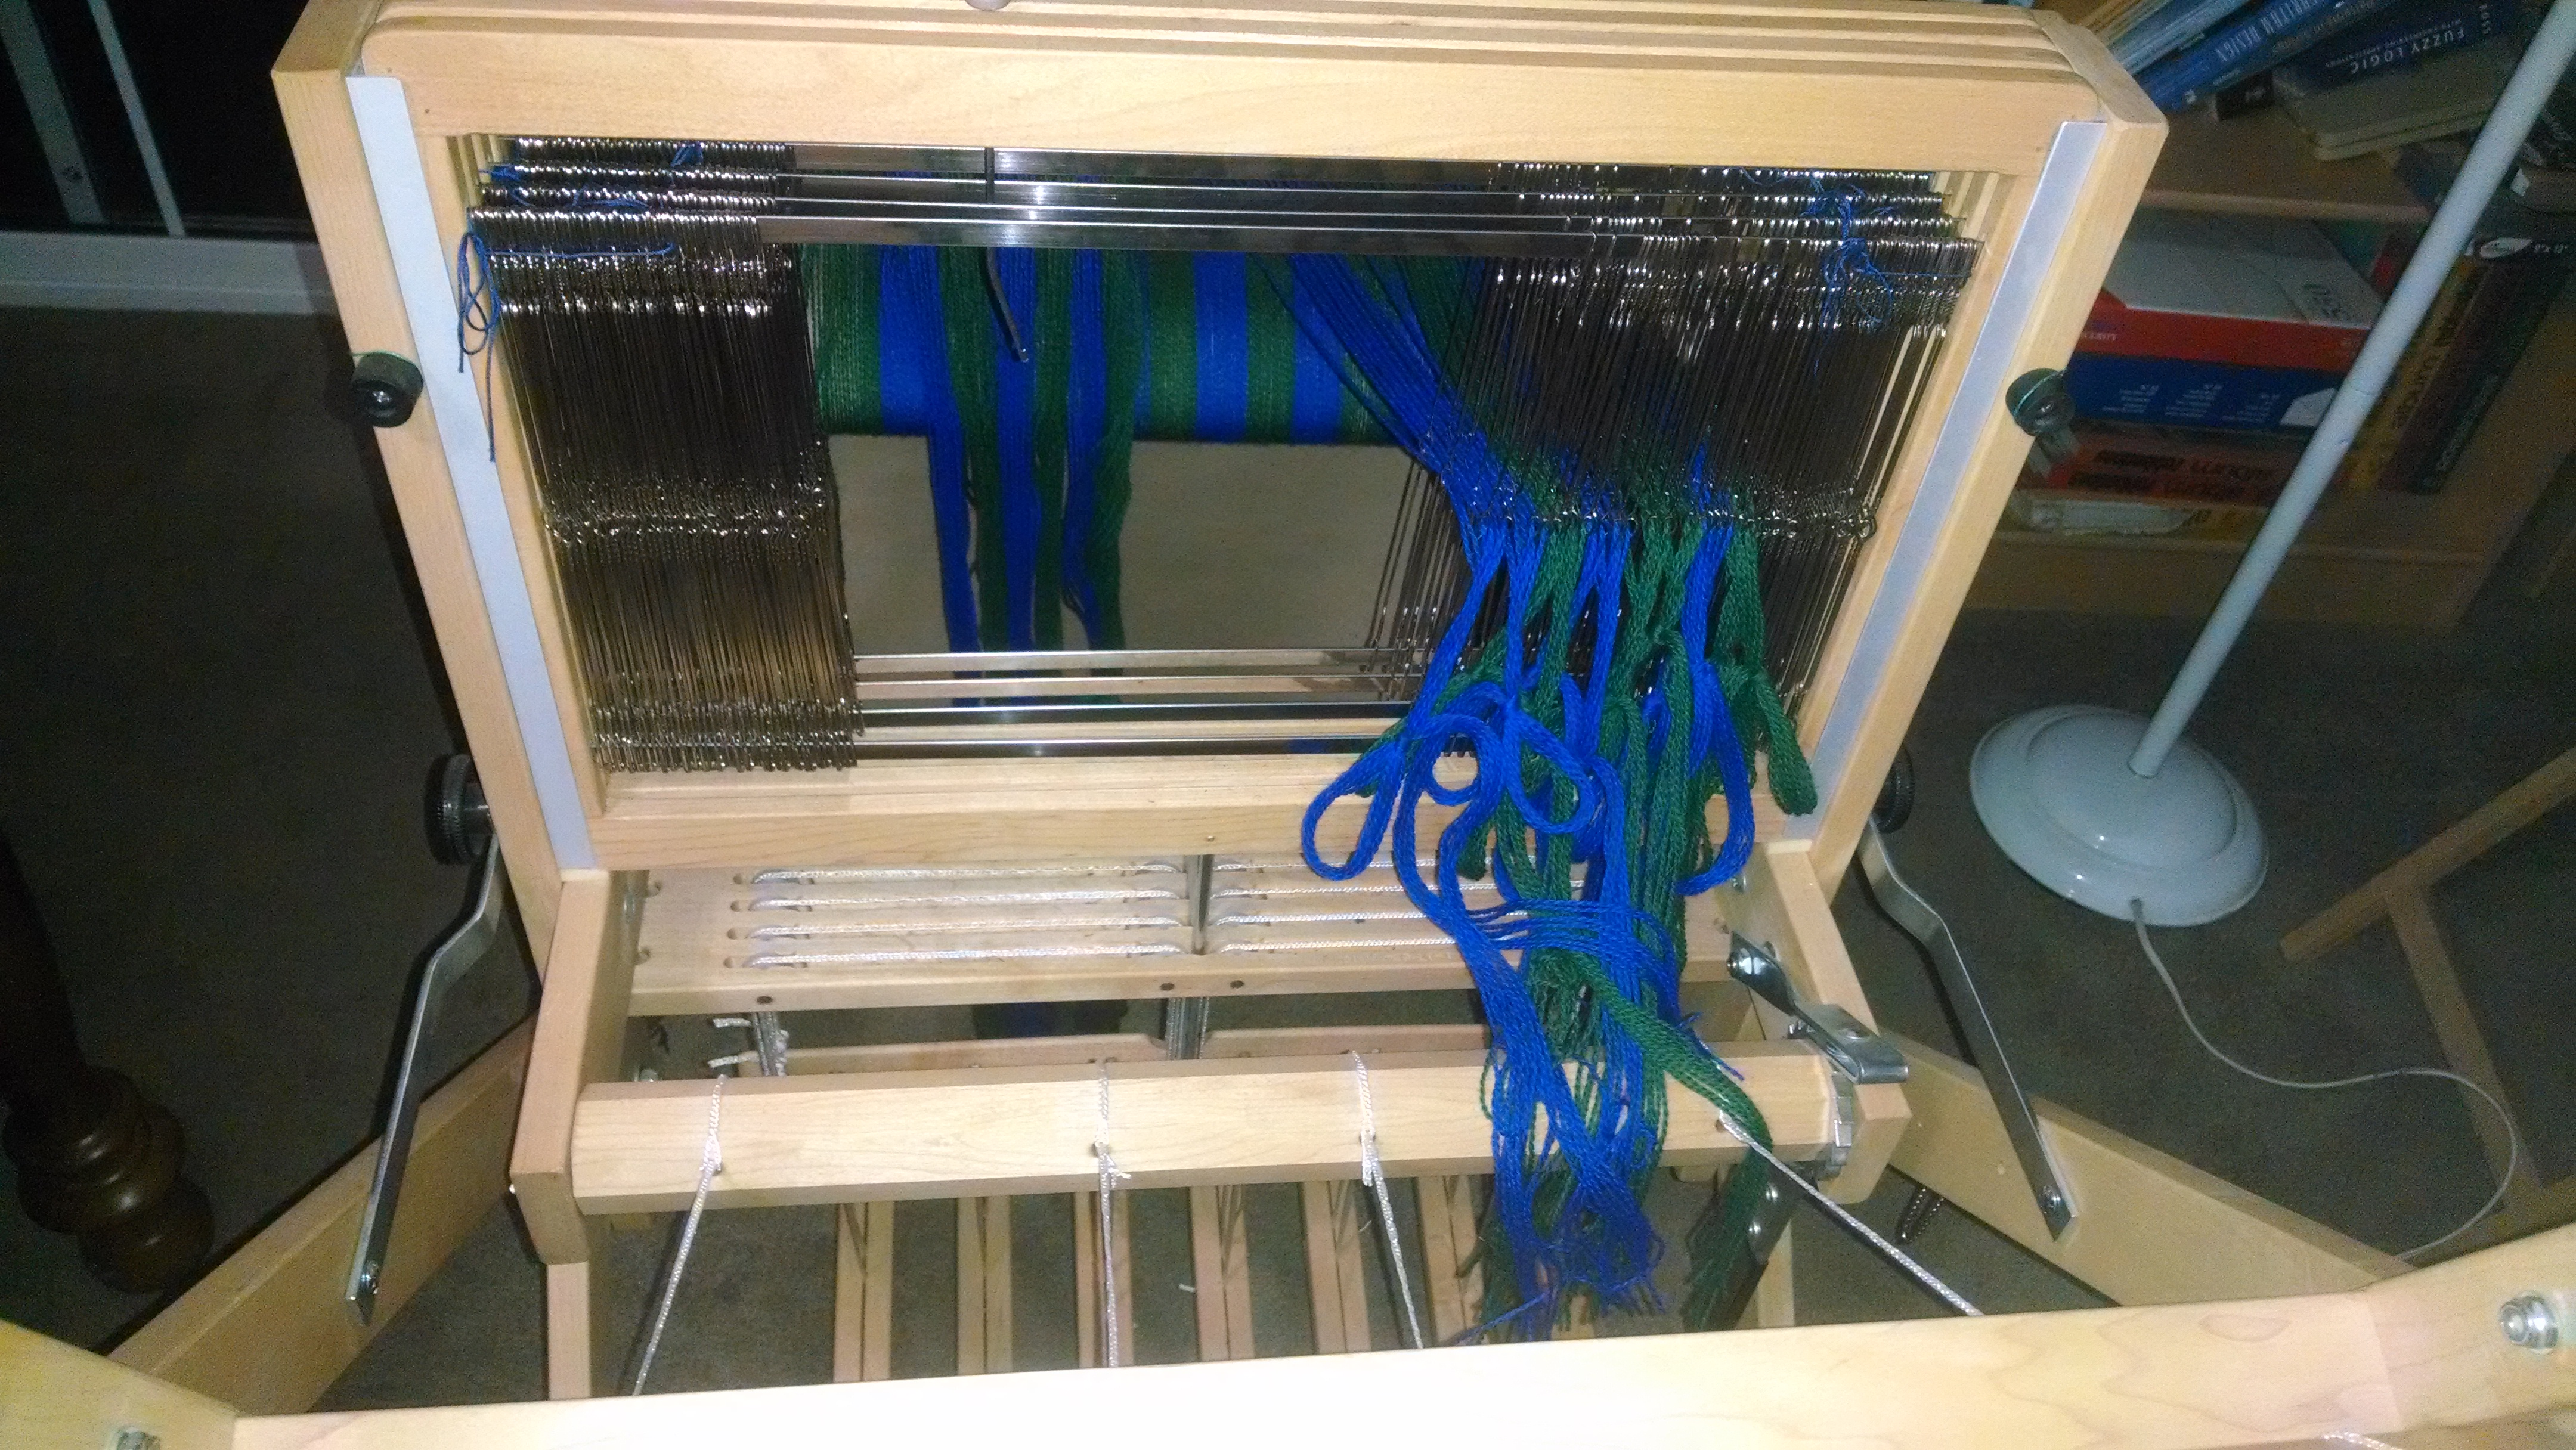
Step 3: threading the heddles. We left the dowel sticks in place and heddles from right to left. The pattern repeats: first 8 heddles 1-2-3-4-1-2-3-4 and then 8 heddles 2-1-4-3-2-1-4-3. Keeping track of count was easy since everything was being done in bundles of 8. The outermost thread on each side was not heddled, and will form the floating selvage.
The reed I have for this loom is 10 ends per inch, so it took me a while to puzzle out how to thread it to get 16 ends to the inch. Finally I decided that solving 8 ends to the half inch (and 5 slots) was easier, and threaded in a 2 – 1 – 2 – 1 – 2 pattern through the slots.
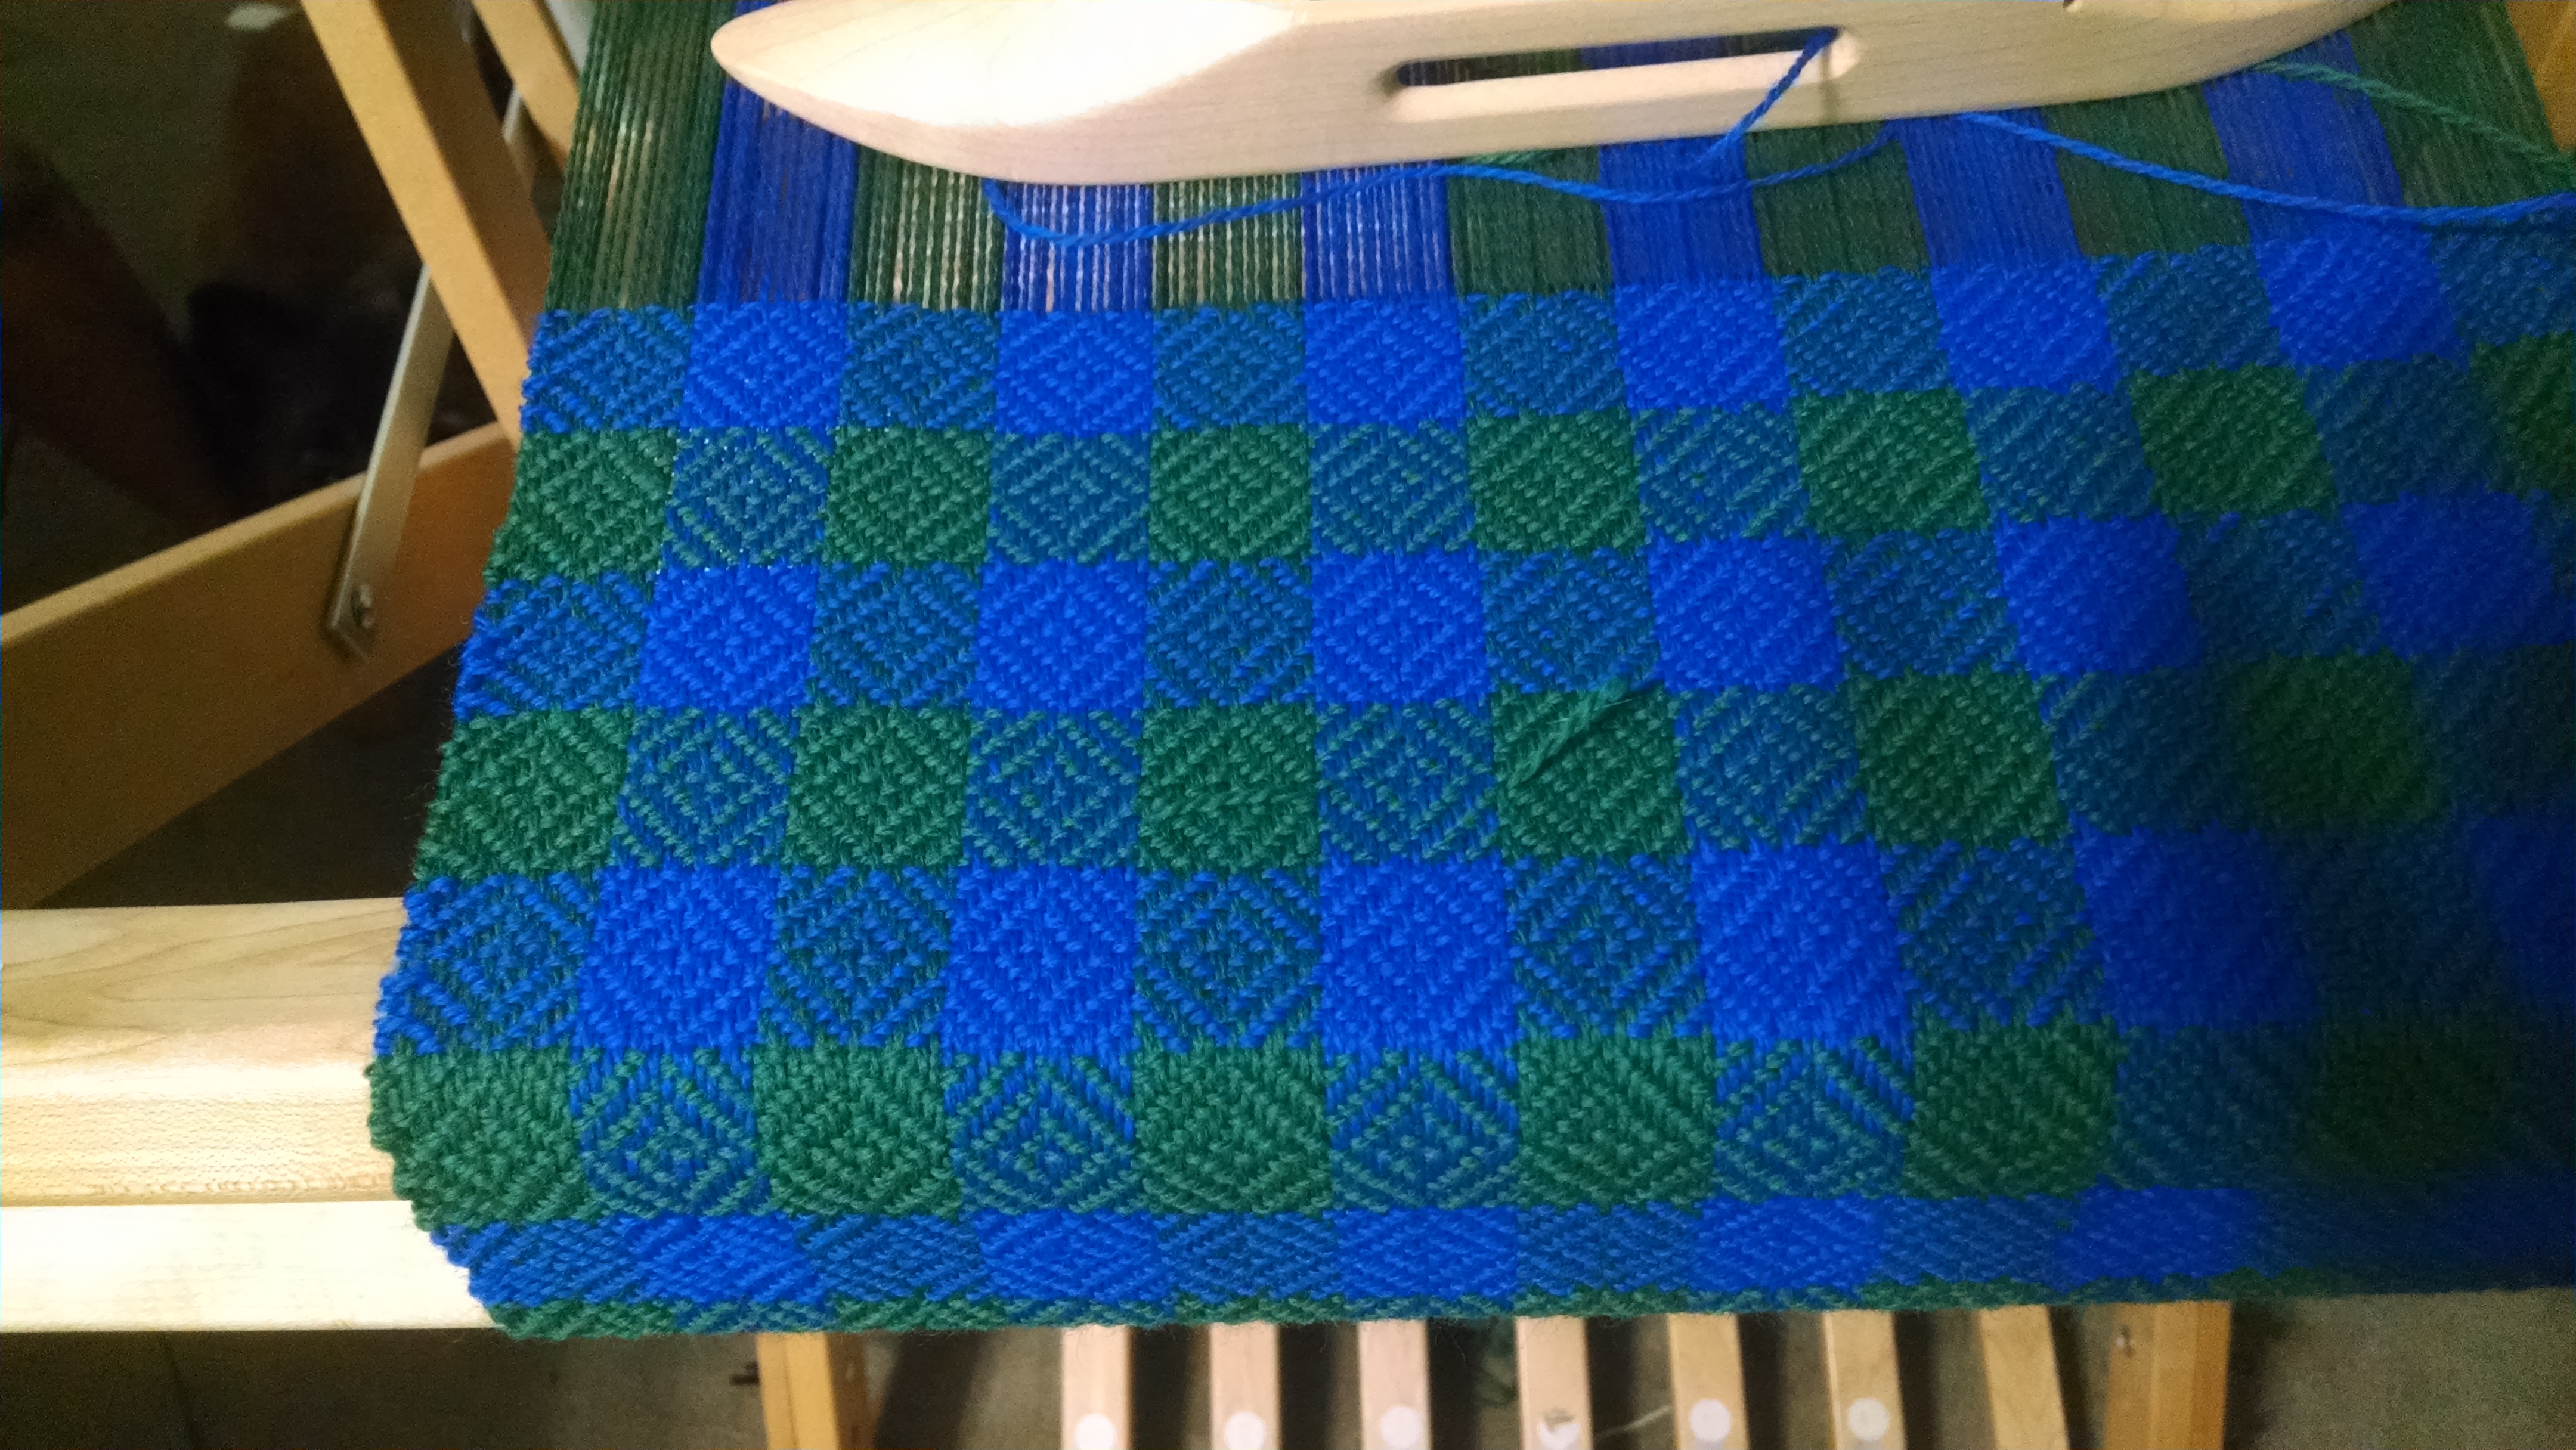
Step 4: We weave! Took a bit of monochrome weaving to get the edges right, and I realized that perhaps I could have set the threads closer together on the outside on both sides, but I got it to square up eventually. And that’s when I added the second colour. There are two shuttles loaded with blue and green respectively, and the one not in use is perched on the desk next to me. The shuttle in use treats the thread from the other colour as a second floating selvage, so there’s a little bit of oddness on the right hand side of the fabric.
For now, though, my concern is still on getting the edges even, and trying to keep the squares … we.. square, which means managing the interplay between the tension of the warp threads, and the force with which I beat. (And when a bobbin runs out, as you can see in the green, you just double up for an inch or so and keep going.)
The last picture, btw, was taken with flash so that you can really see the structure. In natural light the patterning – especially in the monochrome areas – is much more subtle.